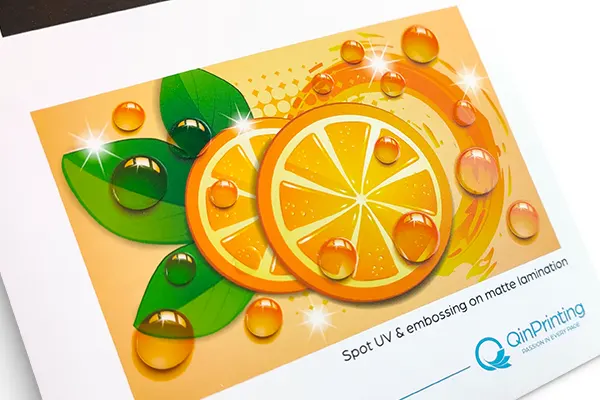
Spot UV Coating: A Complete Guide
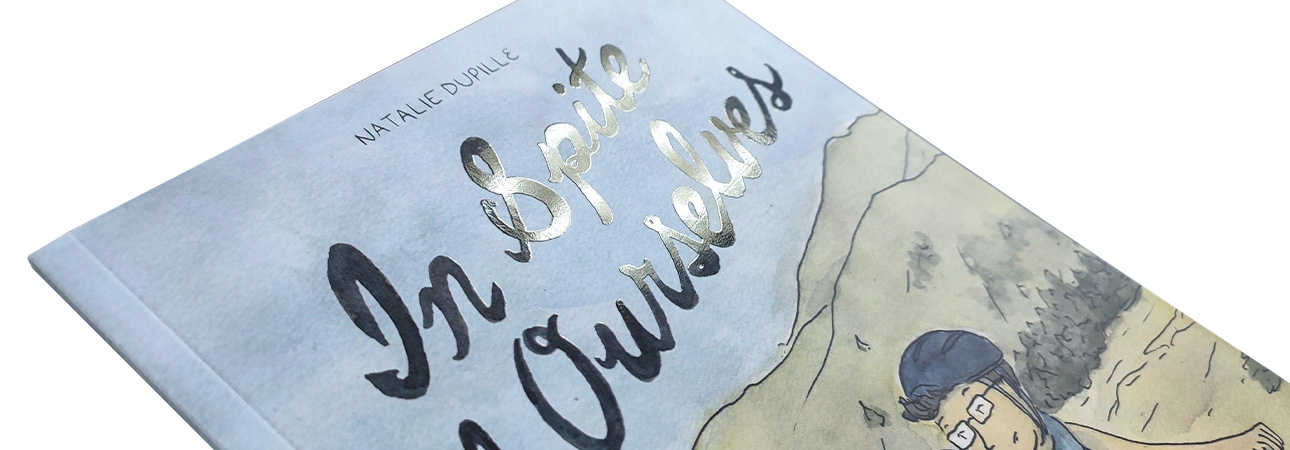
Pick up a matte-laminated book cover and tilt it under the light. See how certain elements—a title, a logo, a pattern—shine and shimmer while the rest stays flat? That’s the magic of spot UV. It’s one of the most effective ways to add a premium, tactile dimension to your project.
What Is Spot UV Coating?
Spot UV is a clear, glossy coating applied to specific areas of a printed surface rather than the entire sheet. The term “spot” refers to its selective application—you choose exactly which design elements receive the coating, whether that’s a title, logo, illustration, or decorative pattern. The “UV” part refers to the curing method: once applied through a silk screen plate, the coating is instantly hardened under ultraviolet light, producing a crisp, raised, glass-like finish.
The result is a striking contrast between the glossy coated areas and the surrounding surface. This works especially well over matte or soft-touch laminated backgrounds, where the difference in texture and sheen is most dramatic. Think of it as adding controlled light and dimension to an otherwise flat design.
How Spot UV Coating Works
Spot UV is always the final step in the printing process, applied after all ink layers and lamination have been completed. To give you a clear picture of what happens behind the scenes, here’s how we apply spot UV at our facility, step by step.
Step 1: File Review and Prepress Setup
Before anything goes to press, our prepress team manually checks your files for errors. Minor issues are corrected in-house; anything significant, we’ll work with you to resolve. For spot UV, this means verifying that your mask file is properly set up: the spot UV elements should be on a separate layer above the artwork, assigned a named spot color, and saved in vector format. We process both your artwork PDF and your mask PDF to confirm they’re compatible and correctly aligned.
Step 2: Screen Plate Production
Once the files pass review, we produce a silk screen plate from your mask file. The plate is precision-crafted to match the vector shapes in your design—this is what determines exactly where the UV coating lands on the sheet. Accuracy at this stage is critical: even a fraction of a millimeter of misregistration will be visible on the finished product.
Step 3: Coating Application
With the screen plate mounted, the printed and laminated sheets are fed through the coating station. The clear UV-curable varnish is applied through the screen, depositing a controlled layer of coating only on the areas defined by your mask. The coating is thicker than a standard varnish—typically around 10–20 microns—which is what gives spot UV its characteristic raised, glass-like feel.
Step 4: UV Curing
Immediately after application, the sheet passes under high-intensity ultraviolet lamp arrays. The UV light triggers an instant chemical reaction that hardens the varnish in a fraction of a second. Because the coating is cured by light rather than heat or evaporation, the process is fast, the finish is extremely hard, and there’s no drying time or risk of smudging. The cured coating is resistant to scuffing, moisture, and fingerprints.
Step 5: Quality Inspection and Finishing
After curing, our quality control team inspects the sheets for coating consistency, edge sharpness, and registration accuracy. The sheets then move on to cutting, folding, and binding—your spot UV finish is fully cured and ready to handle.
Advantages of Spot UV Coating
Spot UV has become one of the most popular finishing techniques in commercial printing, and for good reason. Here’s what it brings to the table:
- Visual contrast: The interplay between glossy highlights and a matte background creates depth and dimension that flat printing alone cannot achieve.
- Tactile appeal: The coated areas have a noticeably smooth, raised texture that invites touch—an important factor in shelf appeal and first impressions.
- Color protection: The UV-cured layer seals the ink beneath it, helping to prevent fading, scuffing, and moisture damage over time.
- Cost efficiency: Compared to foil stamping or embossing, spot UV delivers a premium look at a lower cost, making it accessible for a wide range of budgets.
- Combinability: Spot UV pairs beautifully with embossing, debossing, and foil stamping for layered, multidimensional effects.
Surface Pairings and Finishing Combinations
Spot UV produces the most dramatic effect on matte or soft-touch laminated surfaces. The contrast between a flat, non-reflective background and the glossy raised coating is what gives the technique its visual power.
To help you plan your design, here’s how different surface and finishing combinations work with spot UV:
Recommended
These combinations are where spot UV truly shines, and what we recommend for the best results:
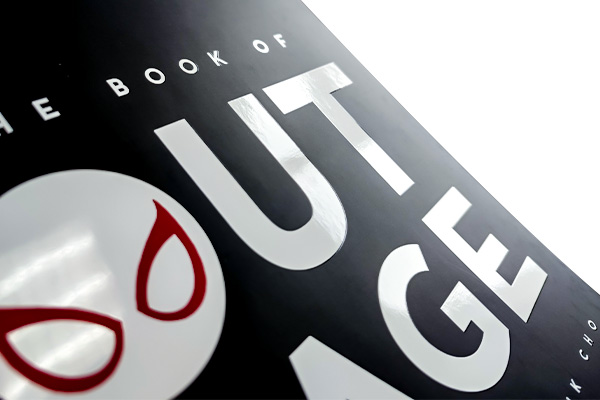
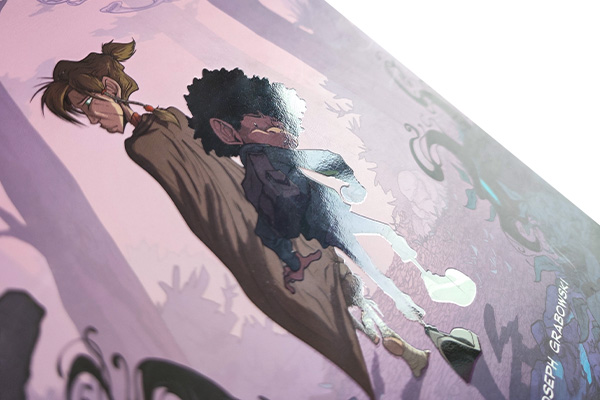
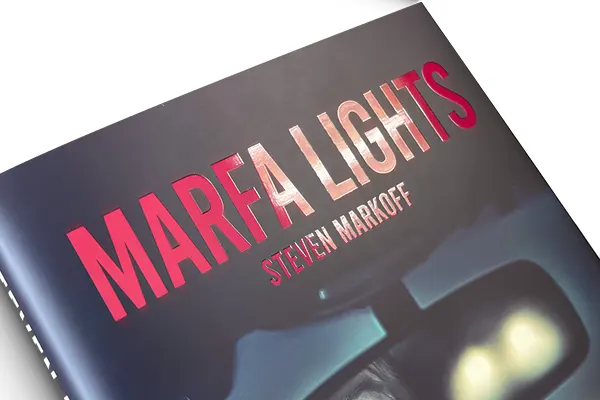
- Matte lamination + spot UV: The most popular combination. Clean, professional, and universally appealing.
- Soft-touch lamination + spot UV: Creates an extraordinary contrast between the velvety matte background and glass-like highlights.
- Embossing + spot UV: The raised texture adds dimension, and spot UV on top amplifies the tactile and visual impact. Embossing must be completed first—spot UV is always the final step.
- Dark matte stock + spot UV: A brand name or logo rendered in spot UV on a deep, dark matte background shifts between visible and invisible as the viewing angle changes—a sophisticated, understated effect.
Possible, But Not Recommended
These combinations are technically achievable, but the results are often compromised. Spot UV must always be applied last:
- Press texturing + spot UV: Texturing must be completed before the UV coating is applied. However, the UV layer will partially fill and flatten the texture, reducing its depth and definition.
- Foil stamping + spot UV: Foil stamping must be completed before the UV coating is applied. However, the UV coating will cover and dull the foil’s reflectivity, significantly diminishing its shine and contrast.
- Debossing + spot UV: Debossing must be completed before the UV coating is applied. However, the UV coating’s thickness will partially fill the recessed area, making the deboss feel shallower than intended.
If you prefer to avoid these trade-offs, simply position the effects in separate areas of the design—there are no restrictions when they don’t overlap.
Not Recommended
These surface types are not compatible with spot UV in any meaningful way:
- Gloss lamination + spot UV: Both surfaces are highly reflective, which eliminates the contrast that makes spot UV effective. The effect becomes nearly invisible and adds cost without visual benefit.
- Varnish + spot UV: A varnished surface has its own sheen that competes directly with the UV coating, resulting in a flat, undifferentiated finish where the spot UV highlights cannot stand out.
Popular Applications
Spot UV is versatile enough for virtually any print product, but it’s especially effective in these categories:
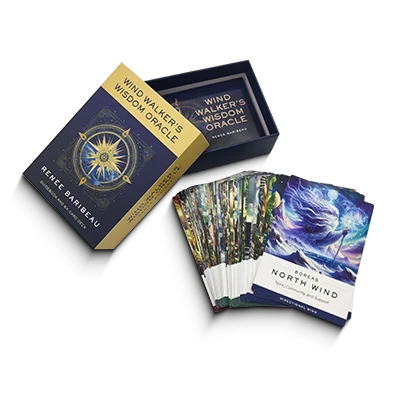
- Book covers: Highlight a title, author name, or award emblem on a matte-laminated hardcover or paperback for an instant premium upgrade.
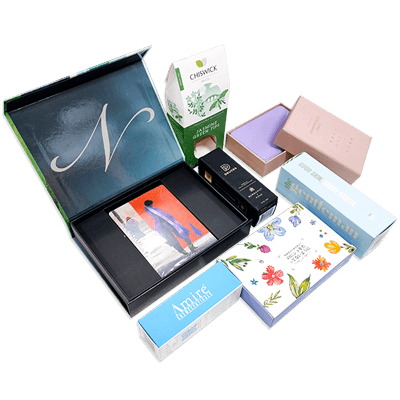
- Packaging: Apply spot UV to your logo or key brand elements on rigid boxes, folding cartons, or sleeves to make them stand out on the shelf.
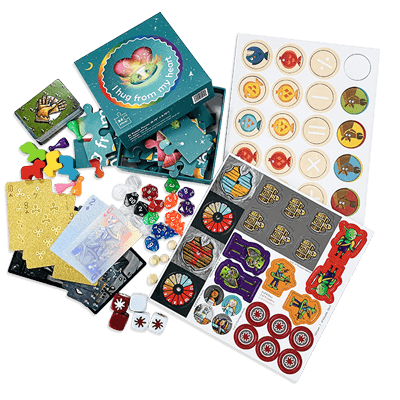
- Board games: Enhance box lids, game boards, or card backs with selective gloss to add visual depth and protection.
- Catalogs and brochures: Draw attention to product images or section headers with targeted gloss highlights.
How to Prepare Your Design Files
Getting spot UV right starts with proper file setup. Here’s what you need to know:
- Create a separate mask file: Duplicate your artwork and remove everything except the areas where you want spot UV applied. Fill those areas with a solid spot color (we recommend naming it “SPOT_UV”).
- Use vector artwork: All spot UV elements should be vector-based, not raster. This ensures crisp, clean edges when the screen plate is made.
- Maintain exact alignment: Your mask file must be the same dimensions as your artwork file and align perfectly to avoid misregistration.
- Minimum detail size: For the sharpest results, keep text at 8 pt or larger and line weights at 0.3 mm or above.
- File format: Export both your artwork and mask files as separate high-resolution PDFs.
Spot UV vs. Full UV Coating
It’s worth noting the distinction between spot UV and full-surface UV coating. Full UV coating applies the same clear varnish across the entire printed sheet, creating a uniform high-gloss finish with excellent scuff resistance. It’s ideal when you want consistent shine and protection everywhere.
Spot UV, by contrast, is about selective emphasis. It’s a design tool as much as a protective one—used to guide the viewer’s eye, create visual hierarchy, and add a tactile element that sets your product apart.
Design Tips for Maximum Impact
- Less is more: A few carefully chosen elements in spot UV will have more impact than coating large areas.
- Consider the lighting: Spot UV catches light at certain angles, so think about how your product will be displayed and handled.
- Pair with photography: A spot UV highlight on a key image within an otherwise matte cover is a proven attention-grabber.
- Test with a proof: If you’re new to spot UV, order a printed proof to see and feel the effect before committing to a full run.
Spot UV at QinPrinting
At QinPrinting, we apply spot UV using precision silk screen technology and high-intensity UV curing lamps. Our team reviews every mask file before production to ensure accurate registration and clean edges. If you’re not sure whether spot UV is the right choice for your project—or if you need help setting up your files—our team is always happy to advise.
Related Resources