Custom Card Decks
 Custom Holographic Cards
 Folding Cartons
 Rigid Boxes
 Corrugated Boxes
 Custom Board Game
 Kickstarter Print Solutions
Glow-in-the-Dark Printing: A Complete Guide
What if your book cover could reveal a hidden design after the lights go out? Or your game box could glow on the shelf at a dimly lit convention booth? Glow-in-the-dark printing makes that possible—and it’s more versatile than most people realize.
What Is Glow-in-the-Dark Printing?
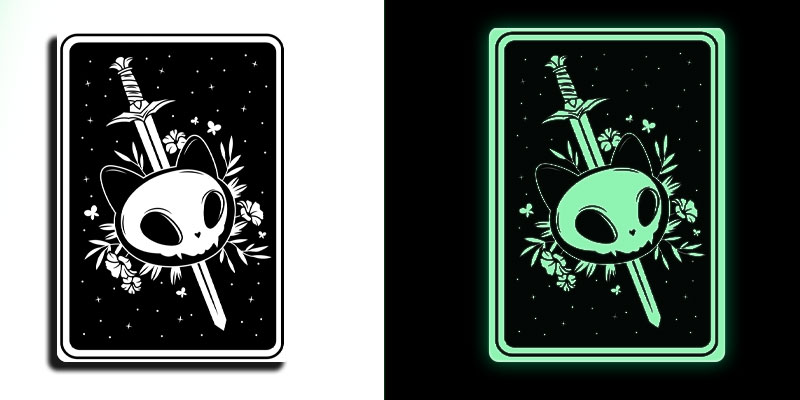
Glow-in-the-dark printing is a specialty technique that uses inks containing phosphorescent compounds—substances that absorb light energy from ambient sources (sunlight, room lighting, UV lamps) and then emit a visible glow when the lights go out. The printed areas literally glow in the dark, creating an effect that’s surprising, interactive, and genuinely memorable.
The inks are applied using screen printing technology on top of the standard CMYK-printed surface. The phosphorescent layer is transparent when viewed in normal lighting, so it doesn’t obscure the underlying artwork. But in darkness, the treated areas emit a soft, luminous glow that reveals hidden text, illustrations, or patterns.
How Glow-in-the-Dark Printing Works
- Standard CMYK printing is completed first, laying down all colors and images on the sheet. All post-press finishing, including lamination, is also completed before the glow ink is applied.
- A screen printing plate is created from a separate mask file that defines which areas will receive the glow-in-the-dark ink.
- The phosphorescent ink is applied through the screen onto the designated areas of the fully finished sheet.
- The ink is cured, and the sheet proceeds to the final production steps: cutting and binding.
The glow effect is rechargeable: every time the print is exposed to light, the phosphorescent compounds recharge. The intensity and duration of the glow depend on the strength and duration of the light exposure.
Key Properties of Glow-in-the-Dark Inks
There are several important characteristics to keep in mind when designing with these inks:
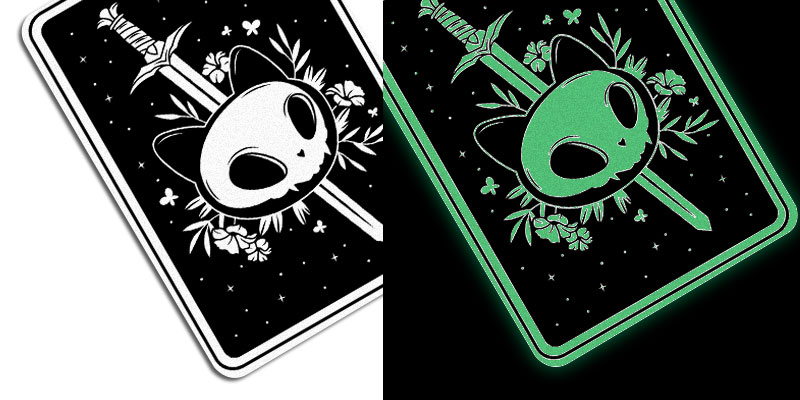
- Background color matters: The glow is most visible and intense on white or light-colored backgrounds. On medium-toned backgrounds, the effect is present but muted. On black or very dark backgrounds, the glow will not be visible.
- Charge time and glow duration: A brief exposure (20–30 seconds of moderate light) will produce a faint glow. Longer exposure (45+ minutes) produces a much brighter glow lasting up to a couple of hours.
- Texture: The phosphorescent compounds give the printed area a slightly grainy texture, which is noticeable to the touch.
- Longevity: Under normal use, the glow effect remains effective for at least a year. Over several years, the intensity may gradually diminish.
- Color: The standard glow color is a yellow-green, which is the most naturally luminous tone for phosphorescent materials. Other glow colors (blue, orange) may be available on request but tend to be less bright.
Design Tips for Maximum Glow Effect
- Use white or very light backgrounds beneath glow areas for the strongest, brightest result.
- Avoid printing glow-in-the-dark ink over black or very dark areas—the glow will be effectively invisible.
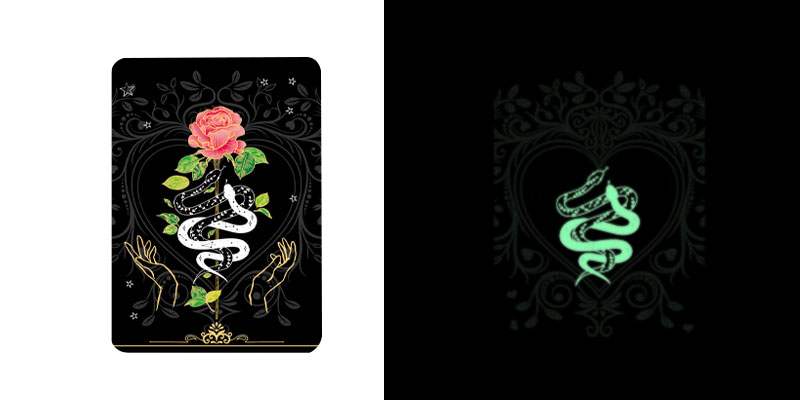
- Consider using the glow effect to reveal a “hidden” design that’s not visible in normal light—this creates a surprise-and-delight moment for your audience.
- Bold, simple shapes and text work best. Very fine details may not produce a strong enough glow to be clearly visible in the dark.
How to Prepare Your Design Files
Preparing artwork for glow-in-the-dark printing follows a similar process to spot UV: you’ll create a separate file that tells us exactly where to apply the phosphorescent ink. Here’s a step-by-step guide:
Open your design in a vector-based application such as Adobe Illustrator or Adobe InDesign.
Duplicate your artboard to create a second working copy. This copy will become your glow mask file.
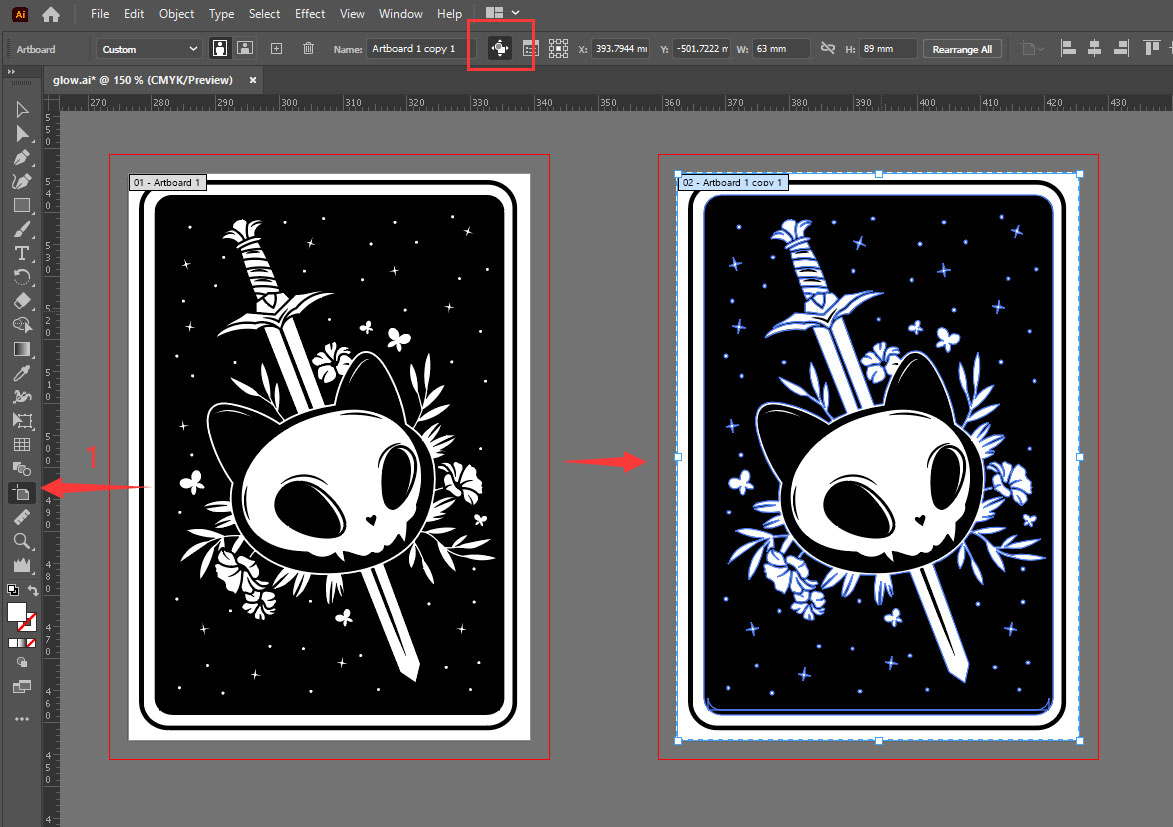
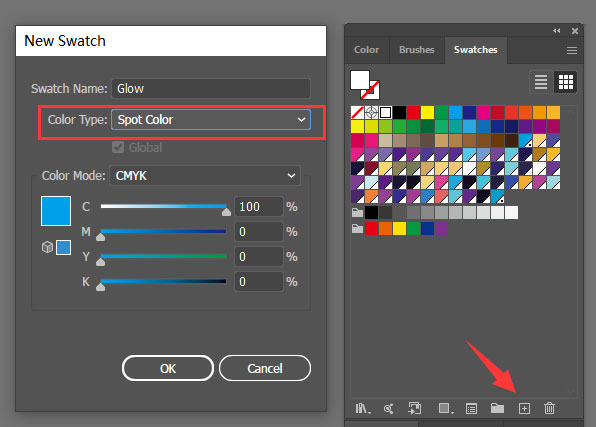
Create a new spot color swatch in your Swatches panel. Name it “GLOW” (or similar) and set the Color Type to Spot Color. Assign it any visible color for reference—the actual color doesn’t matter, as it’s just a marker for our prepress team.
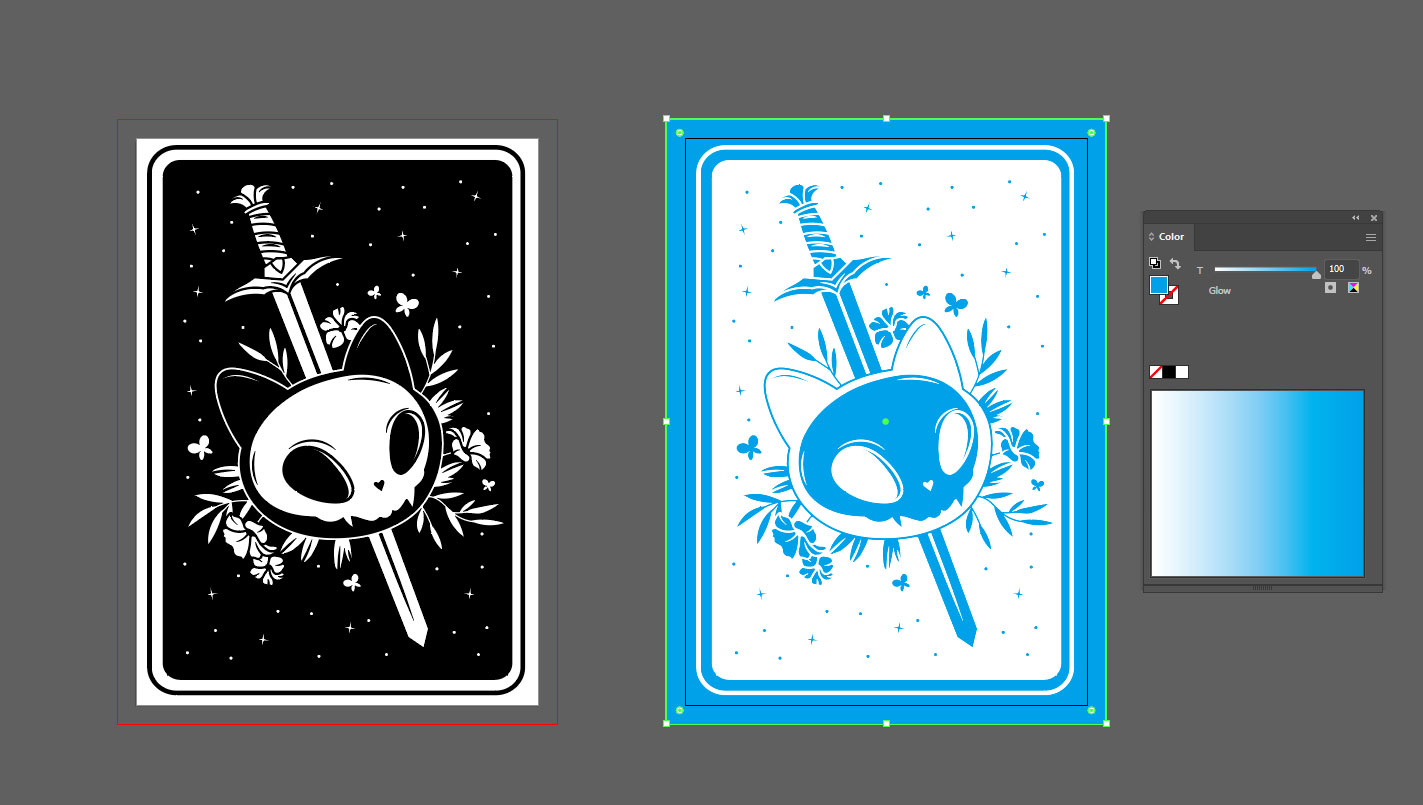
On your duplicated artboard, use the pen tool or shape tools to trace the outlines of all areas where you want the glow-in-the-dark ink applied. Make sure the tracings align perfectly with the corresponding elements on your original artwork.
Fill the traced areas with the GLOW spot color you created. Then delete all other content from this artboard, leaving only the spot-color shapes.
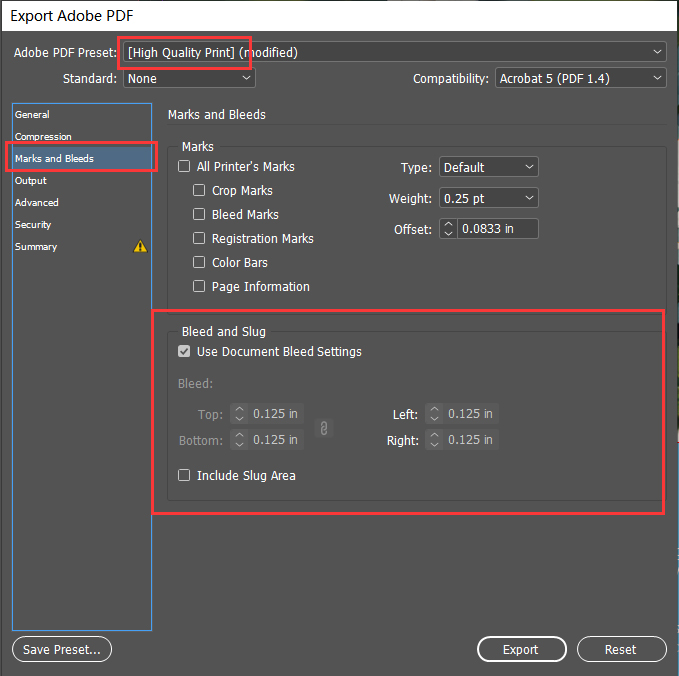
Save your original design and the glow mask file together as a single PDF. When exporting, check the “include bleed” option to ensure no white borders appear after trimming.
Verify your file: Open the exported PDF in Adobe Acrobat, go to Print Production → Output Preview, and confirm that the spot color layer is applied correctly and aligns with your artwork.
If everything looks good, you’re ready to send the files to us. Our prepress team will review them and confirm everything is correctly set up before printing.
Popular Applications
- Children’s books: Glow-in-the-dark covers and interior pages add a magical, interactive element that kids love—especially for bedtime stories and nighttime-themed books.
- Horror and mystery comics: Hidden cover art or title treatments that appear in the dark are a natural fit for the horror genre.
- Board games and card decks: Game components that glow in the dark add a fun, immersive layer to game night.
- Halloween and seasonal packaging: Event-themed products and promotional packaging with glow elements create instant shelf impact.
- Posters and art prints: Glow-in-the-dark ink on posters creates a dual-experience print that changes character after dark.
- Brochures and event materials: Conference materials, club flyers, or event programs with glow elements add memorability and conversation value.
Have a project idea that isn’t listed here? Just get in touch—if it can be printed, there’s a good chance we can make it glow.
Related Resources