Bleed in Printing
Wondering what printers mean by “bleed”? This guide explains everything you need to know to prepare documents with the correct bleed for printing.
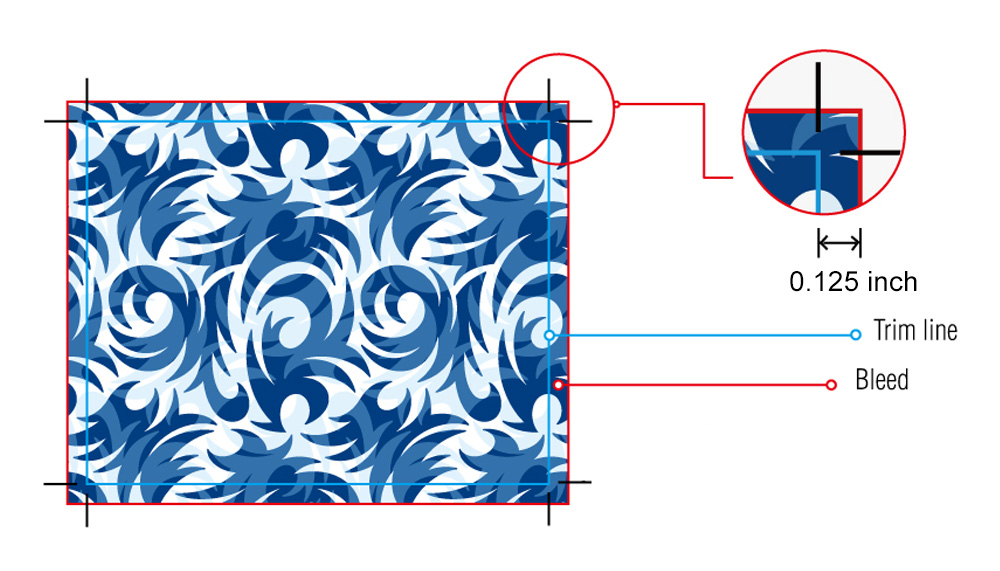
What Is Bleed in Printing?
Bleed is the part of your document that extends beyond the trim size. Full bleed means that an image or background color stretches completely to the edge of the page, leaving no white margins. It ensures that, after cutting, no unwanted white edges appear on your book pages. Without a proper bleed, printed pages may show a white border around images or backgrounds.
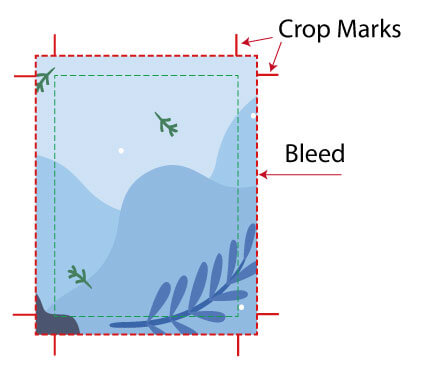
A typical bleed zone is 0.125″ or 3mm from the edge of the page. When setting up your document, make sure to give every background color or image a bleed zone so that there will be a seamless transition from the background to the edge of the paper.
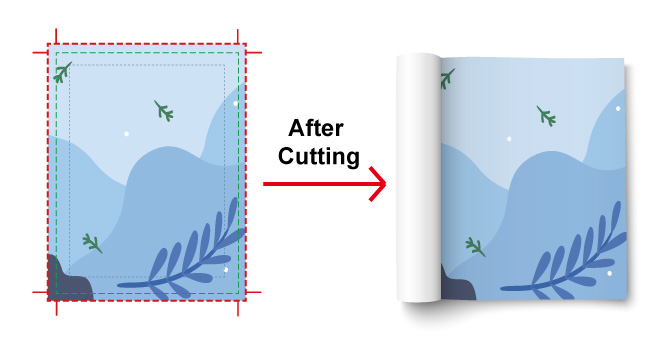
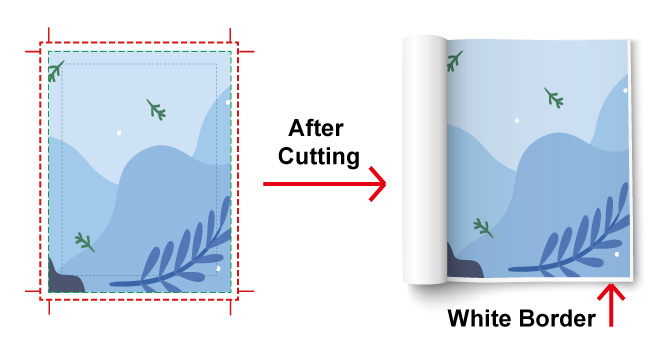
Here are the samples after cutting with bleed and without bleed.
How Much Bleed Is Needed for Printing?
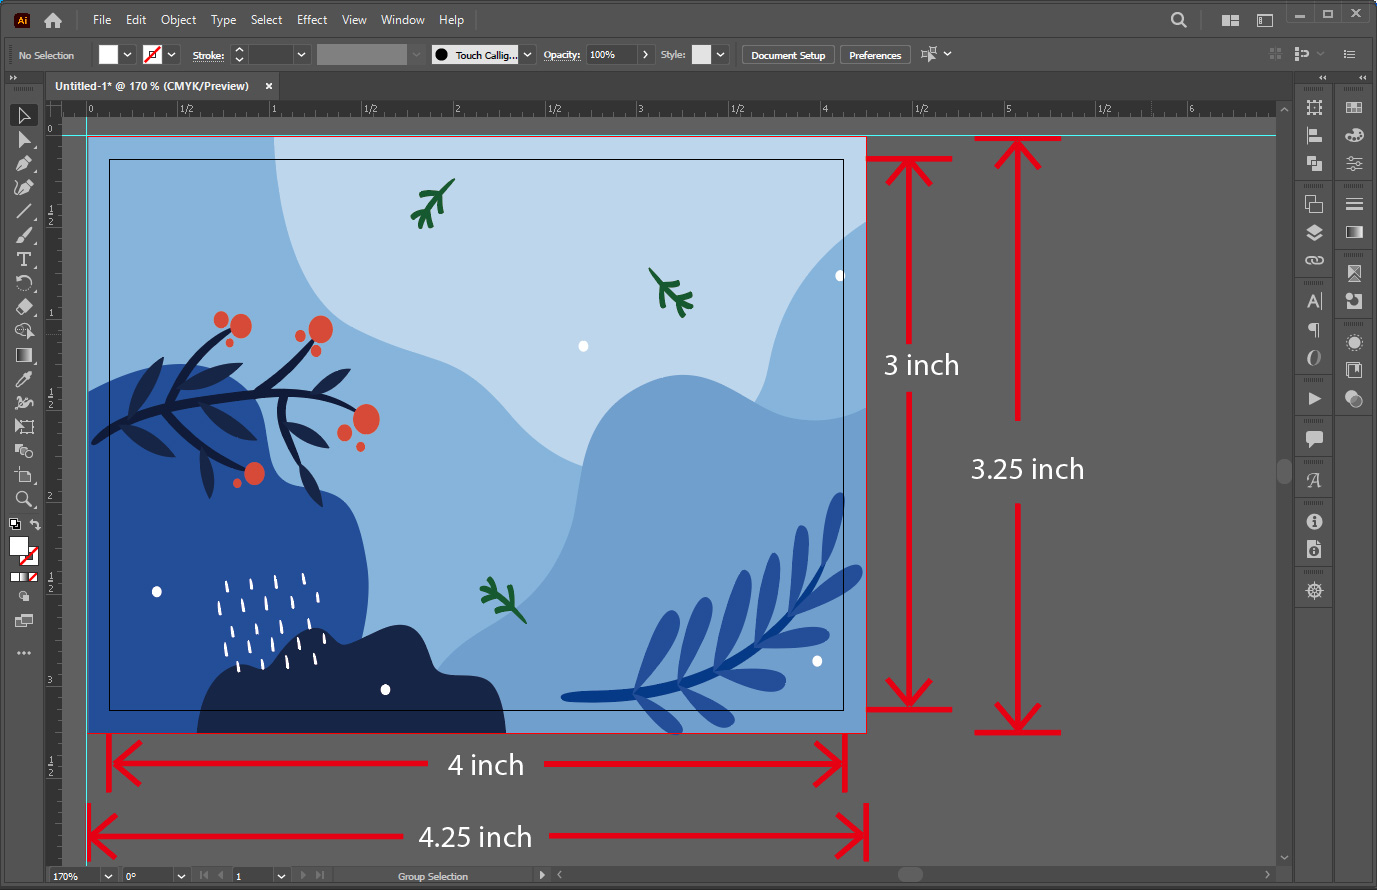
For most projects, a bleed of at least 0.125 inches on each side is recommended. For example, if your document’s final size is 3 x 4 inches, the dimensions with bleed would be 3.25 x 4.25 inches.
Difference Between Bleed and Crop Marks
Bleed and crop marks work together to ensure accuracy in the final printed piece. While bleed extends the artwork beyond the trim line, crop marks indicate where the paper should be cut.
Creating Bleed with Page Spreads
- When you’re working with page spreads, you don’t need to add bleed between two pages.
- If you’re designing for wire-o or spiral binding, make sure that all four sides of every page have bleed zones; and remember that for these bindings, if you’re using InDesign, do not use the “facing page” option.
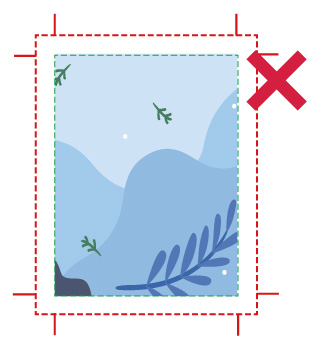
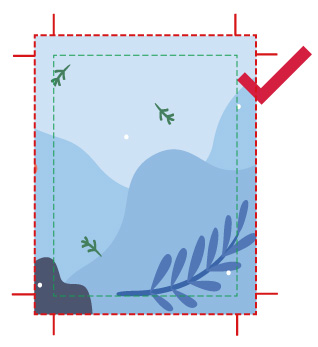
Common Mistakes with Bleed
1. Add 0.125 inches of white space around the edges of the document or on one side
Always make sure the bleed zone extends 0.125 inches from the trim line and that the image or background goes over the trim line to the extent of the bleed area.
2. The artwork "floats" on the page
Always adjust the size of the entire document to fill the bleed size, not just the background color.
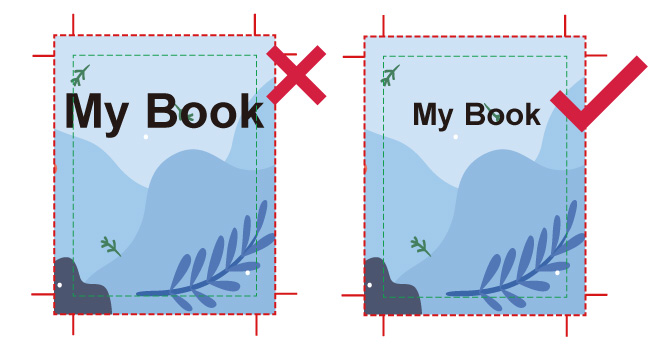
3. The image looks great but the text has been cut off
Keep text within the safe zone to avoid cutting.
How to Add Bleed and Export PDF Artwork
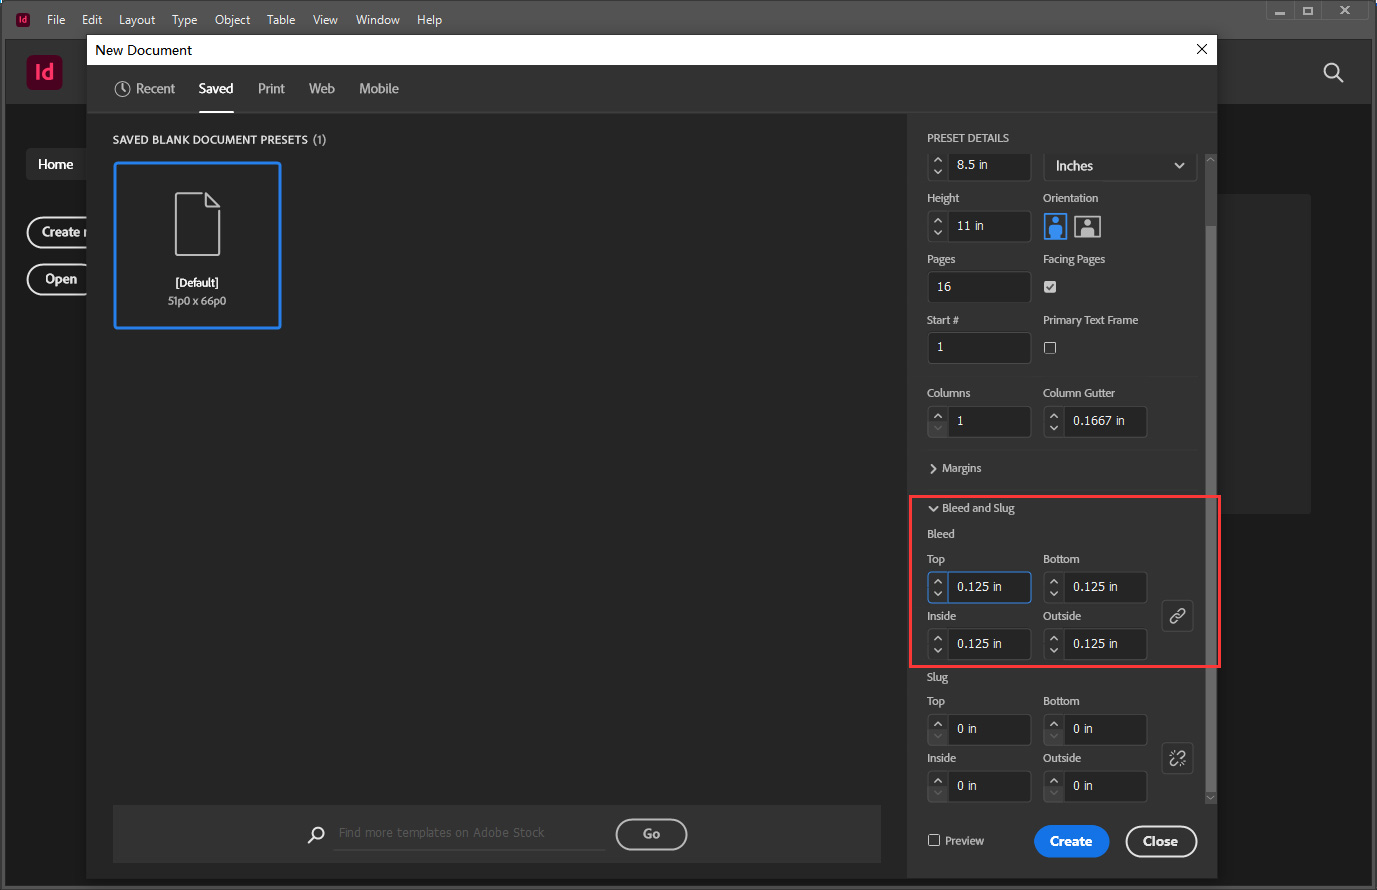
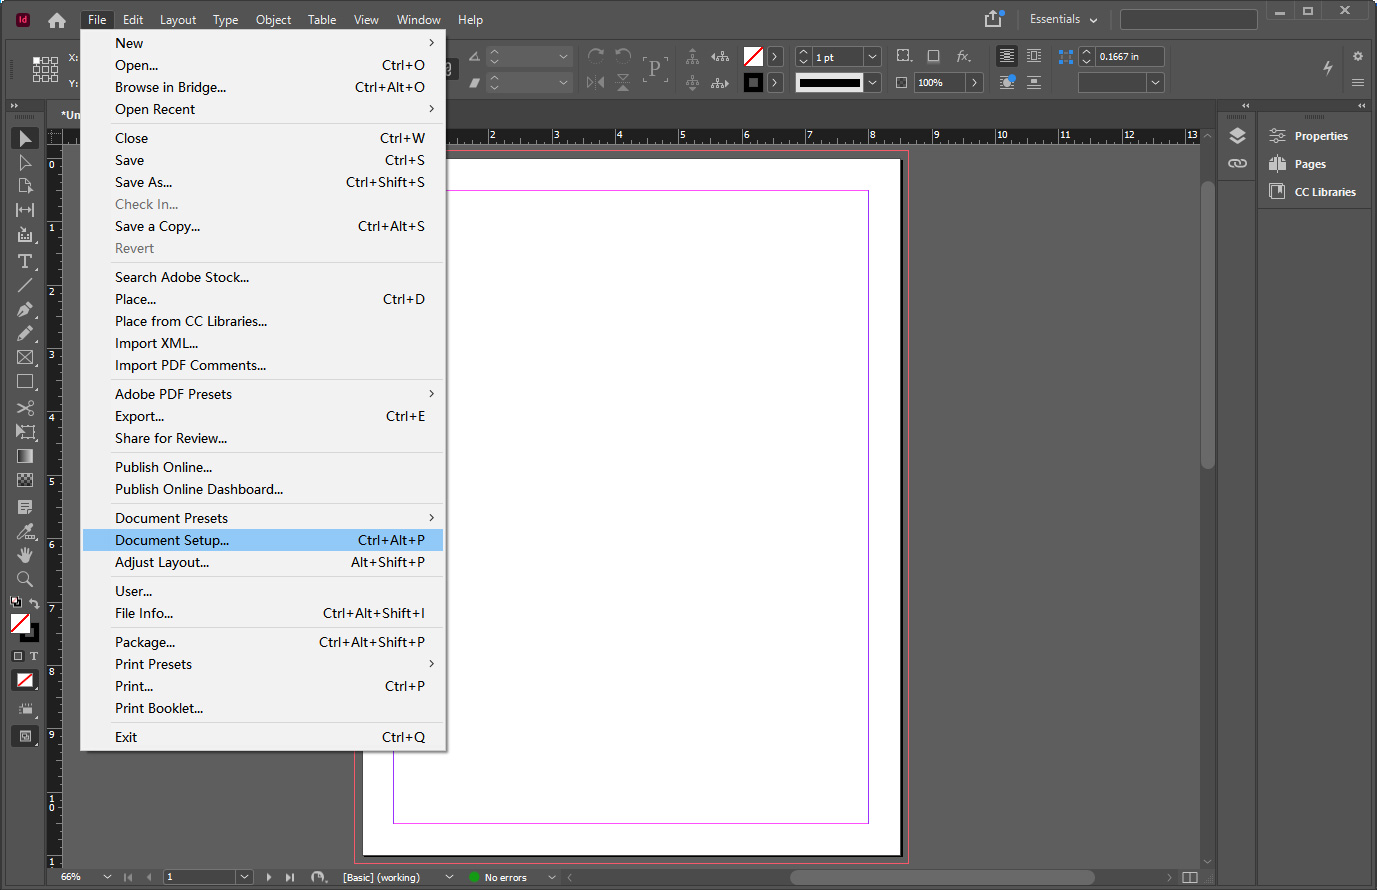
Add Bleed in Adobe InDesign
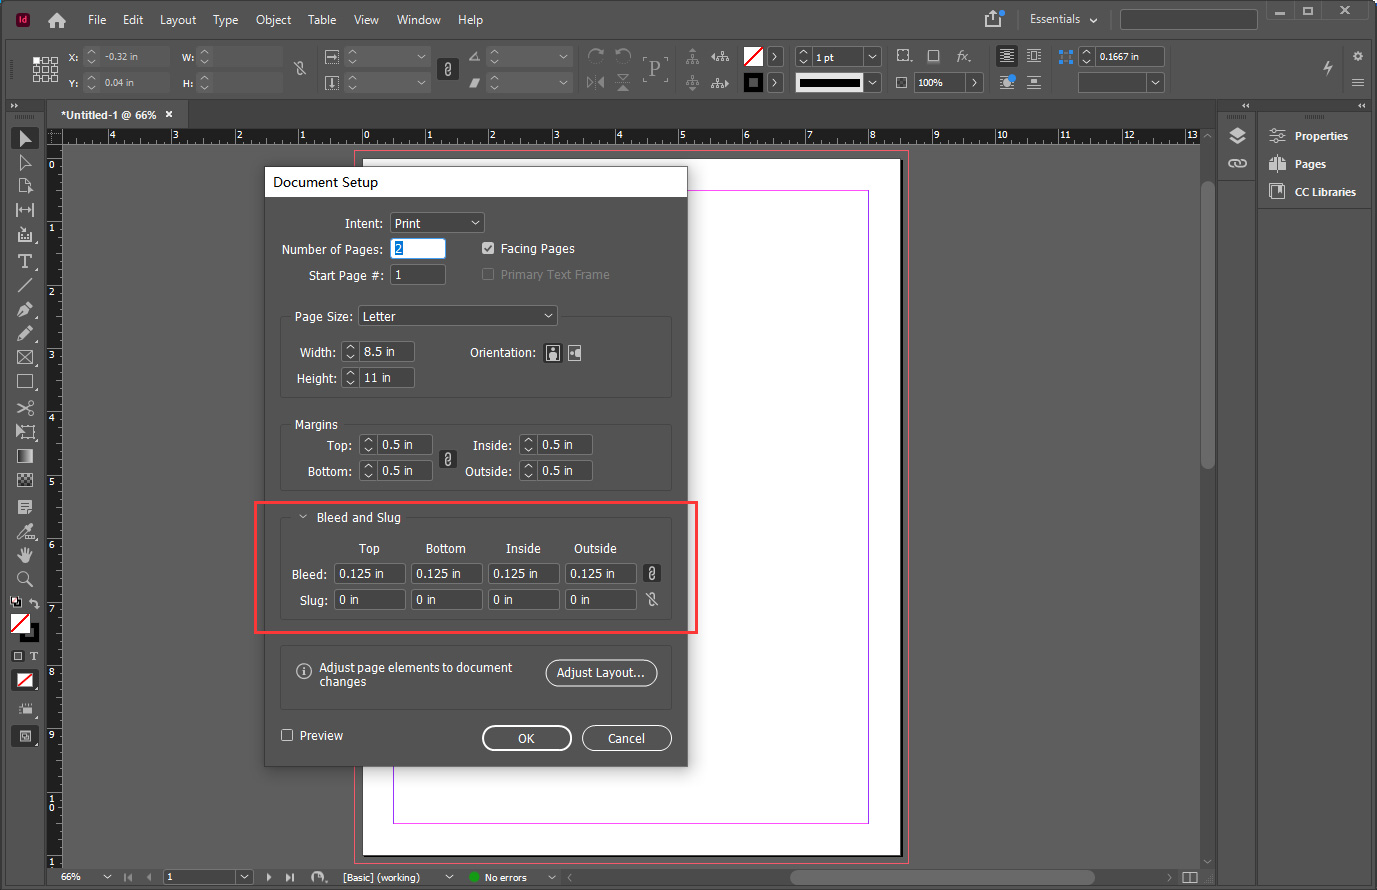
Set Bleed in the “New Document” setting.
Open up your document and go to the File menu. Select “File” > “Document Setup” to open the “Bleed and Slug” panel. Here, you can set your bleed margins by entering the desired width into the “Top,” “Right,” “Bottom,” and “Left” fields.
Export PDFs with Bleed from Adobe InDesign
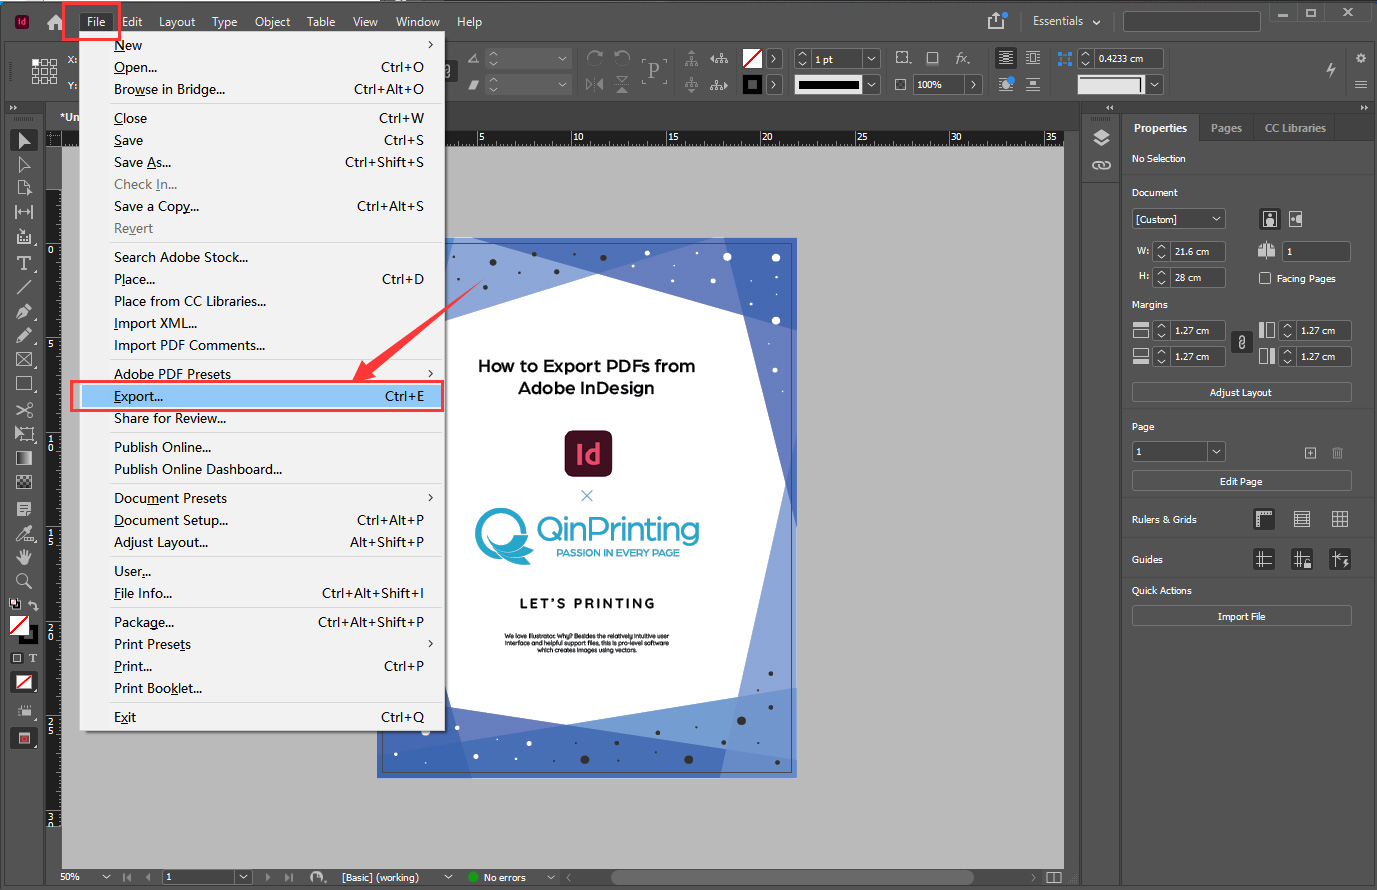
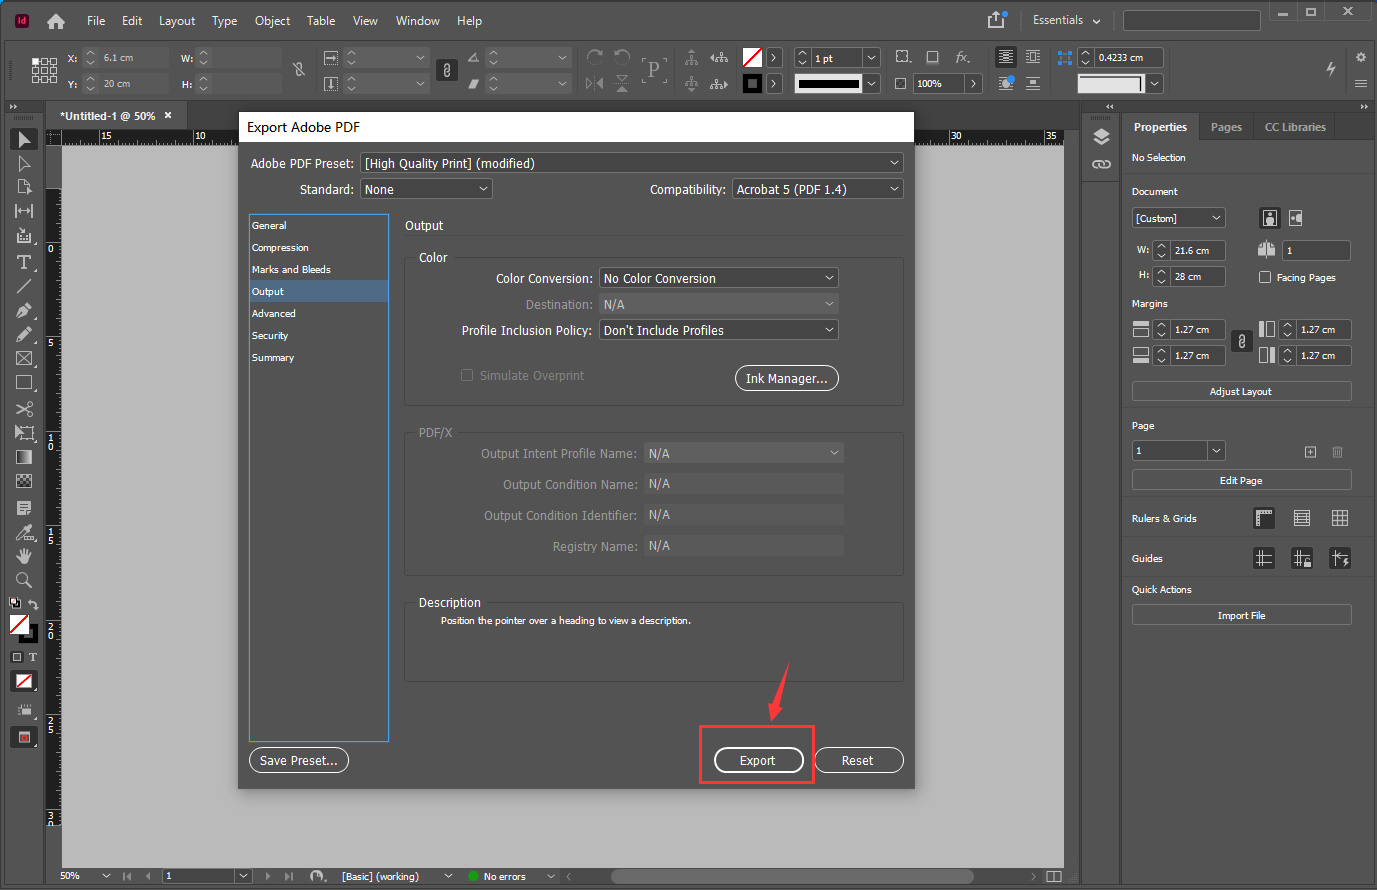
1. Click on File > Export.
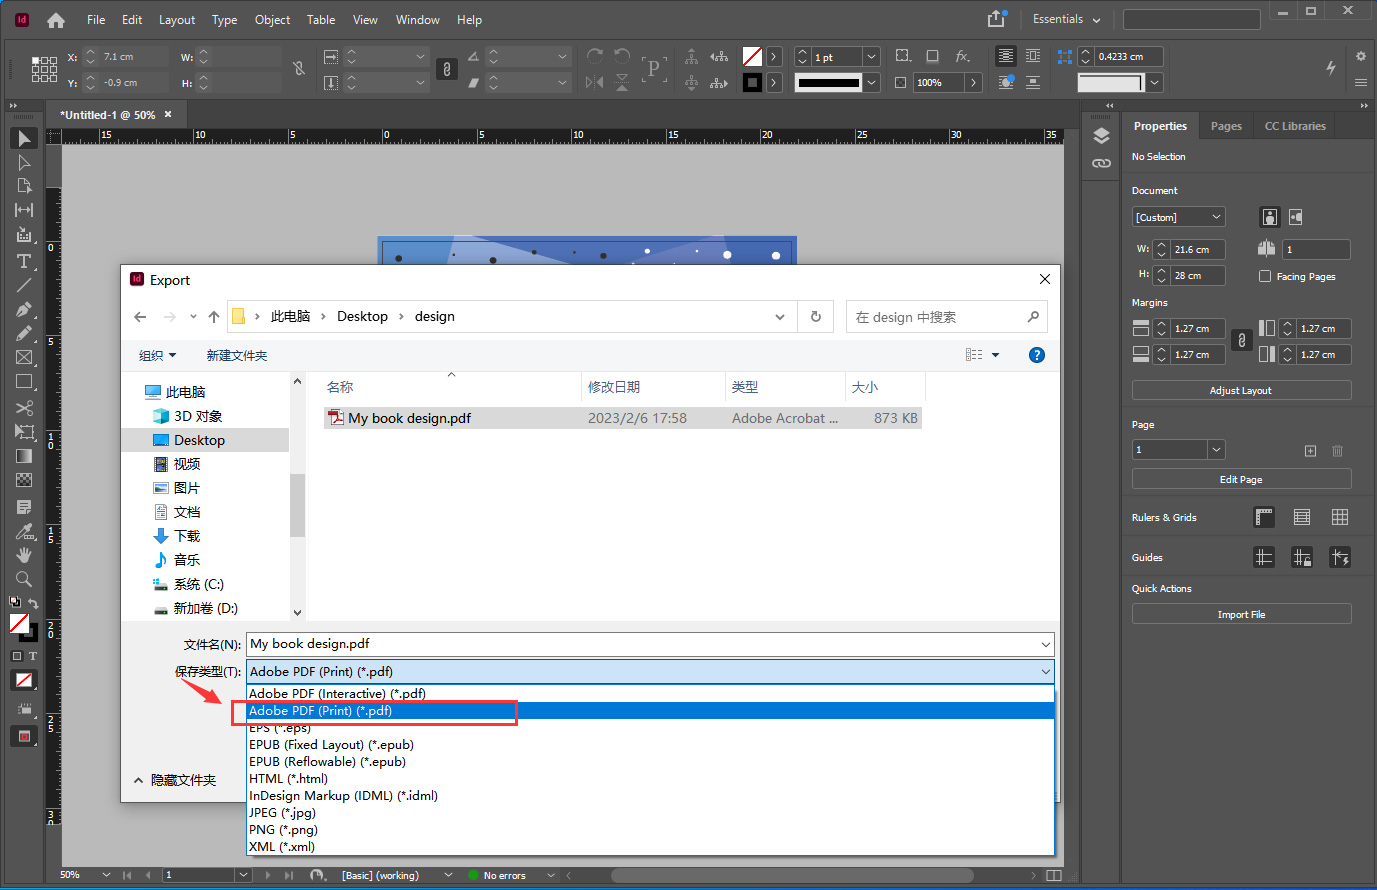
2. Give the file a name and choose .PDF.
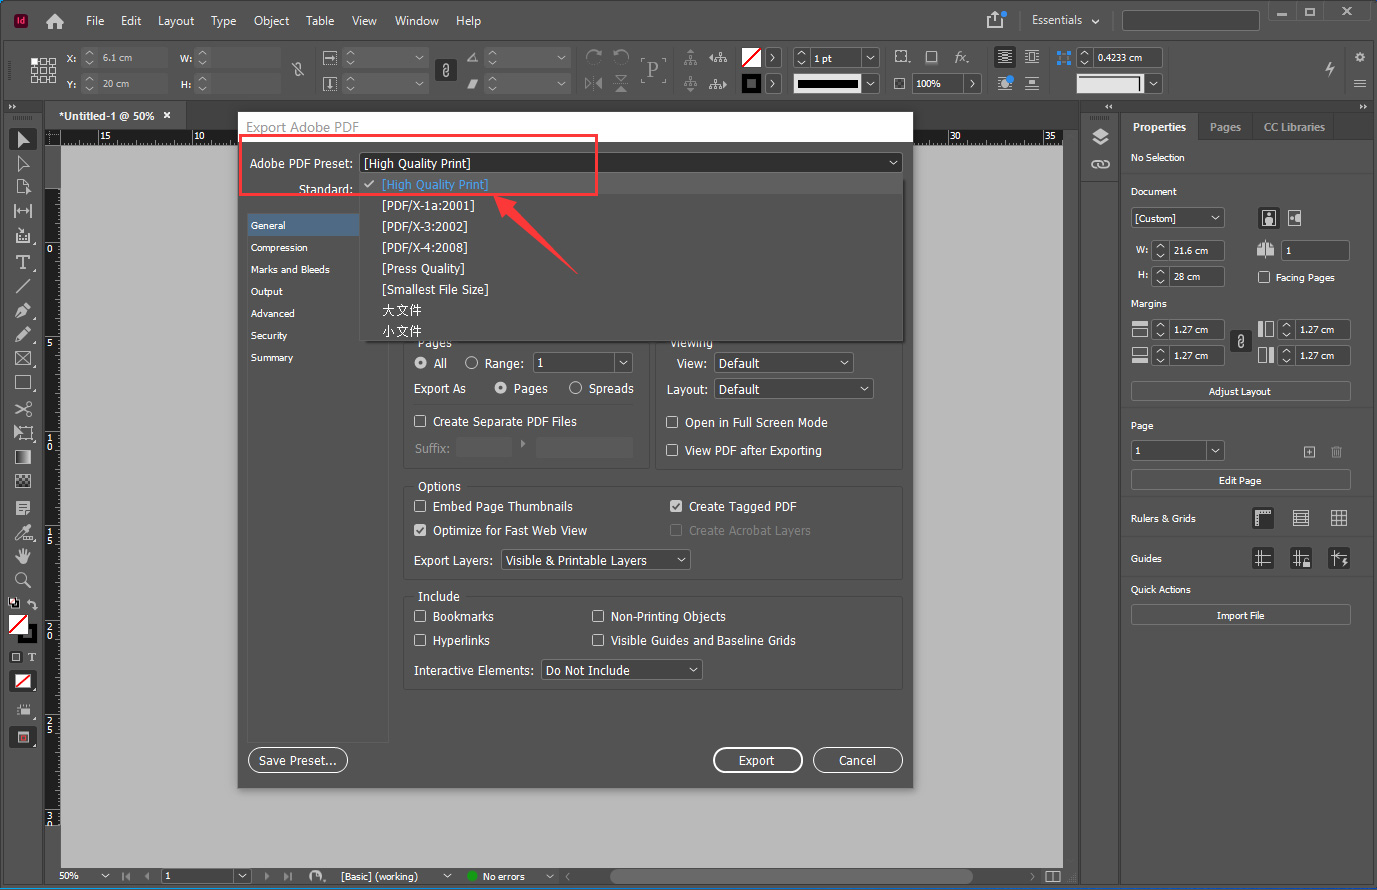
3. Select the PDF Preset > High Quality Print.
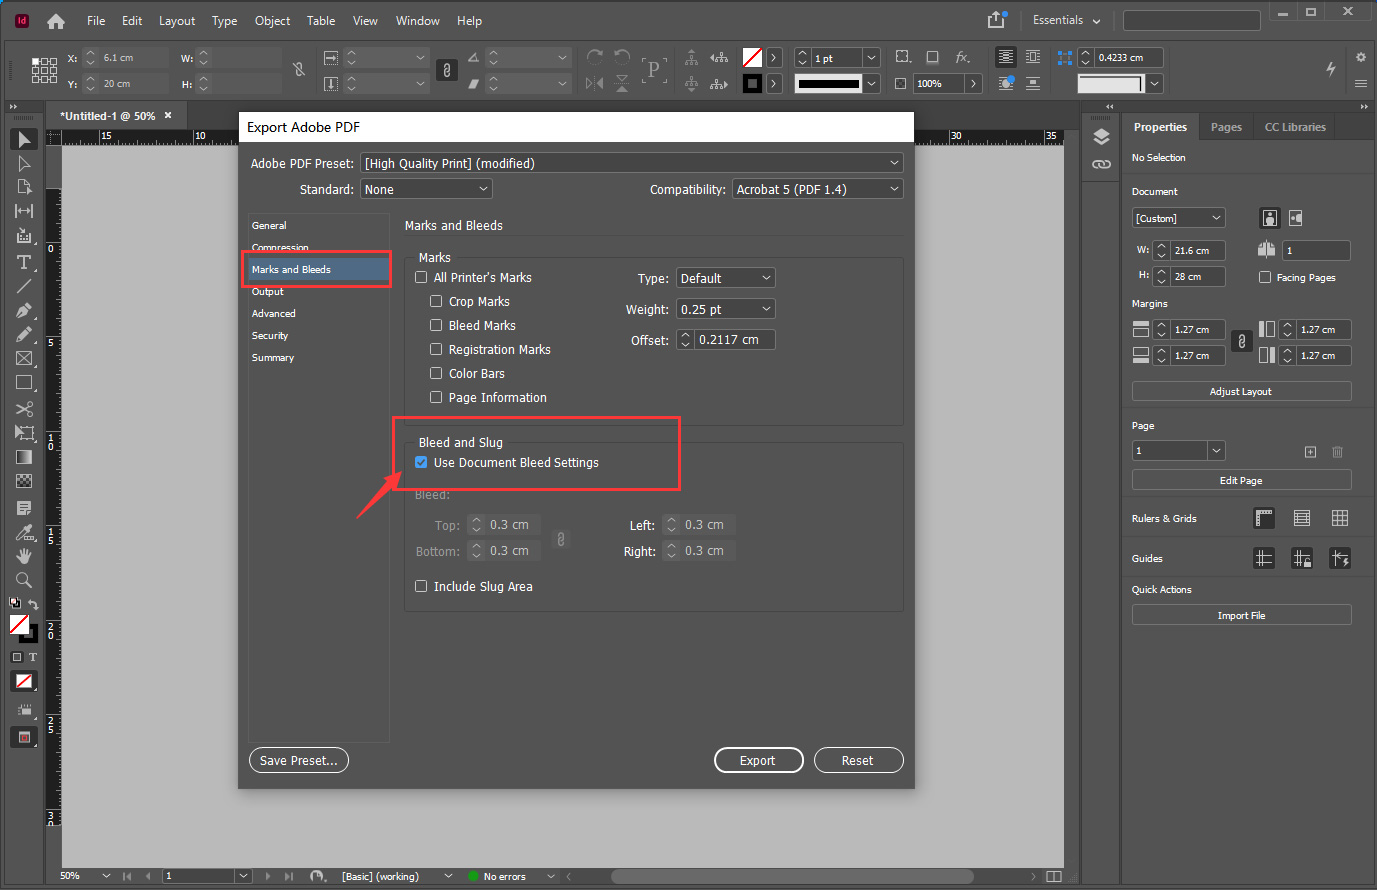
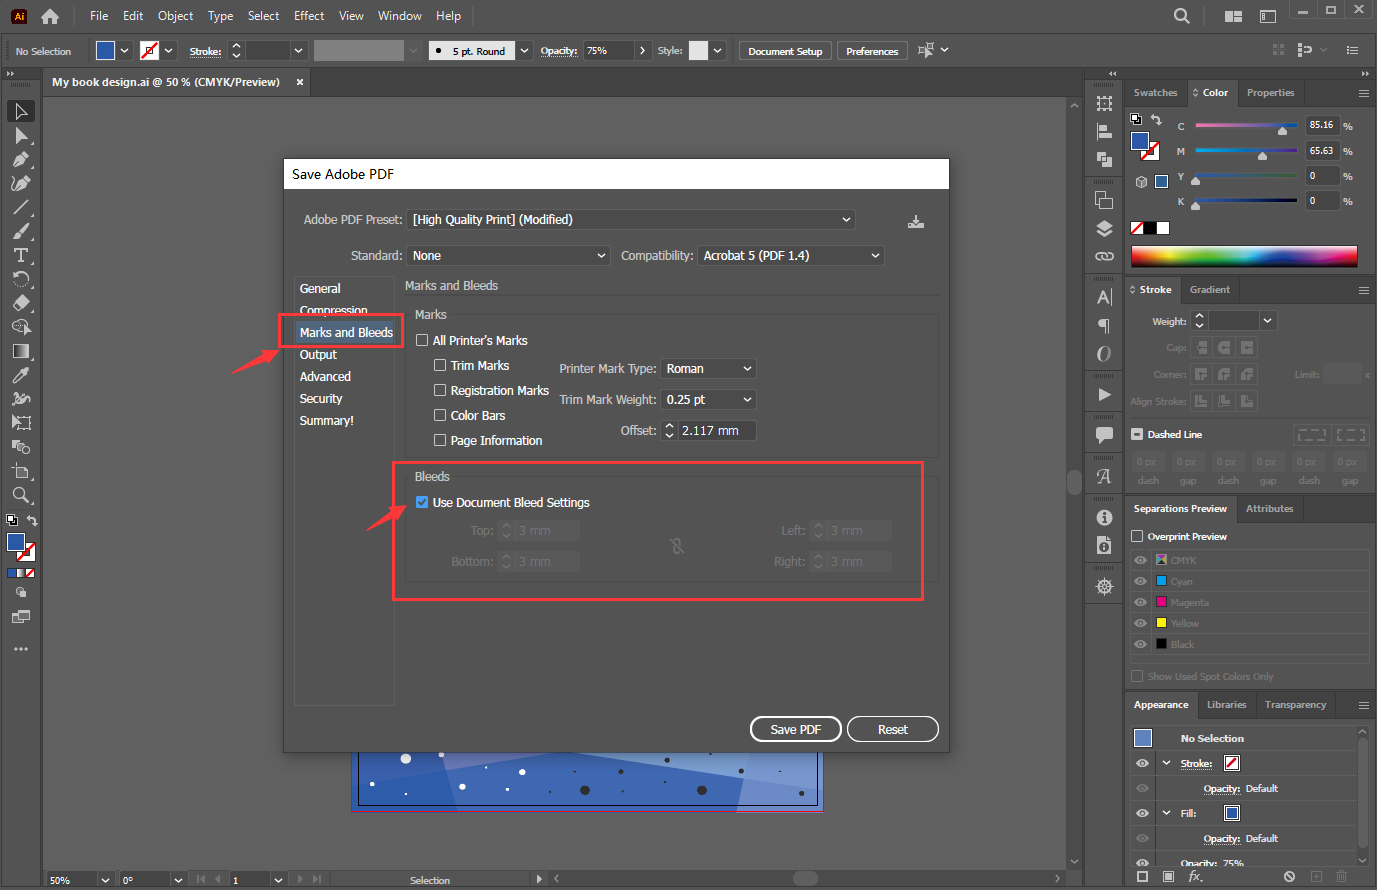
4. Go to Marks and Bleeds, for Bleeds, select Use Document Bleed Settings.
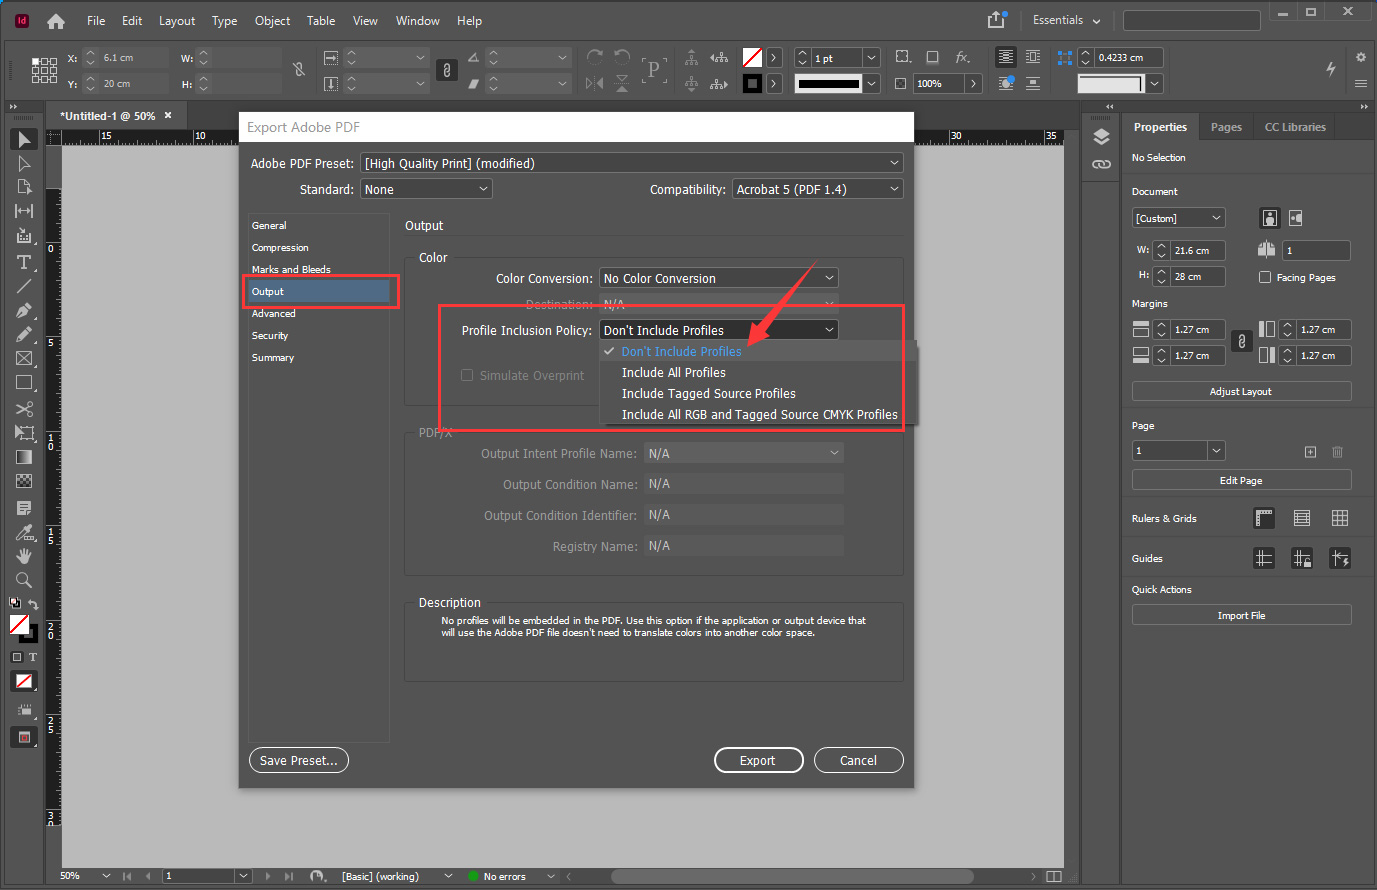
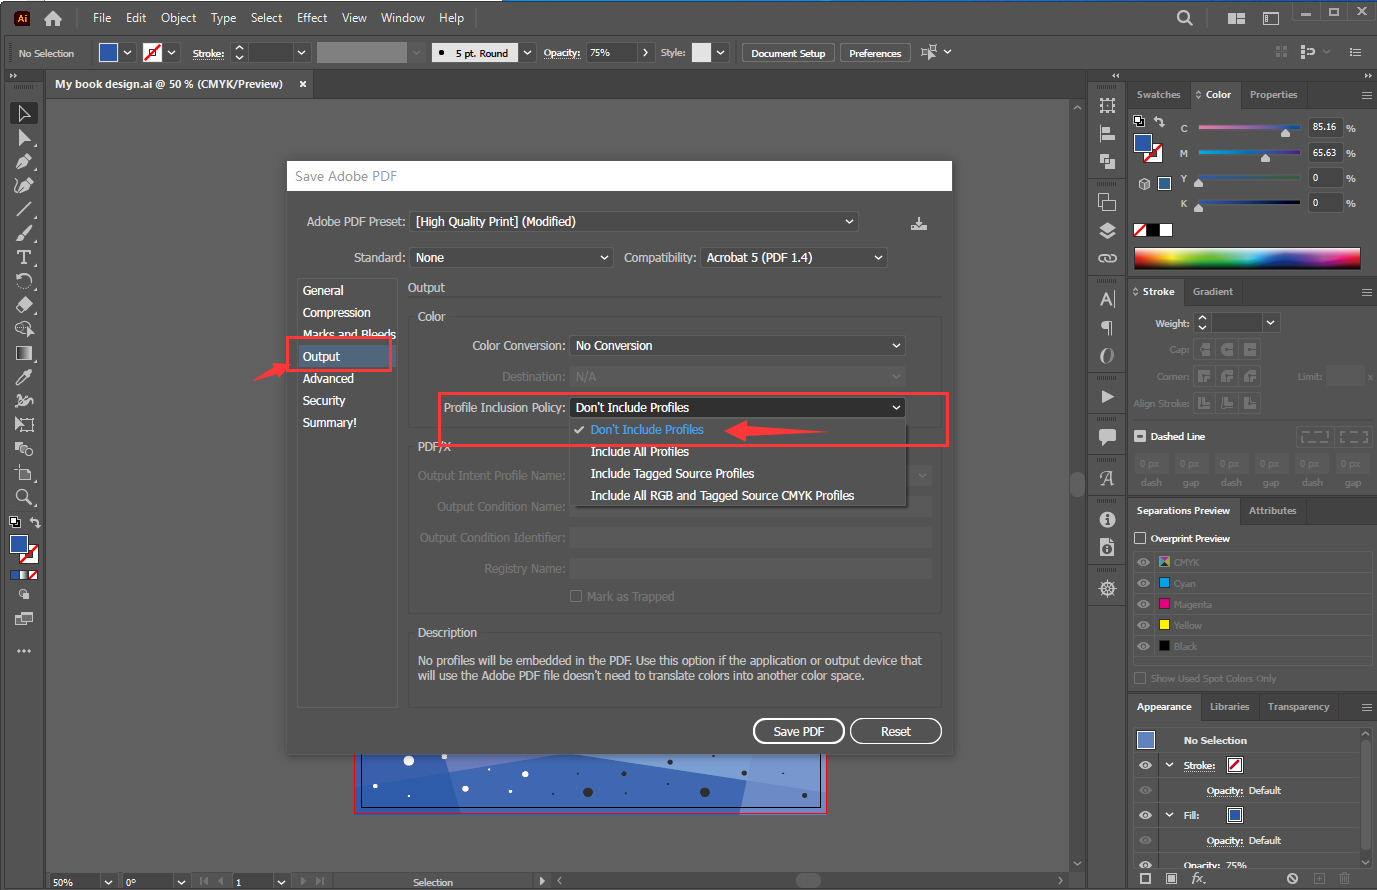
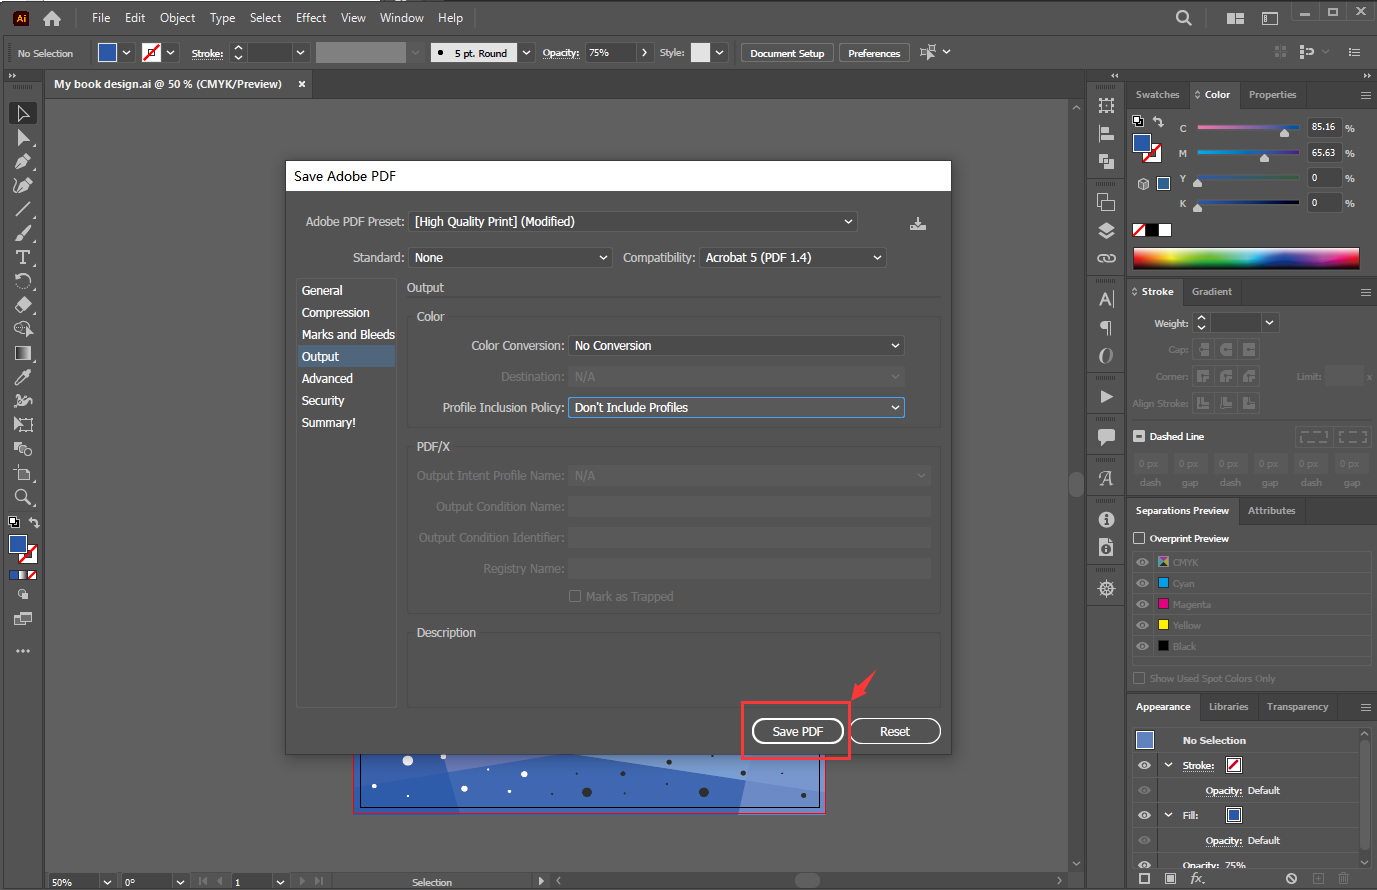
5. Go to Output, for Profile Inclusion Policy, select Don’t Include Profiles.
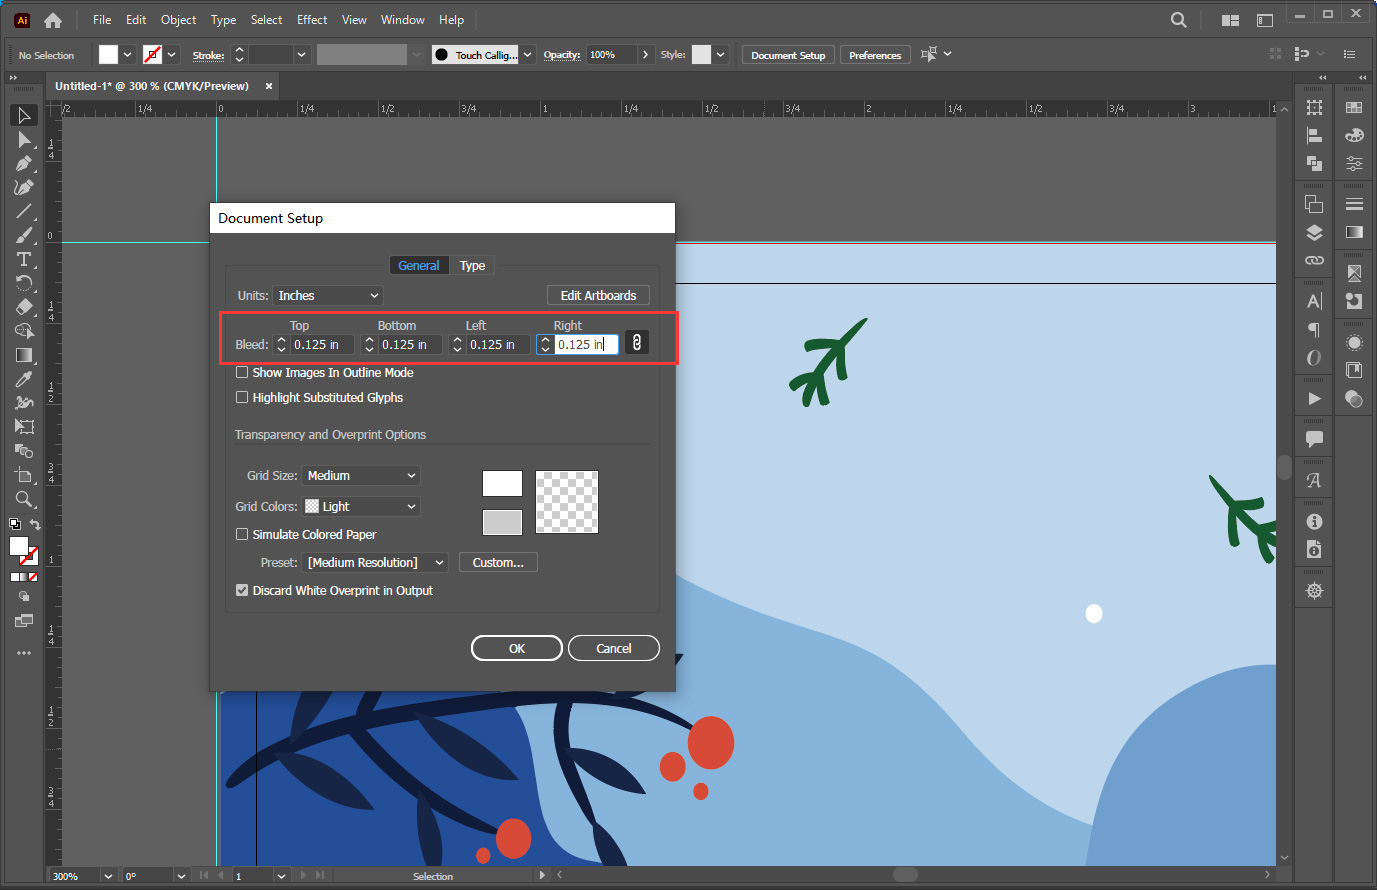
Add Bleed in Adobe Illustrator
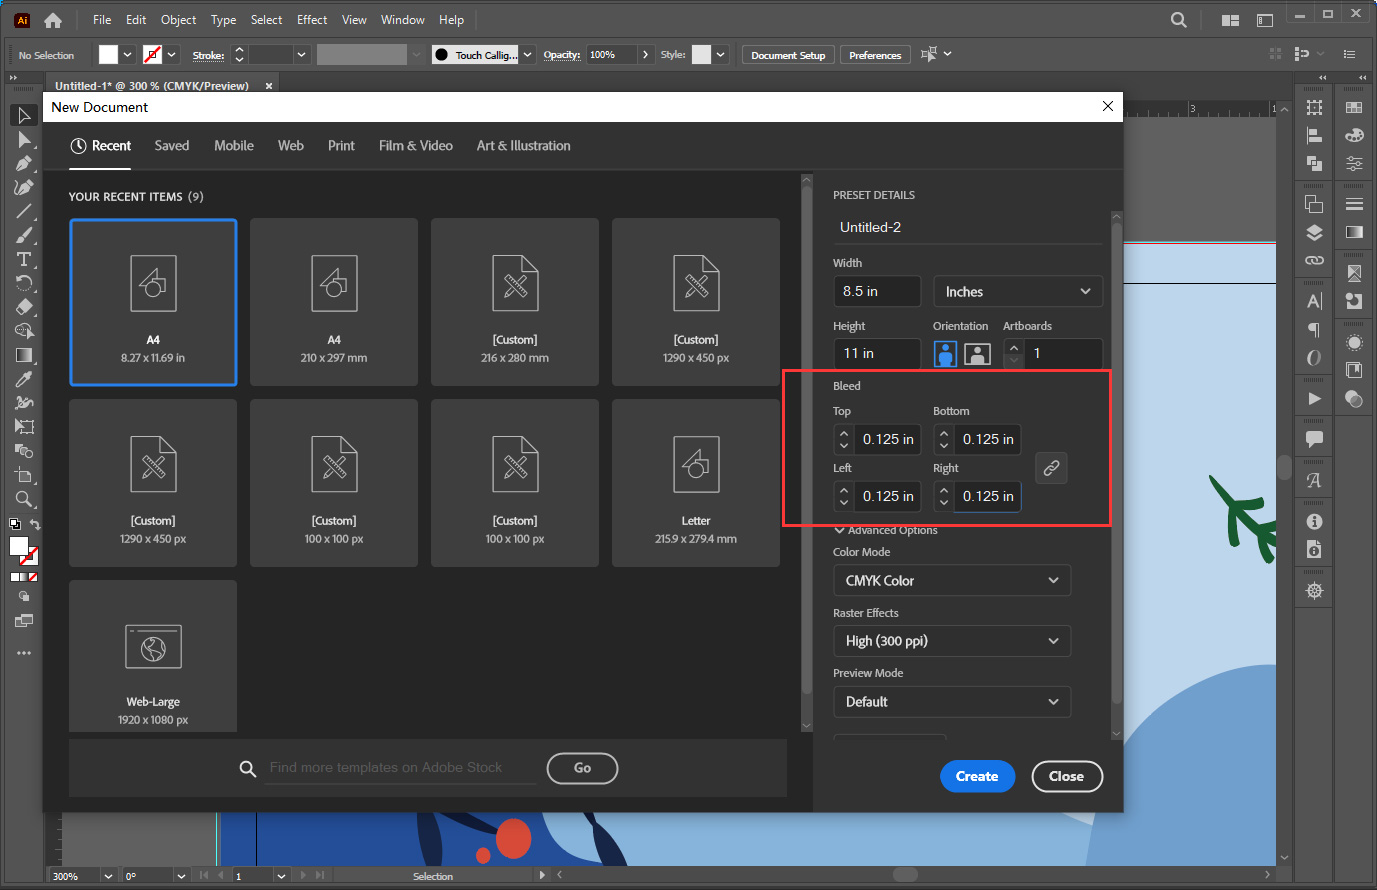
Set Bleed in the “New Document” setting.
Open your artwork, go to “File” > “Document Setup“, and enter the desired bleed width.
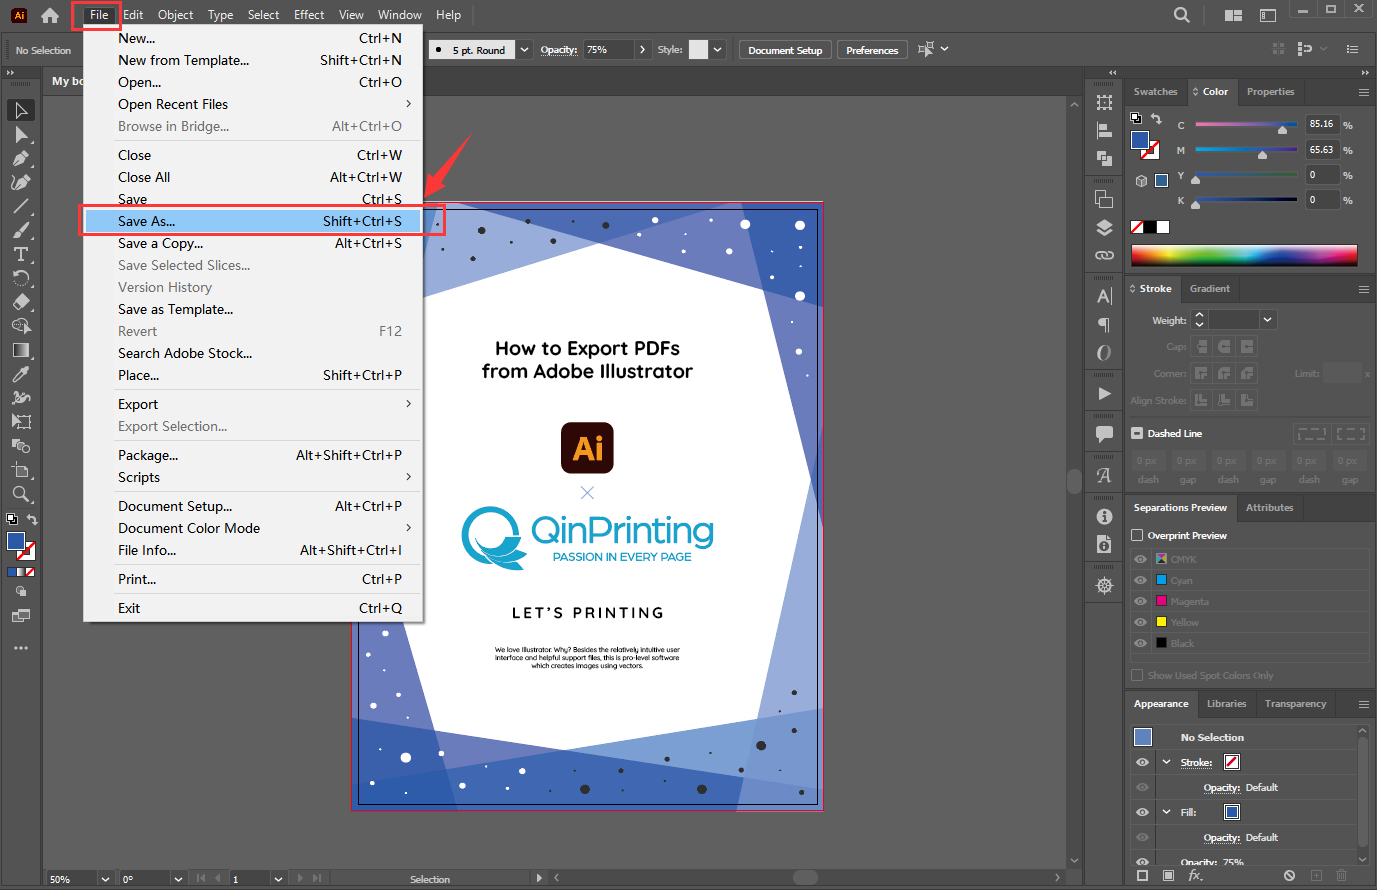
Export PDFs with Bleed from Adobe Illustrator
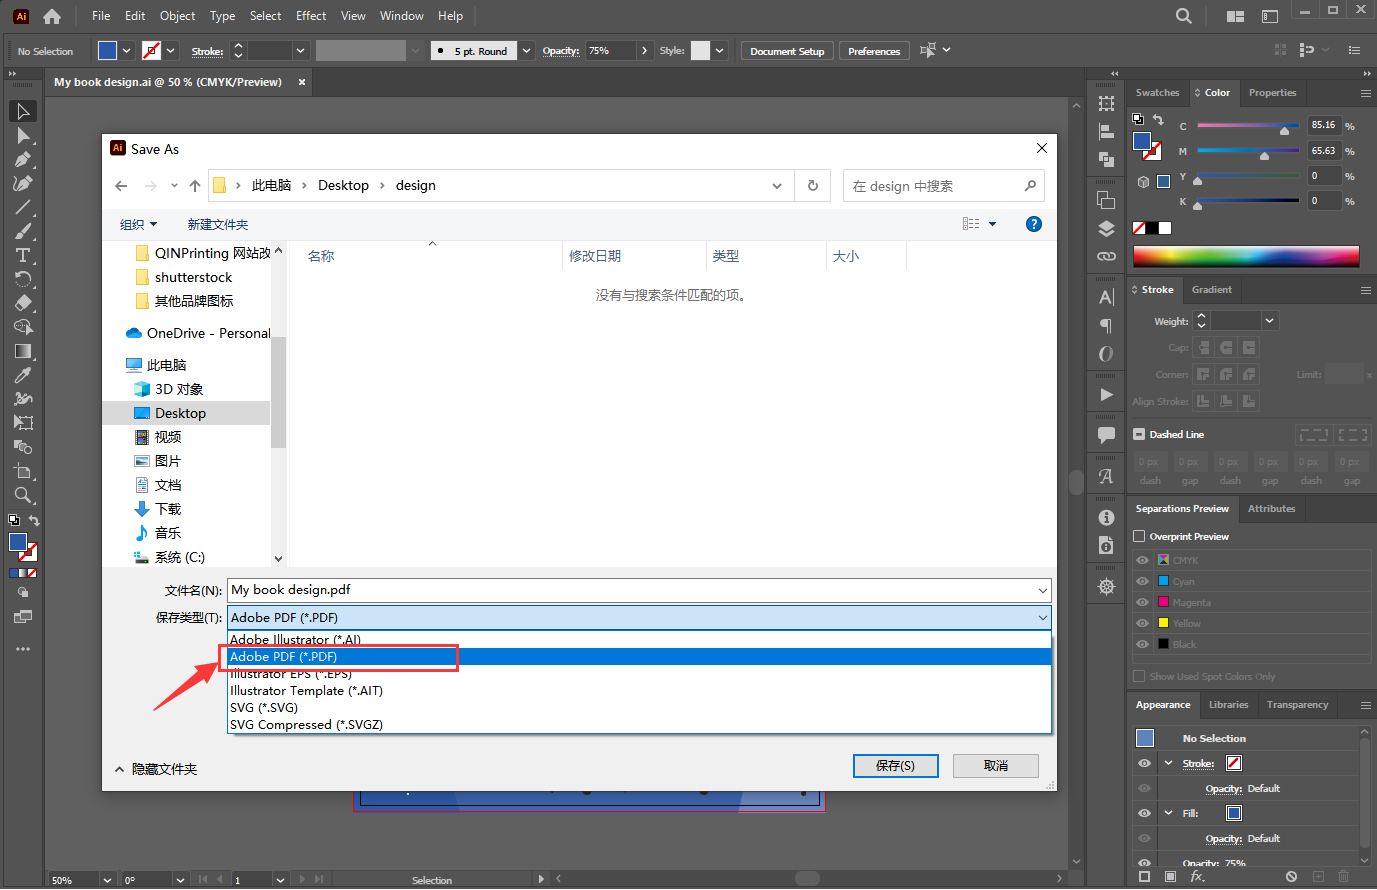
1. Click on File > Save As.
2. Give the file a name and choose .PDF.
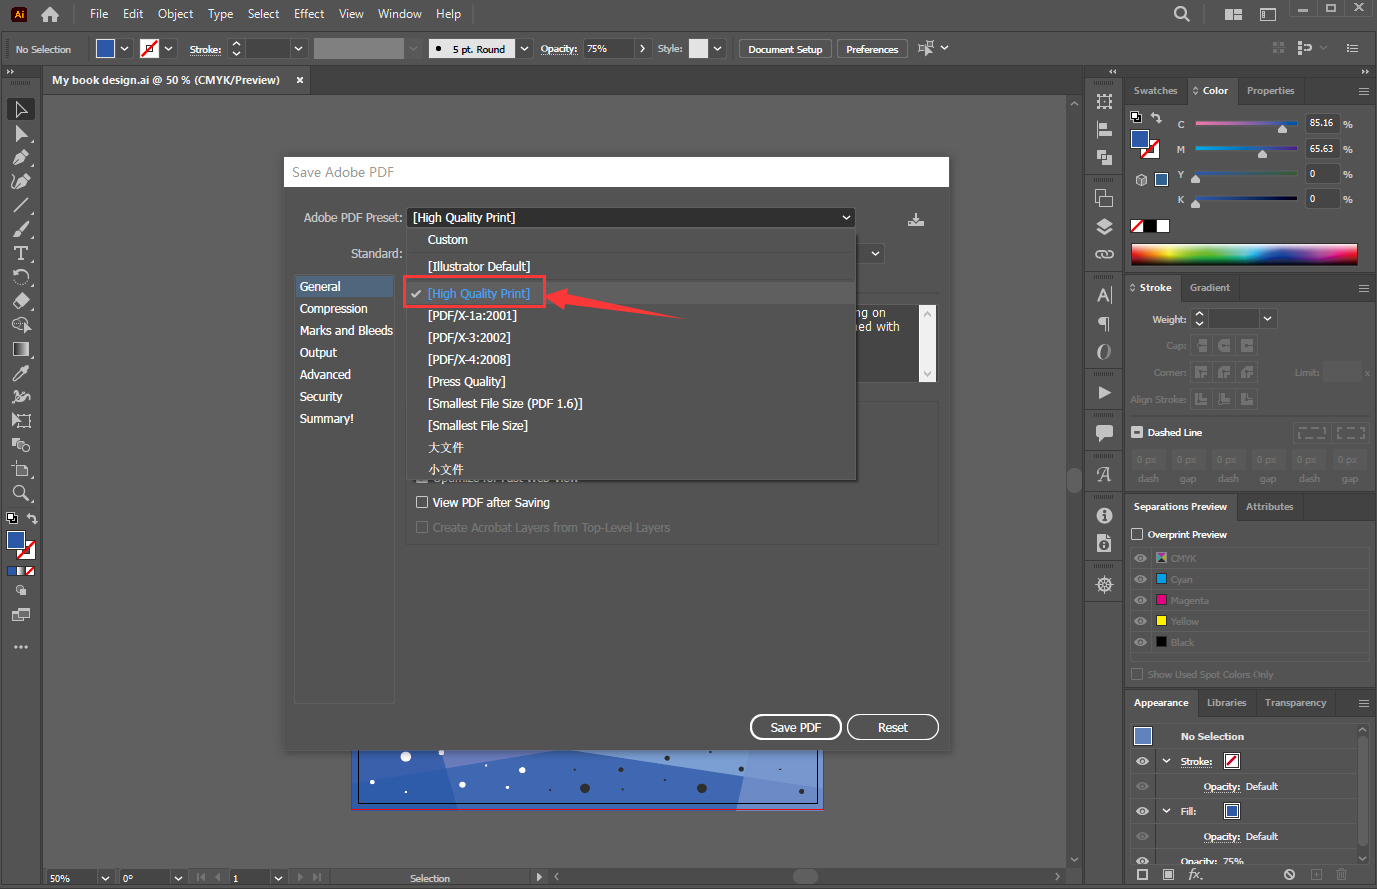
3. Select the PDF Preset >High Quality Print.
4. Go to Marks and Bleeds, for Bleeds, select Use Document Bleed Settings.
5. Go to Output, for Profile Inclusion Policy, select Don’t Include Profiles.
Add Bleed in Adobe Photoshop
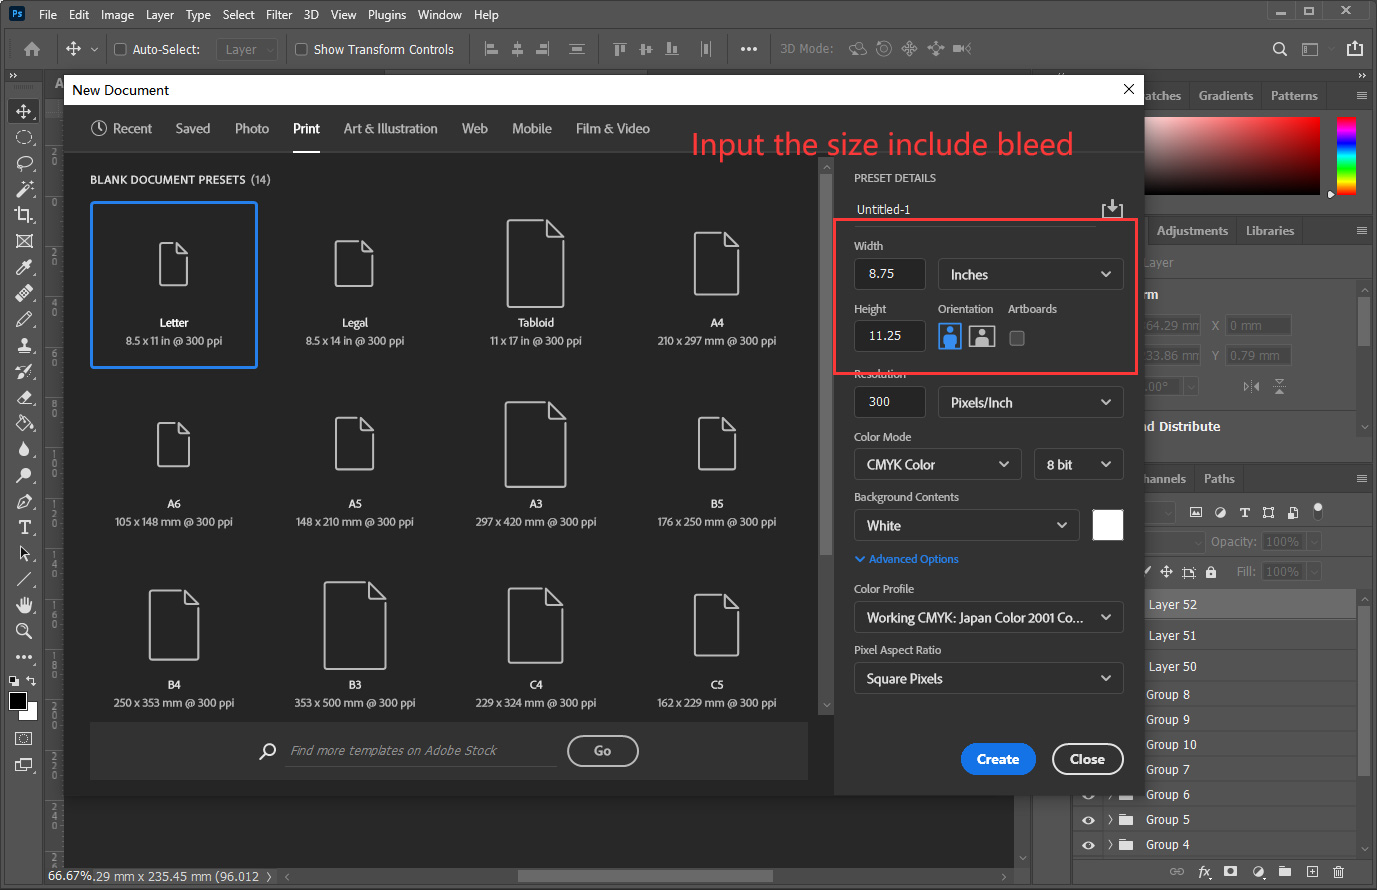
Photoshop does not have a separate bleed setting, you can only enter the size with bleed when inputting the document size
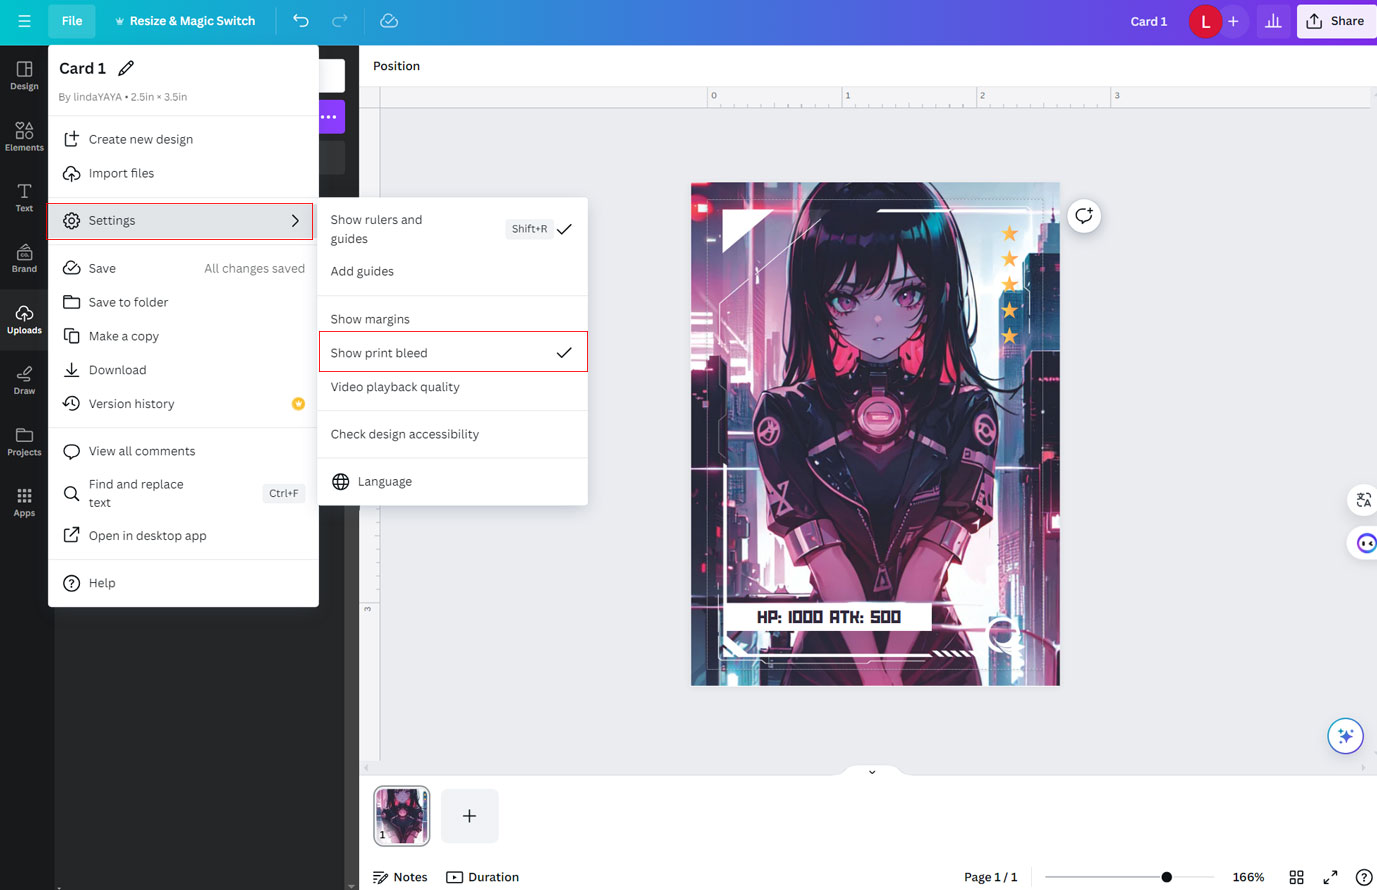
Add Bleed in Canva
1. Click on File > Setting > Show print bleed.
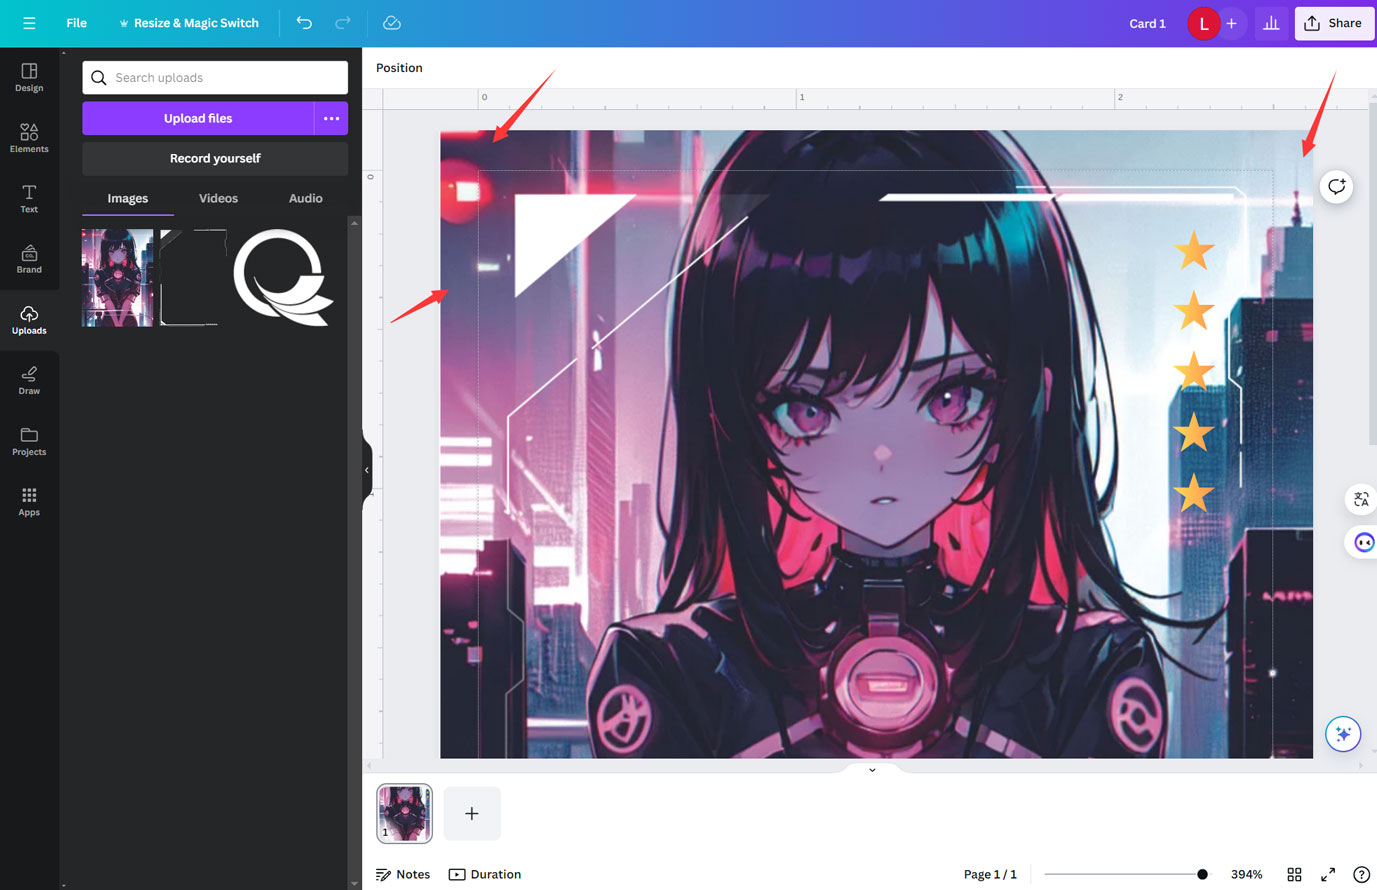
2. Extend your background to cover the bleed area
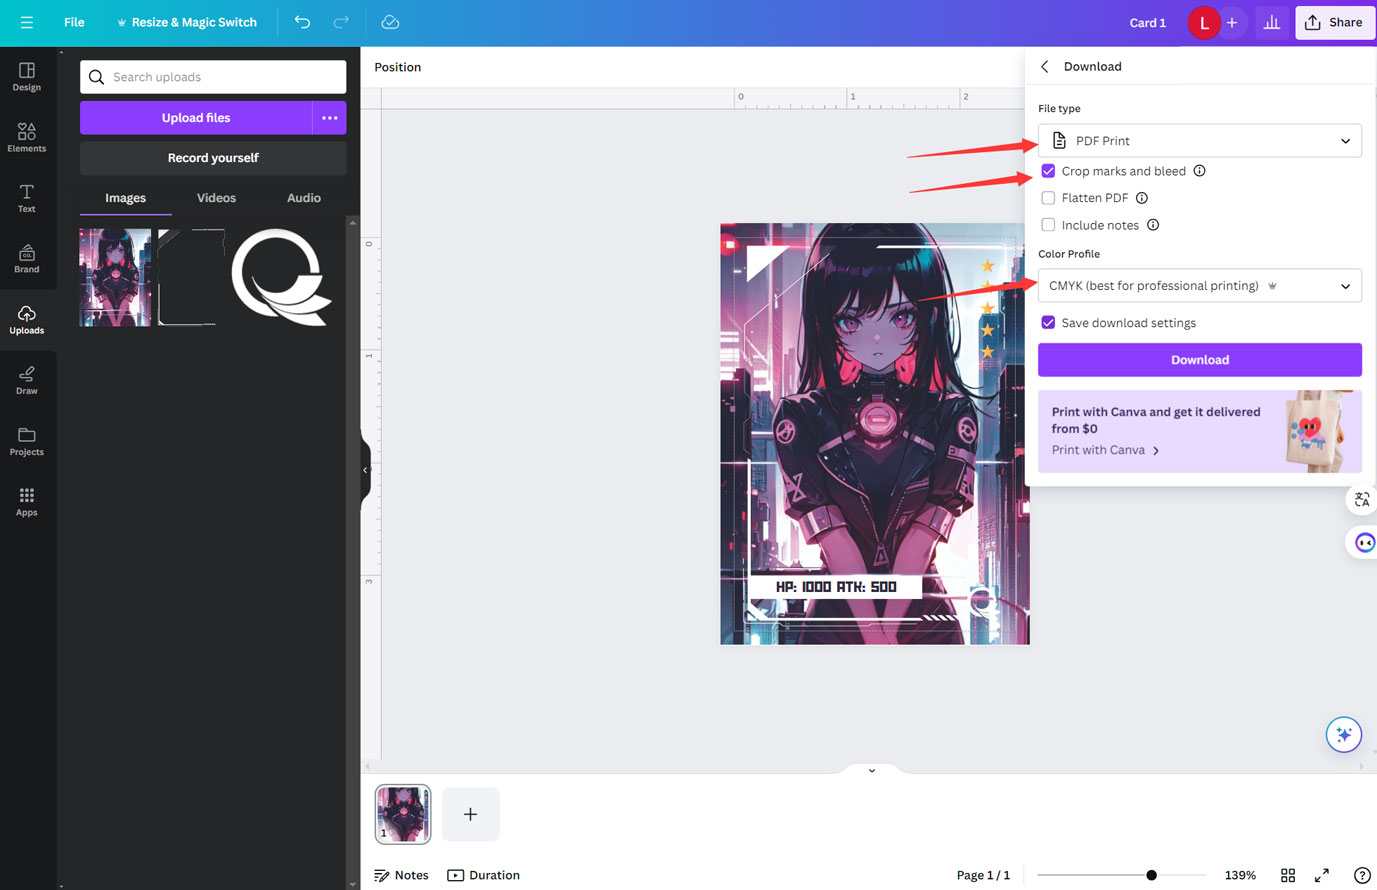
Export PDFs with Bleed from Canva
1. Extend your background to cover the bleed area
2. Click on >Share > Download and choose “PDF print“.
Make sure to tick the boxes for crop marks and bleed, and select CMYK as the color profile for accurate printing.
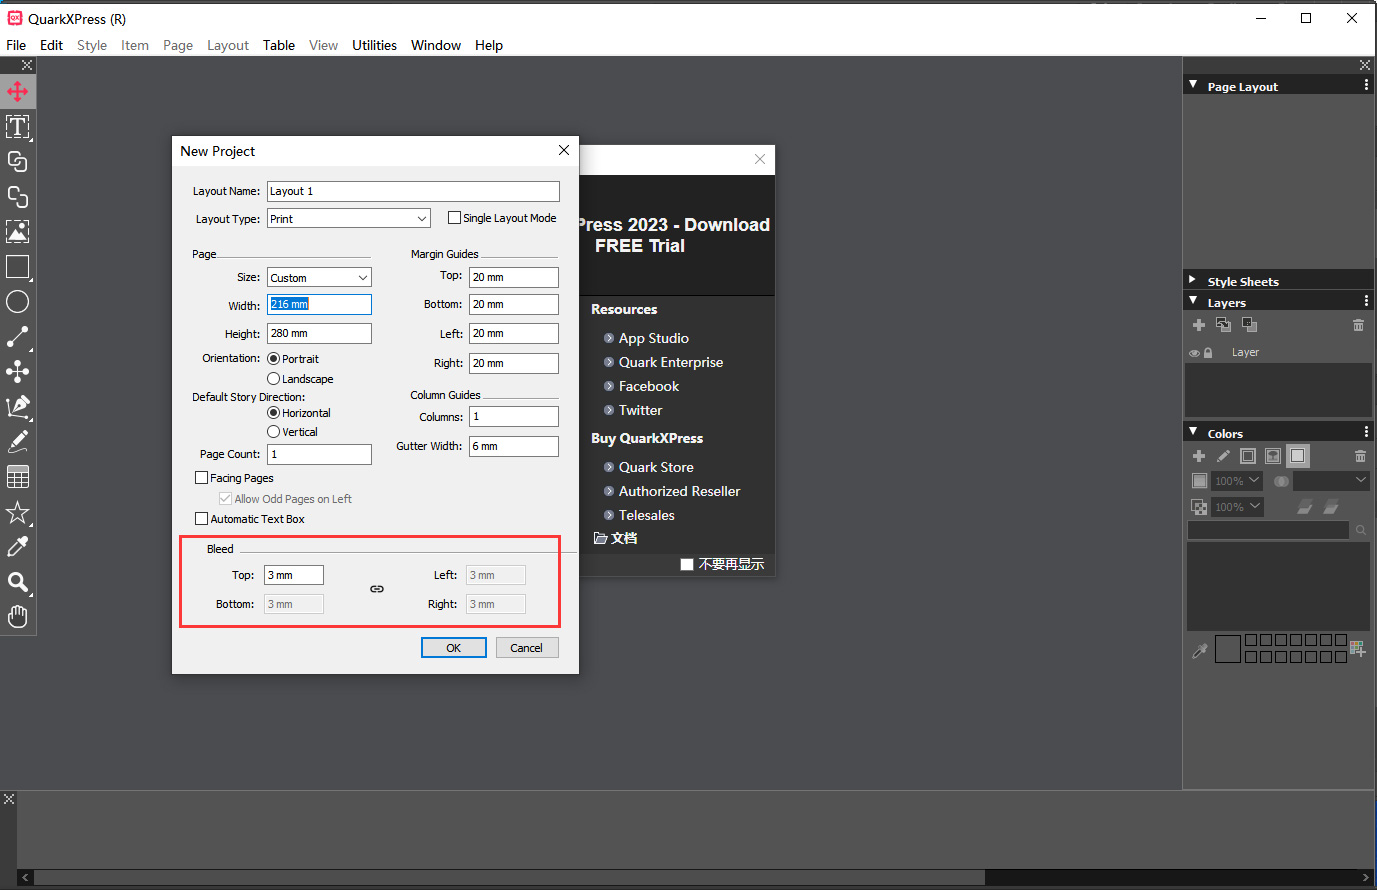
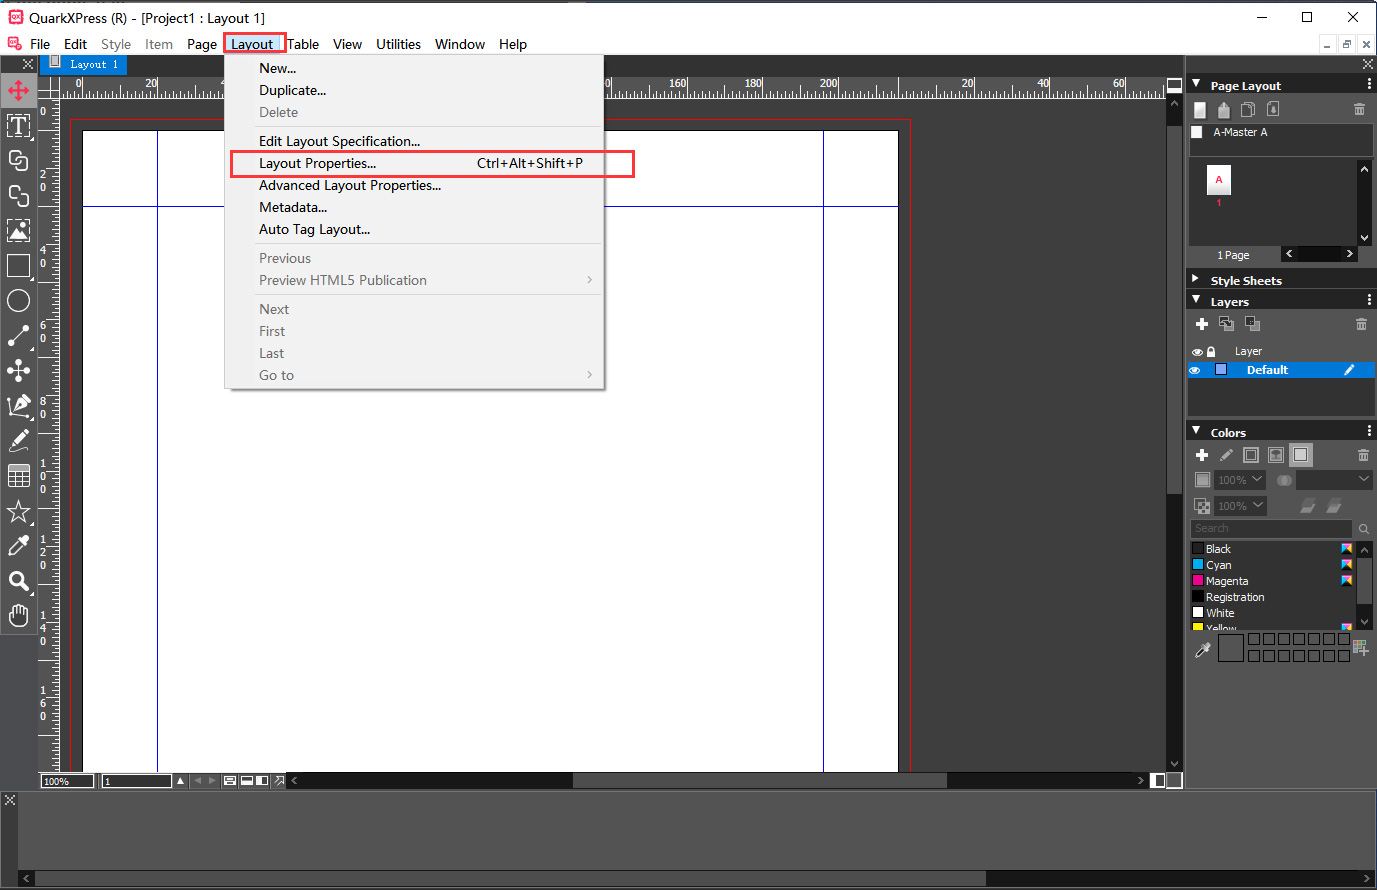
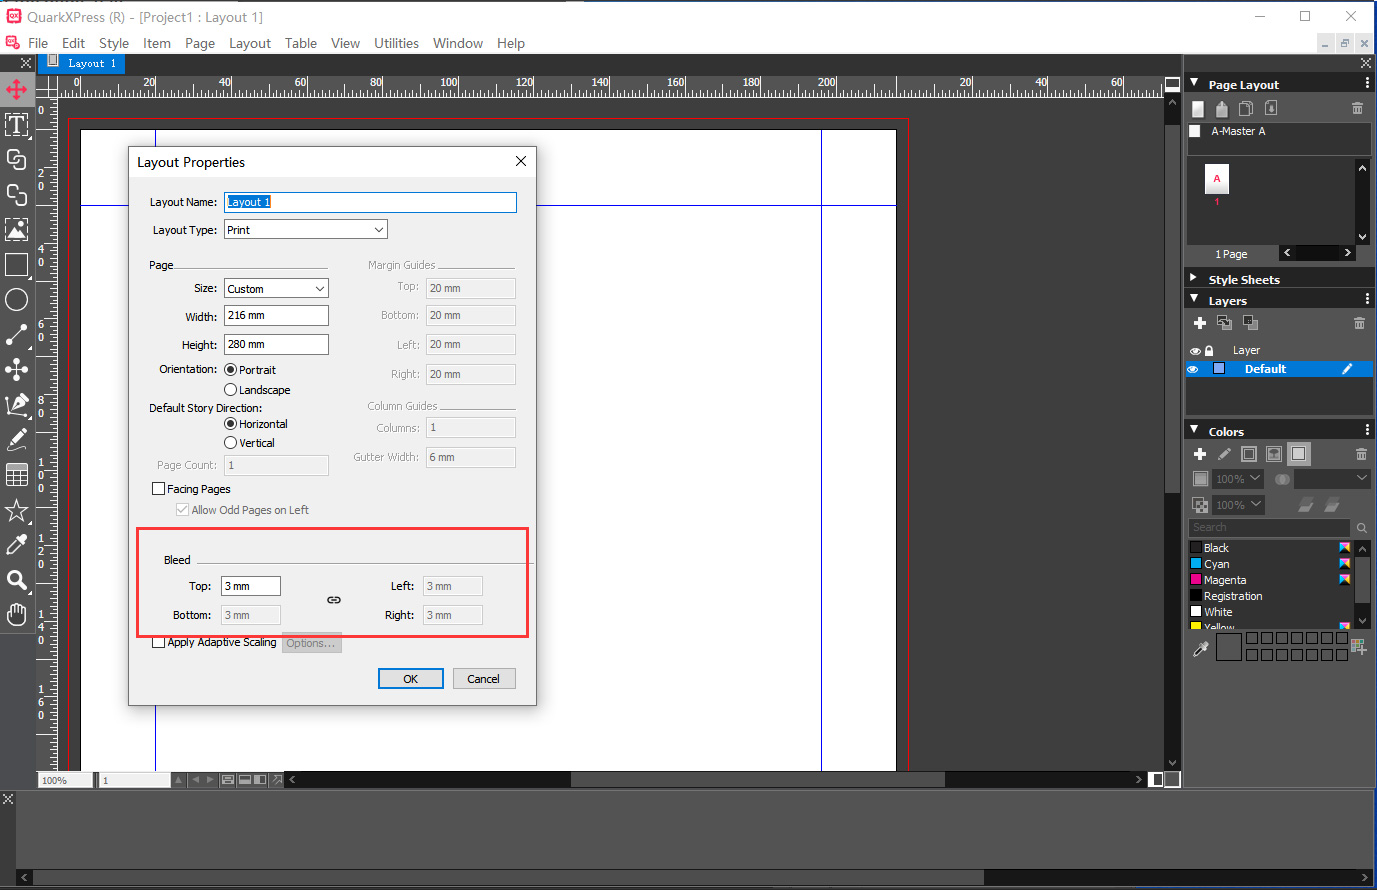
Add Bleed in QuarkXPress
Set Bleed in the “New Project” setting.
To create bleed margins in QuarkXPress, start by opening your document. In the document window, select the “Layout” > “Layout Properties“. Enter a suitable value in the “Bleed” field, and then click “OK”.
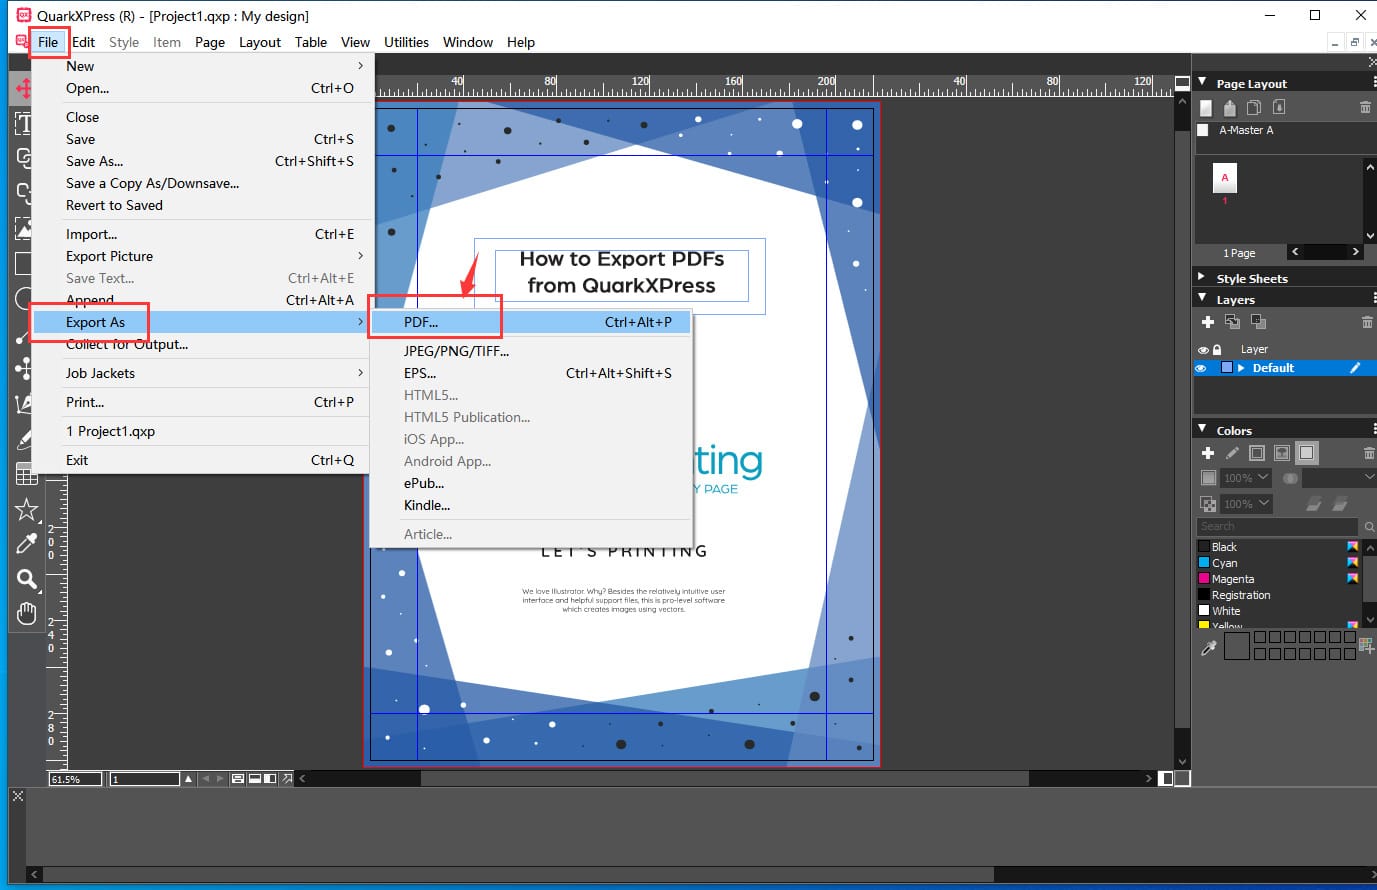
Export PDFs with Bleed from QuarkXPress
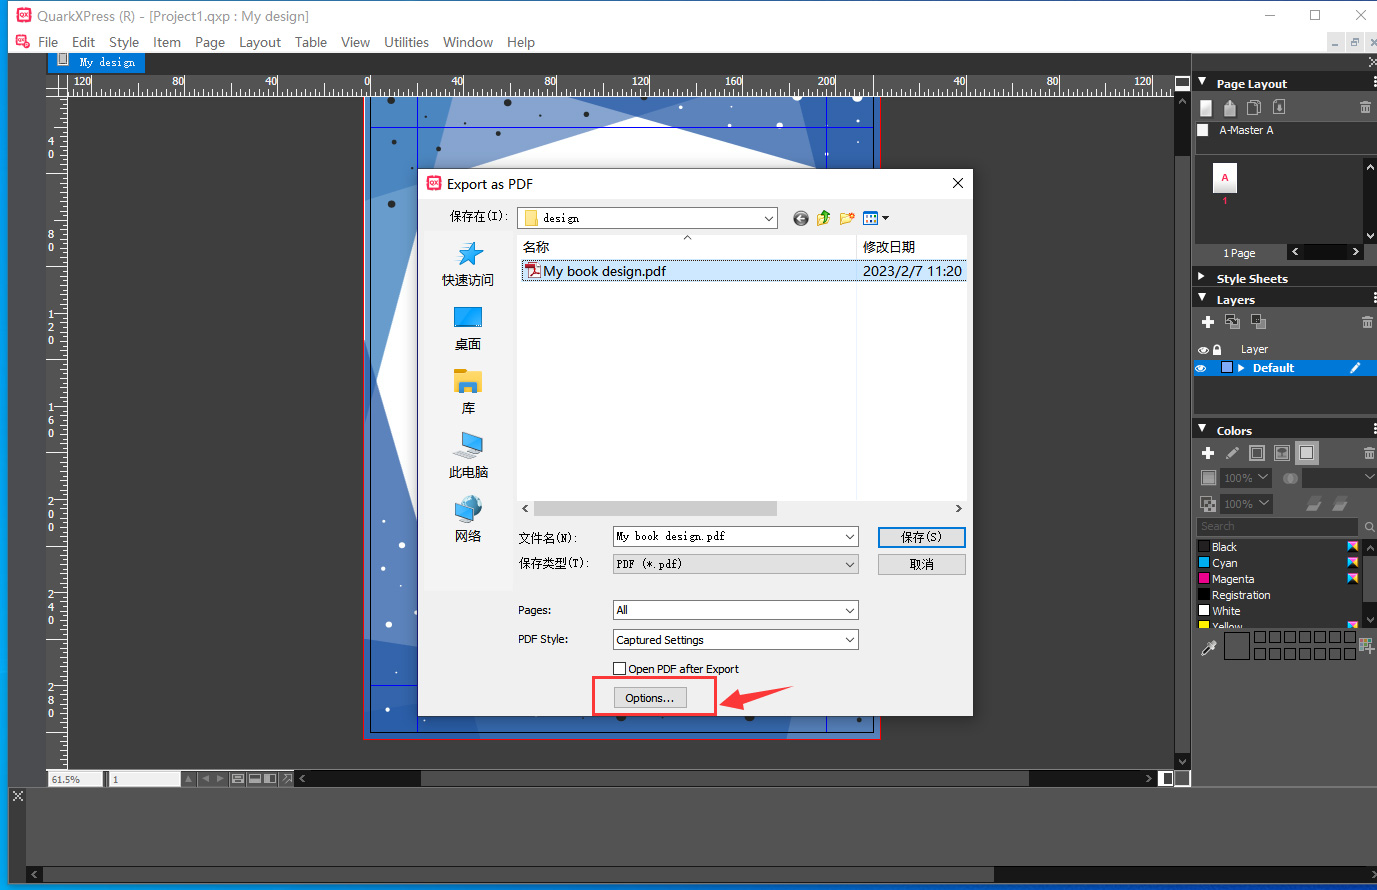
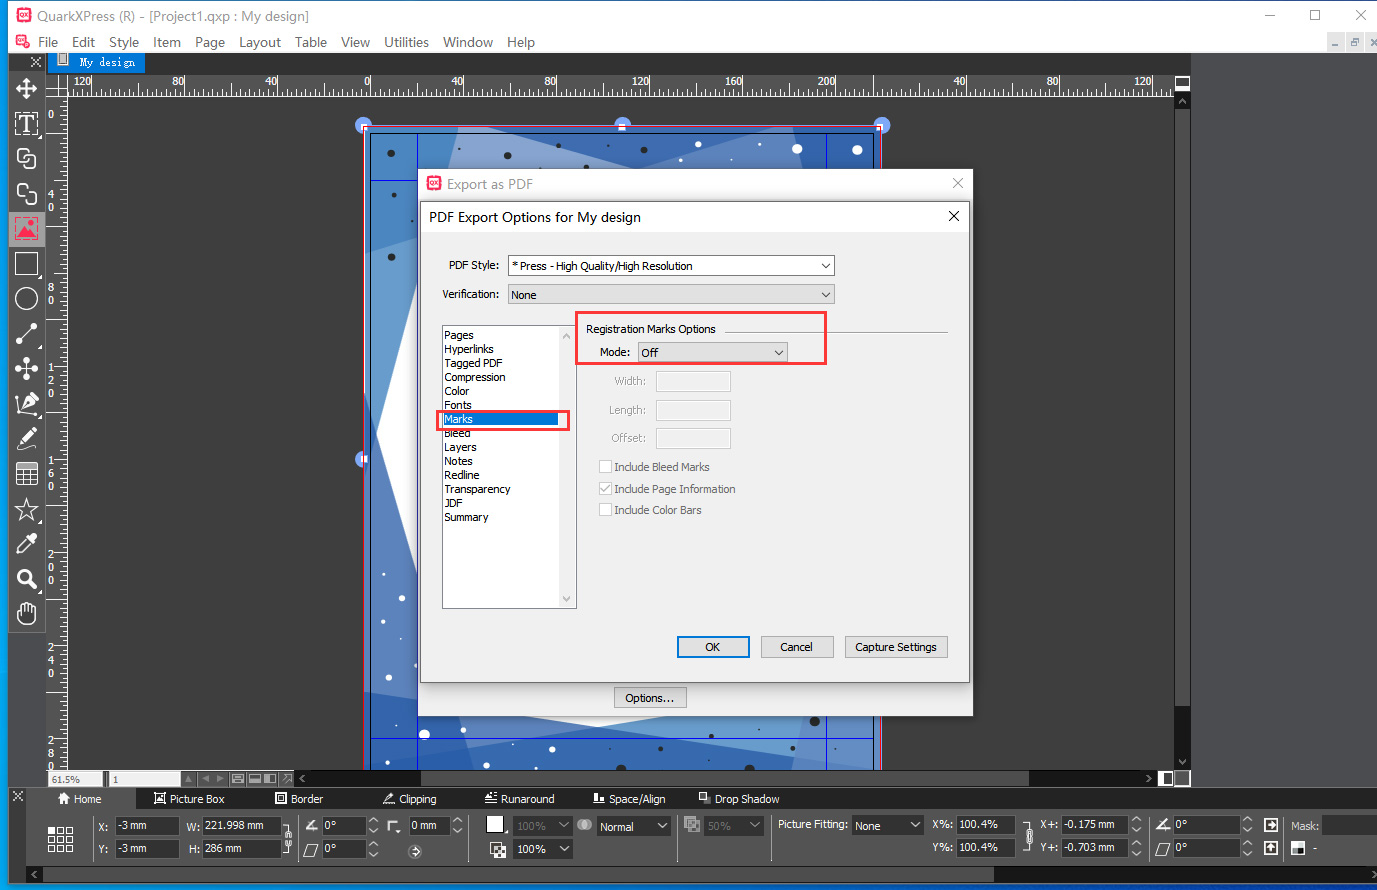
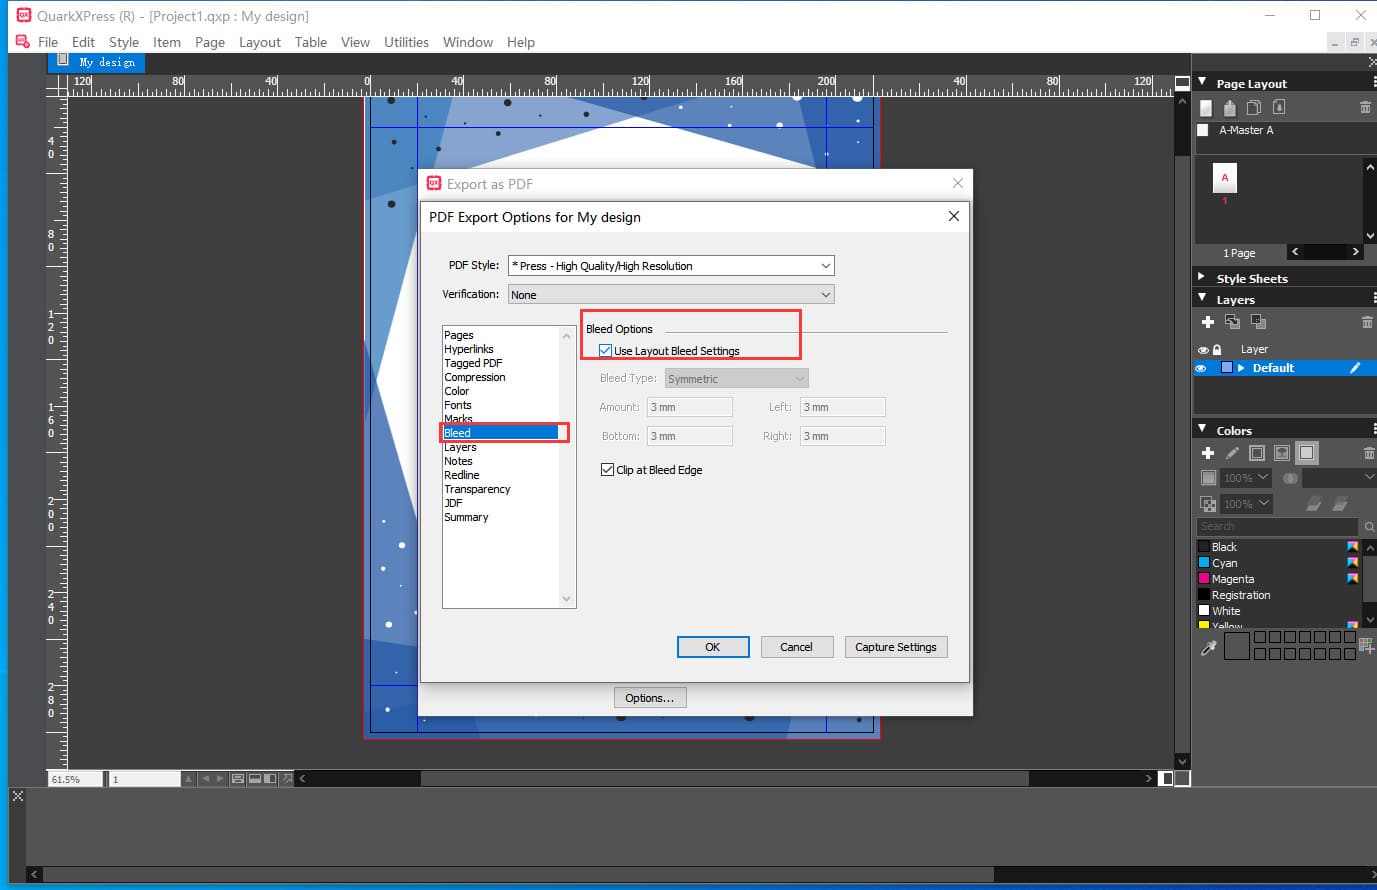
1. Click on File > Export As > PDF.
2. Give the file a name and choose Options.
3. Select the PDF Style >Press-High Quality / High Resolution.
4. Go to Marks, for Mode, select Off.
5. Go to Bleed, select Use Layout Bleed Settings.
6. Click on OK, then save.
Ready-to-Use Templates
Our website offers templates with pre-set bleed settings, ready for you to use. These templates can be conveniently downloaded from the Quote and Template Download pages, making your design process even smoother.
 Custom Card Decks
 Custom Holographic Cards
 Folding Cartons
 Rigid Boxes
 Corrugated Boxes
 Custom Board Game
 Kickstarter Print Solutions