Custom Card Decks
 Custom Holographic Cards
 Folding Cartons
 Rigid Boxes
 Corrugated Boxes
 Custom Board Game
 Kickstarter Print Solutions
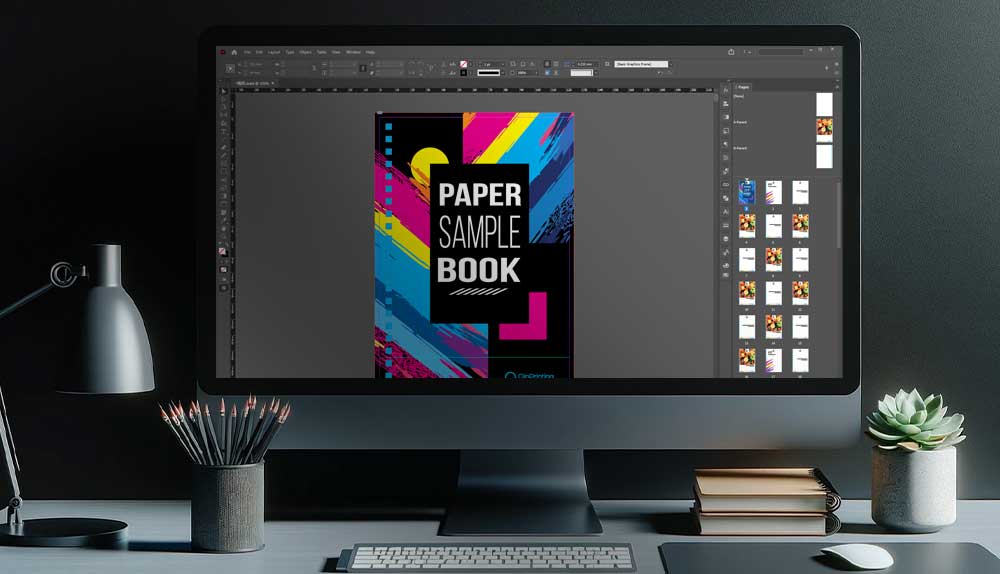
Your complete step-by-step guide to creating print-ready files for all your projects
How do I prepare files for printing?
Ready to turn your vision into a beautiful, tangible product? We know that final step—sending your print files to the printer—can feel like a make-or-break moment. A single error can throw the whole process off track, but don’t worry! With decades of expertise, we’re here to guide you every step of the way, making sure your files are flawless and ready to print. So, take a deep breath, and let’s dive into a straightforward, step-by-step approach to preparing print-ready files.
How to prepare color files for printing
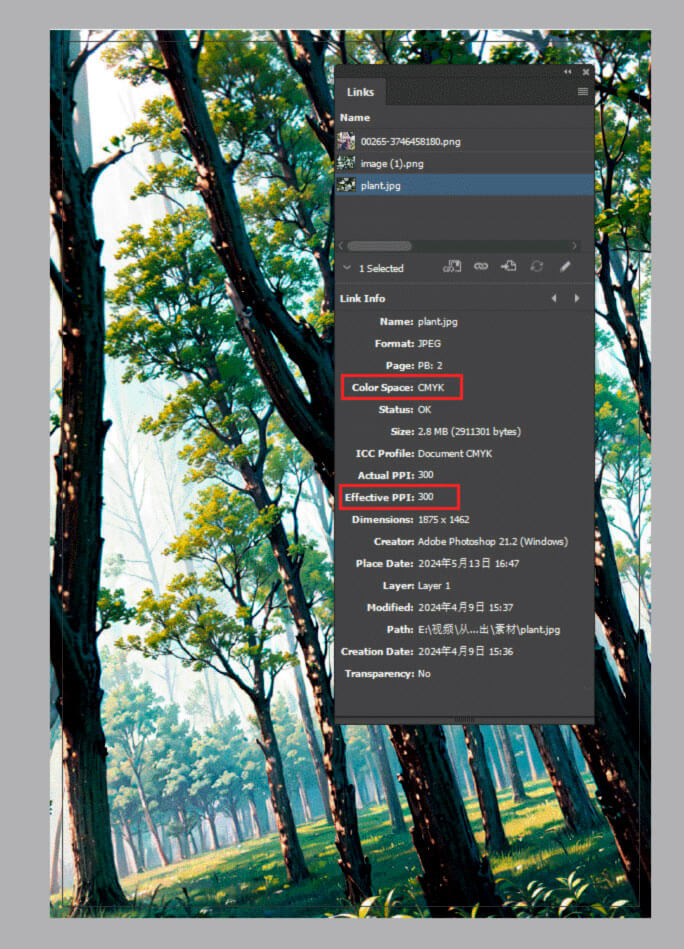
We’ll start with color, just because it’s one of the factors that seems to cause most anxiety. The key is to make sure that you’re working in the correct color system. So, to make it simple:
- When your designer works in color on the computer, they’ll use the RGB system. RGB just stands for red, blue, and green. Using these basic colors, the system can generate millions of variations in hue and shade.
- But your custom printer’s press uses another system, a four-color process called CMYK. It stands for cyan, magenta, yellow, and black.
- On occasion, you may need colors that can’t be created by either of these systems. In that case, you need to talk to your printer about ‘spot colors‘ which must be specially created for your project. But 99% of commercial projects don’t need that level of customization.
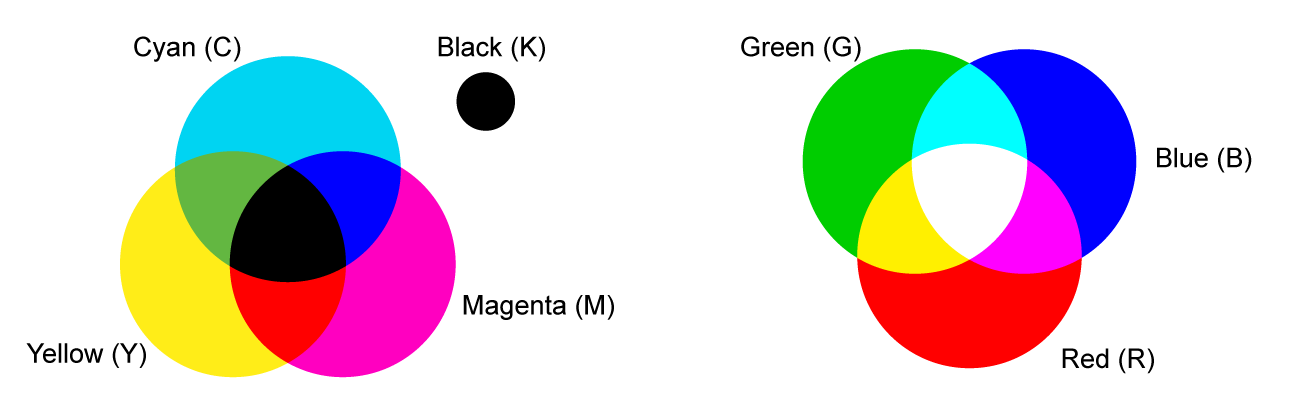
What all this means is that before submitting your finished files for printing, you’ll need to convert them from RGB to CMYK. These different systems are known as “color spaces” in printing jargon. How easy it is to do depends on the program used. Most are straightforward, with the option to choose between spaces with a few simple clicks. Others are a bit more convoluted, and a few can’t do it at all and so you’ll need your printer to do it for you.
But it’s usually in your interest to do the conversion yourself if you can. The only reason is that it makes for a smoother and faster print turnaround and gives you complete control over how your images come out. At QinPrinting, we’re always happy to talk to you, support you, and advise you every step of the way, so if you have any doubts, just ask us and our expert team will guide you through what you need to do to get your color files ready.
Certain colors don’t translate. This is true across the board and just one of the factors that we all need to live with when designing on a computer and mass printing to paper with a press. With a photographic image, any differences of this nature are likely to be so slight that even the keenest visual artist wouldn’t notice. But for your core branded graphics — such as logos — we’d recommend generating them in CMYK from the outset.
How to Convert Images from RGB to CMYK
To make this easy for you, here are step-by-step instructions on how to convert your image from RGB to CMYK. If you have any questions, feel free to reach out—we’re always happy to help.
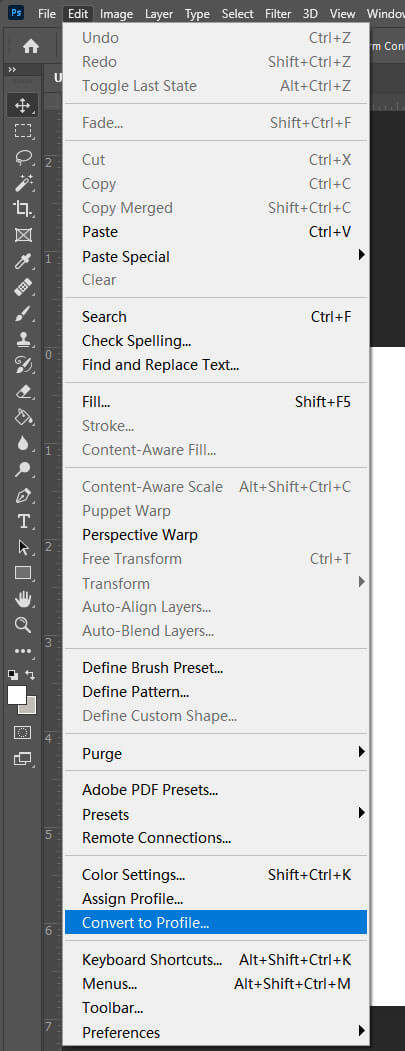
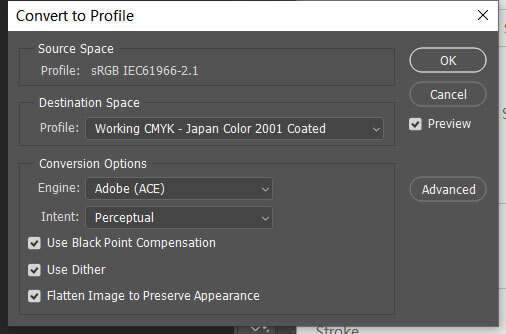
In Photoshop, converting is straightforward. Here’s how to do it:
- Open your RGB file.
- Go to the “Edit” menu and select “Convert to Profile.”
- Choose “CMYK Profile” in Destination Space.
- Click “OK,” and your file is now in CMYK mode.
What's the right image resolution for best print quality?
Print demands high quality images, and that means the resolution must be correct for clear reproduction. In the digital format, resolution is measured in PPI (dots-per-inch). For print, you must make sure that your images have a resolution of 300 PPI. Even if the images look great on the computer screen, it’s vital to check and adjust the resolution if you want them to look just as good in print, too.
Also, keep in mind that if you resize an image within your layout, you’ll change the resolution, too. Making an image smaller increases the PPI. Making it larger reduces the image quality. If you up- or downsize an image by altering the pixel density, make sure that the final result has a PPI (pixels-per-inch) of at least 300. Your text and line drawings or logos should be formatted as vectors (AI, SVG, or EPS).
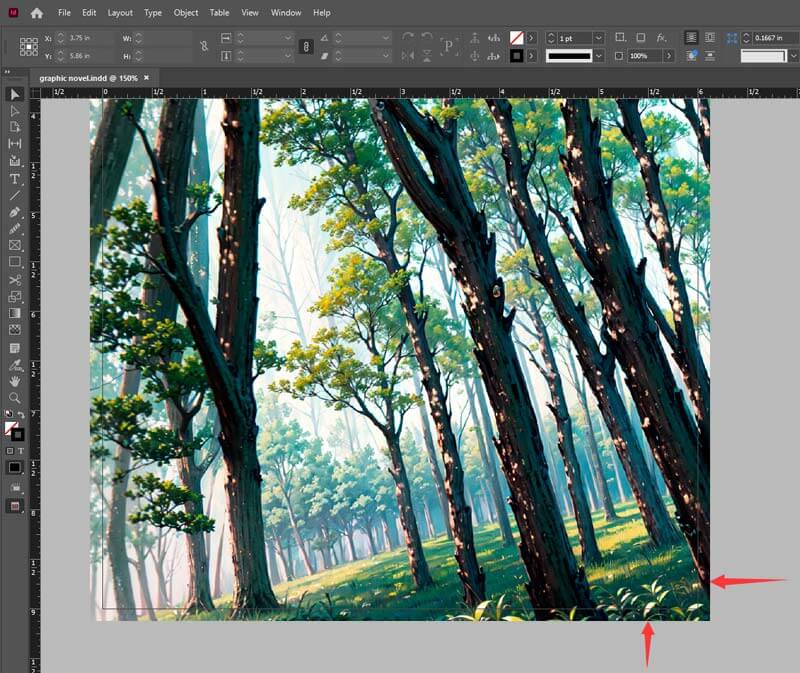
Bleed dimensions, folds, and trimming
Often, you’ll want your layout to ‘bleed’. All this means is that the image or color background ‘bleeds‘ out beyond the final trimmed dimensions of the printed document. Bleed sizes may vary but will typically allow for about 0.125 inches outside the trim space.
Leaflets, brochures, catalogs, booklets, and other projects may all have folds. You must account for any folds when designing your layout so as not to lose important elements from images or text. The easiest way to account for folding is to generate a prototype of the design space and measure out a ‘safe’ area within which you can position all your content.
Your final print product will be cut and trimmed. Talk to your printer about the specific requirements for your project to make sure that your bleed and safe space dimensions are correct. That way, you’ll make sure that your design is properly positioned on the page and nothing gets lost or cut off.
If you’re unsure what bleed, safe space, and trim margins you need, just talk to us and we’ll help you through.
Book binding choices and pagination settings
Books, catalogs, brochures, and magazines need binding to hold the pages together. Whether using coil or wire binding, perfect binding or saddle stitch, to make sure your pages come out in the right order, you’ll need to think about pagination. Your design software may have the option to switch between document views. But don’t worry about changing to a printer spread. Submit a reader spread file to your printer and they can handle the pagination for you. But remember to include any blank pages in the spread. We can give you a template suitable for your binding choice and we’ll always provide a proof for you to check before going to press.
Custom effects, paper options, and ink choices
If you’d like to enhance your print product with custom effects such as embossing, debossing, die cutting, and foil stamping, make sure to talk with your printer. These are specialized design elements and will also influence your choice of paper. When choosing paper, you’ll need to take account of several factors, including the size of your document, the number of pages, effects, and the binding style. Paper has three fundamental qualities:
- weight
- finish
- and coating
Paper with a higher weight is thicker and more robust. It’s also more expensive. Lower weight paper is thinner and cheaper. Choosing paper weight is a balancing act between cost effectiveness, printing requirements, binding style, and the desired overall effect.
A paper’s finish refers to its texture. Papers may be rougher or smoother. Paper with a more textured finish is popular for certain stationary or packaging projects. Smoother paper is the usual choice for printing most flyers, leaflets, brochures, catalogs, and books.
Paper can be coated or uncoated. Uncoated paper makes the ink look duller and is more absorbent and prone to smudging — if it gets wet, for example. Coated paper may be gloss or matte and makes colored inks appear more vibrant. It also fixes the ink better, so it’s less likely to smudge. There are also more specialized coatings involving UV and varnish for a very glossy or deep matte effect, more often used for covers as they also offer added protection.
How to prepare your files to export to the printer
In most cases, you should export your print-ready files in PDF page format. Remember to include blank pages.
If the file’s too big to go through as an attachment, send it via the Cloud using a file-sharing service such as Google Drive or Wetransfer.
Talk to us! We're here to help
Whatever your project, it’s never too soon to talk to us about your needs. If you choose us to print your project, we’re only a phone call away. With decades of experience in the industry, one of our expert team will be happy to help and guide you as you prepare your files for printing and we have all kinds of useful resources — such as templates, tables, and more — to make your life even easier. Get in touch today for a no-obligation quote or to talk through what you have in mind.