 Book Printing in China
 Custom Card Decks
 Custom Holographic Cards
 Free Wall Calendar Template
 Free Desk Calendar Template
 Folding Cartons
 Rigid Boxes
 Corrugated Boxes
 Custom Board Game
 Custom Card Game
 Kickstarter Print Solutions
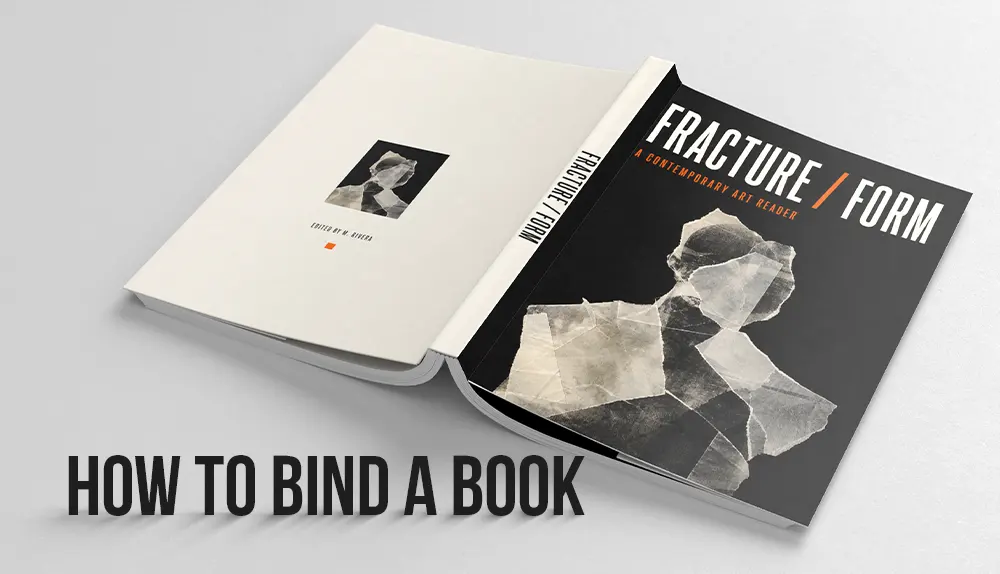
Bookbinding begins with printed sheets and ends with a finished book block. The sheets may be folded into signatures, gathered in page order, secured with staples or thread, glued along the spine, or converted into individual pages for coil binding. After the binding is complete, the book is trimmed and finished.
Preparing the Printed Sheets
The pages are printed before they are bound. In commercial offset printing, multiple pages are commonly imposed on one large sheet. A typical sheet may contain 16 pages, which are then folded into a signature.
After printing, the sheets are folded, gathered, or trimmed according to the selected binding method. A signature remains connected along its folds. When a book requires individual pages, the folded edges are trimmed away and the pages are collated into the correct order.
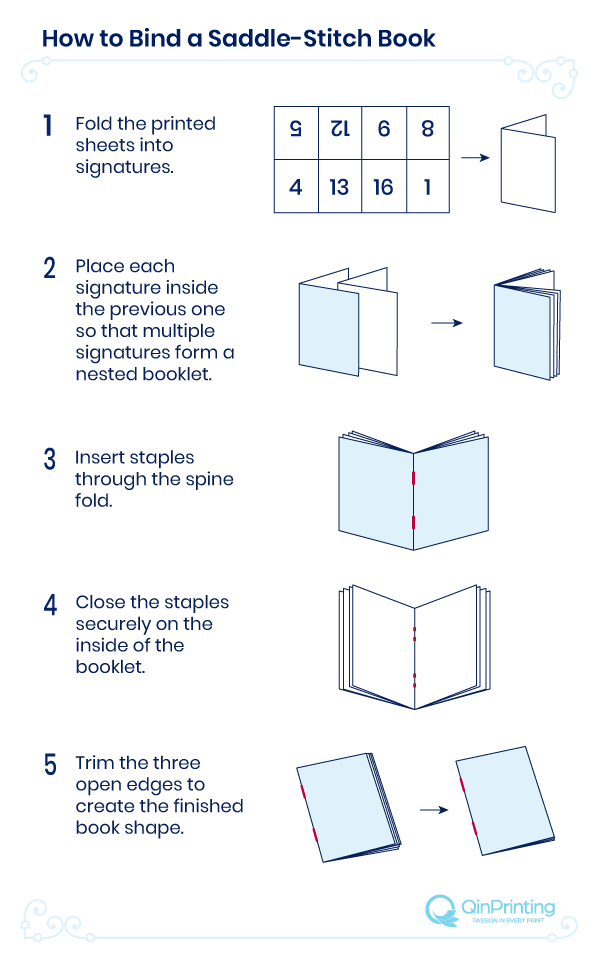
How to Bind a Saddle-Stitch Book
Saddle-stitch binding secures folded signatures and the cover with staples through the spine fold.
- Fold the printed sheets into signatures.
- Place each signature inside the previous one so that multiple signatures form a nested booklet.
- Insert staples through the spine fold.
- Close the staples securely on the inside of the booklet.
- Trim the three open edges to create the finished book shape.
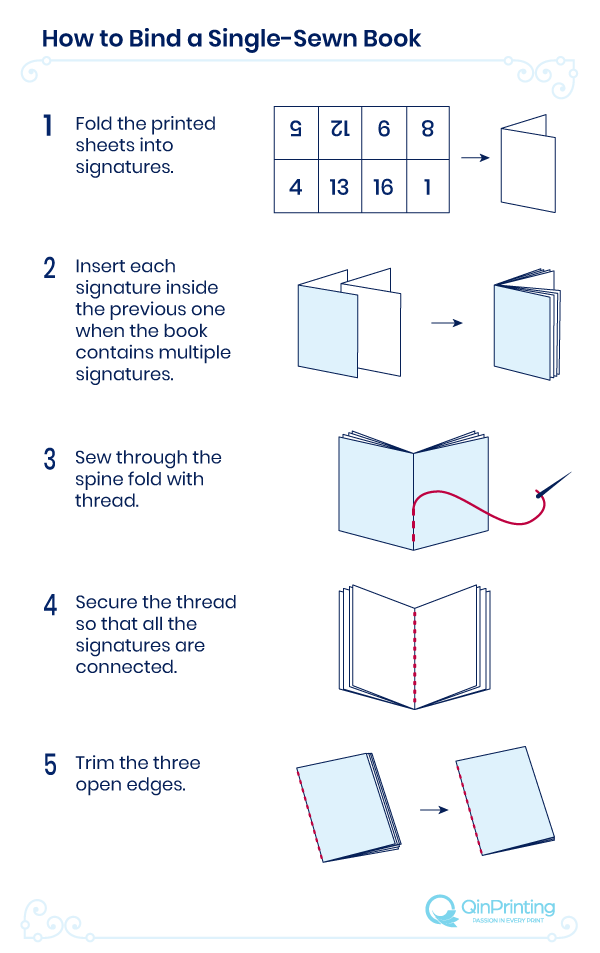
How to Bind a Single-Sewn Book
Single-sewn binding secures a folded signature or a group of nested signatures with thread through the spine fold.
Fold the printed sheets into signatures.
Insert each signature inside the previous one when the book contains multiple signatures.
Sew through the spine fold with thread.
Secure the thread so that all the signatures are connected.
Trim the three open edges.
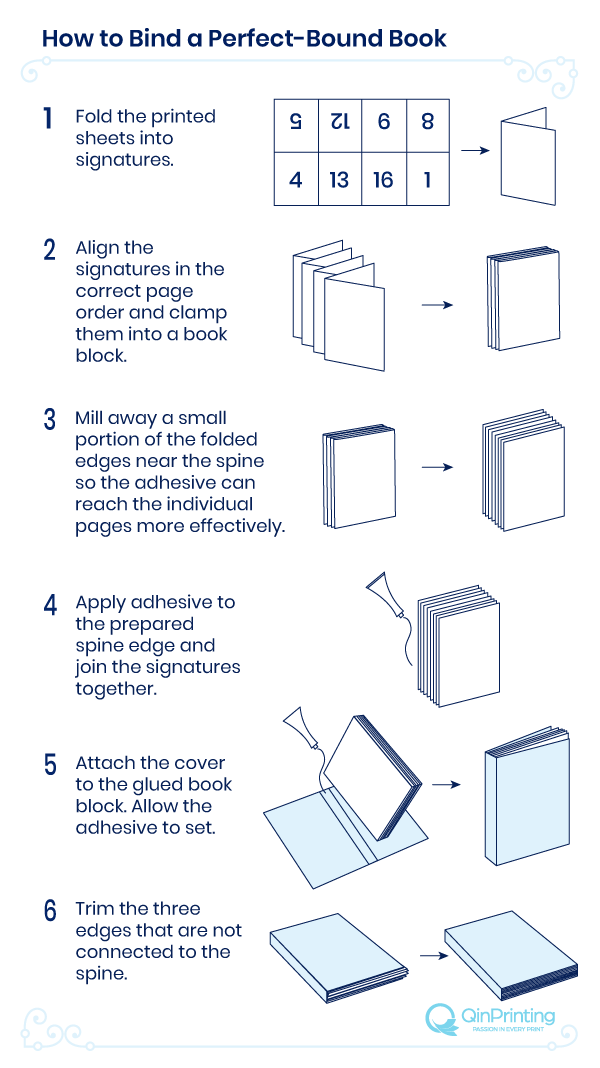
How to Bind a Perfect-Bound Book
Perfect binding joins the gathered signatures with adhesive before the cover is attached.
- Fold the printed sheets into signatures.
- Align the signatures in the correct page order and clamp them into a book block.
- Mill away a small portion of the folded edges near the spine so the adhesive can reach the individual pages more effectively.
- Apply adhesive to the prepared spine edge and join the signatures together.
- Attach the cover to the glued book block. Allow the adhesive to set.
- Trim the three edges that are not connected to the spine.
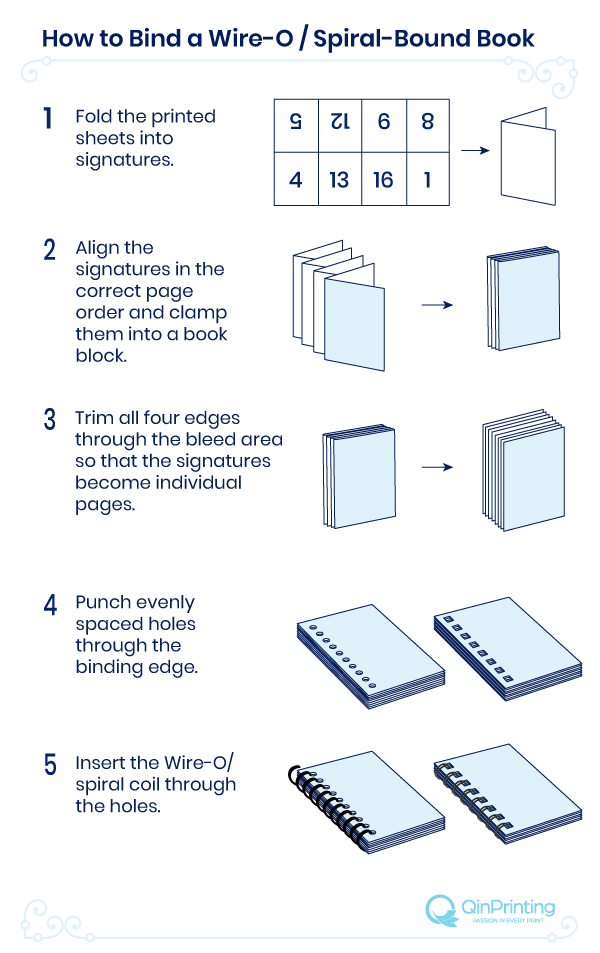
How to Bind a Wire-O / Spiral Book
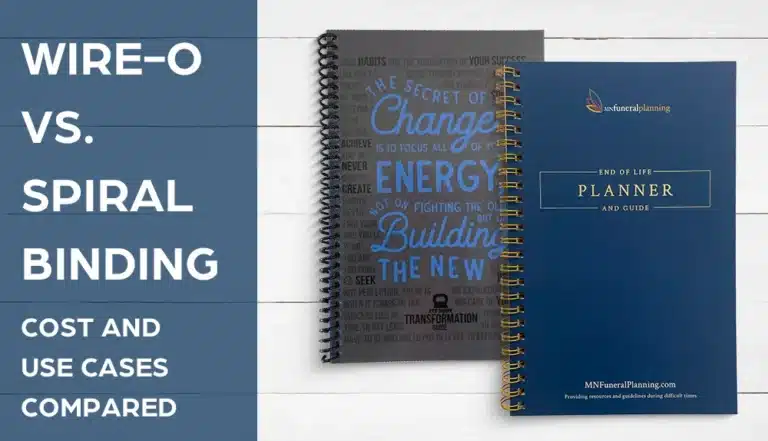
Wire-O / spiral binding turns the folded sheets into individual pages, punches the binding edge, and joins the pages with a double-loop wire.
- Fold the printed sheets into signatures.
Align the signatures in the correct page order and clamp them into a book block.
Trim all four edges through the bleed area so that the signatures become individual pages.
Punch evenly spaced holes through the binding edge.
Insert the Wire-O/ spiral coil through the holes.
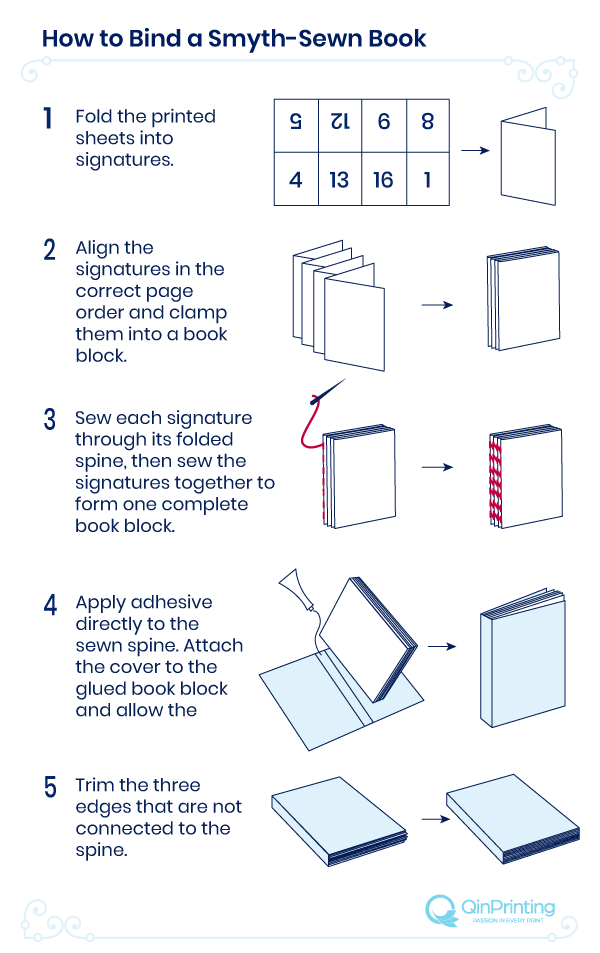
How to Bind a Sewn and Perfect Binding Book
Sewn-and-perfect binding combines thread sewing with adhesive to reinforce the completed book block.
Fold the printed sheets into signatures.
Align the signatures in the correct page order and clamp them into a book block.
Sew each signature through its folded spine, then sew the signatures together to form one complete book block.
Apply adhesive directly to the sewn spine. Attach the cover to the glued book block and allow the adhesive to set.
Trim the three edges that are not connected to the spine.
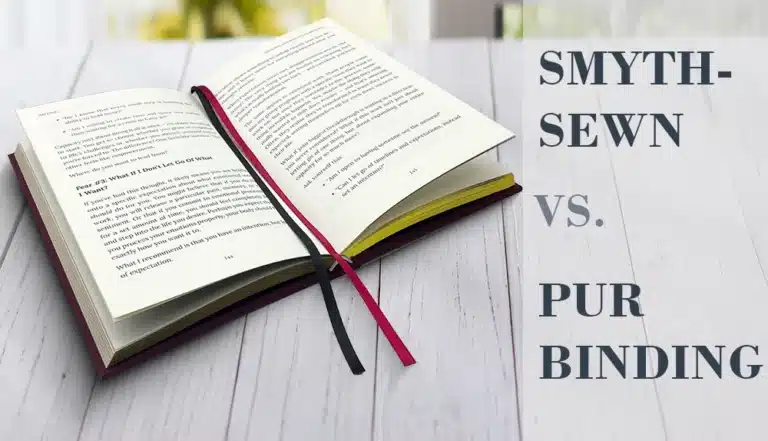
Sewn and perfect hardcover binding uses the same sewn and glued construction, but adds cloth or gauze over the glued spine and connects the reinforced book block to a rigid hardcover.
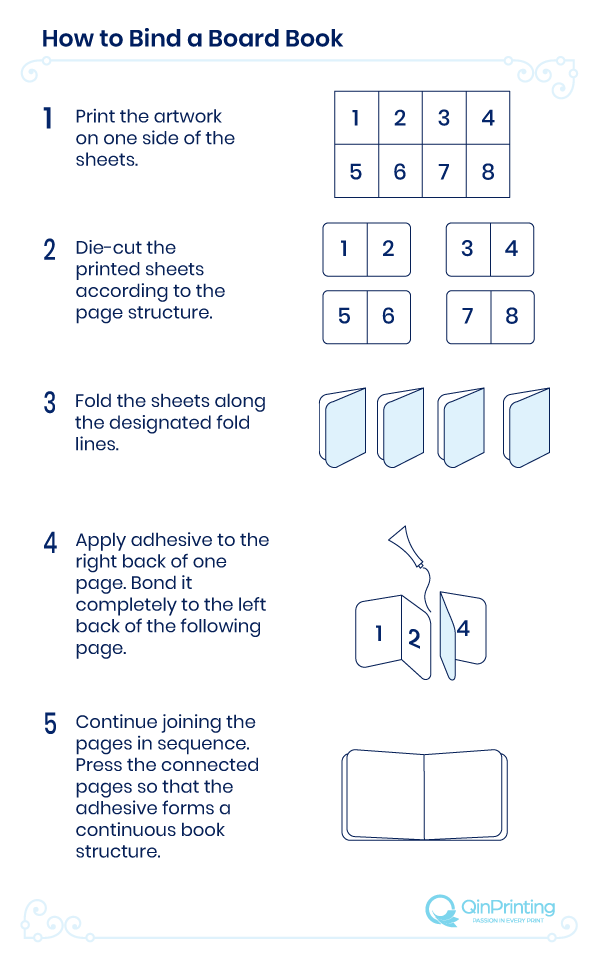
How to Bind a Board Book
Board book binding creates a continuous structure by die-cutting, folding, and bonding adjacent pages together.
Print the artwork on one side of the sheets.
Die-cut the printed sheets according to the page structure.
Fold the sheets along the designated fold lines.
Apply adhesive to the right back of one page. Bond it completely to the left back of the following page.
Continue joining the pages in sequence. Press the connected pages so that the adhesive forms a continuous book structure.
Bookbinding Design and Production Tips
Bleed and safety margins should be established during the design stage. Important text and artwork should remain inside the safety margin because folding, binding, and trimming can cause small positional variations.
Saddle-stitch and single-sewn binding are better suited to books with limited page counts. A general guideline is less than 64 pages with ordinary paper, while thicker paper may be more suitable for a book of less than 32 pages. The final limit depends on paper thickness and the strength of the staples or thread.
Perfect binding does not open completely flat, so it may not display double-page spreads clearly. Wire-O and spiral binding allow the pages to open more freely, but the punched holes occupy part of the binding edge and can interfere with artwork near the spine.
Board book binding requires thick paper because the construction uses a considerable amount of adhesive. Paper around 19 pt C1S is commonly suitable. Since C1S paper is coated on only one side, its uncoated side can absorb adhesive more effectively and support a stronger bond.
Conclusion
Binding a book begins with correctly printed and ordered pages. Those pages may be folded into signatures, cut into individual leaves, or prepared as die-cut sections. The final binding method then determines whether the book is secured with staples, thread, adhesive, wire, a spiral coil, or continuous page-to-page bonding. After the binding is complete, trimming and pressing give the book its finished shape.