Custom Card Decks
 Custom Holographic Cards
 Folding Cartons
 Rigid Boxes
 Corrugated Boxes
 Custom Board Game
 Kickstarter Print Solutions
Everything you need to know to prepare your book interior and color files for perfect printing

In the world of printing, offset printing stands out as a popular choice for producing high-quality and professional-looking materials. Whether you’re printing a book, brochure, or any other printed material, we’ll help you ensure a smooth and successful printing process. Whether you’re a professional designer or a self-published author, understanding proper preparation of your interior and cover files can make a significant difference in the outcome of your book. In this post, we offer you a helpful and comprehensive guide in which we walk you through the step-by-step process of preparing your files for offset book printing, covering everything from file formats to color management and more.
Understanding file formats for offset book printing
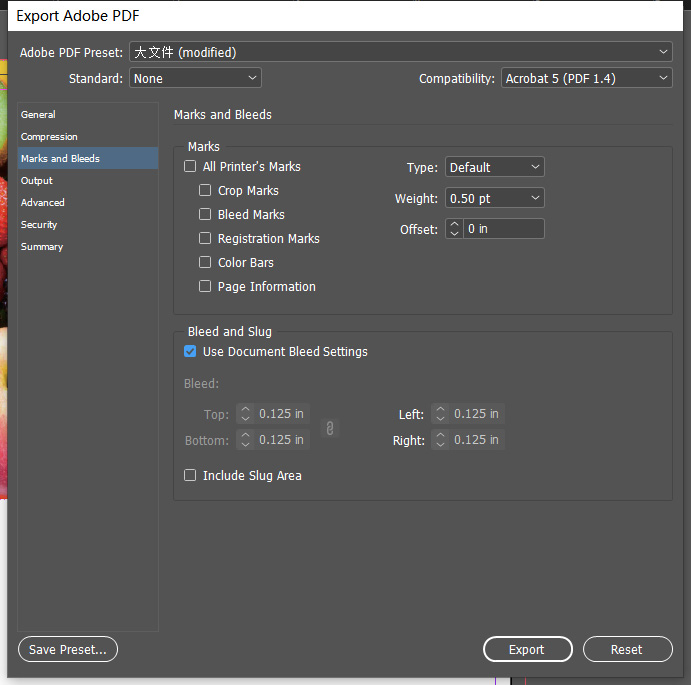
In preparing your interior and cover files for offset book printing, choosing the right file format is crucial. The file format you use can impact the quality and accuracy of the final printed product. While there are various file formats available, PDF (Portable Document Format) is widely recognized as the preferred format for printing and it’s the format we use here at QinPrinting both for interior and cover files.. PDF files offer compatibility across different devices and operating systems, preserve formatting, allow for font embedding, and optimize file sizes without compromising image quality. So, when submitting your files to us for printing, the required file format is a print-ready PDF with embedded fonts and images. Ensure that the PDF is set to CMYK color space, with a bleed of 0.125″ included. We’ll explain what all this means later in the post. But this file type and settings guarantee compatibility with our state-of-the-art printing equipment helps retain the quality of your design during production.
Remember to provide all necessary links and fonts and ensure they are compatible with our requirements. Following these guidelines will provide optimal file formats for your offset printing project.
Document setup for offset printing
To make sure your design is printed correctly and trimmed accurately, proper document setup is essential. Key aspects to consider are bleed and safe area.
Bleed and safe area
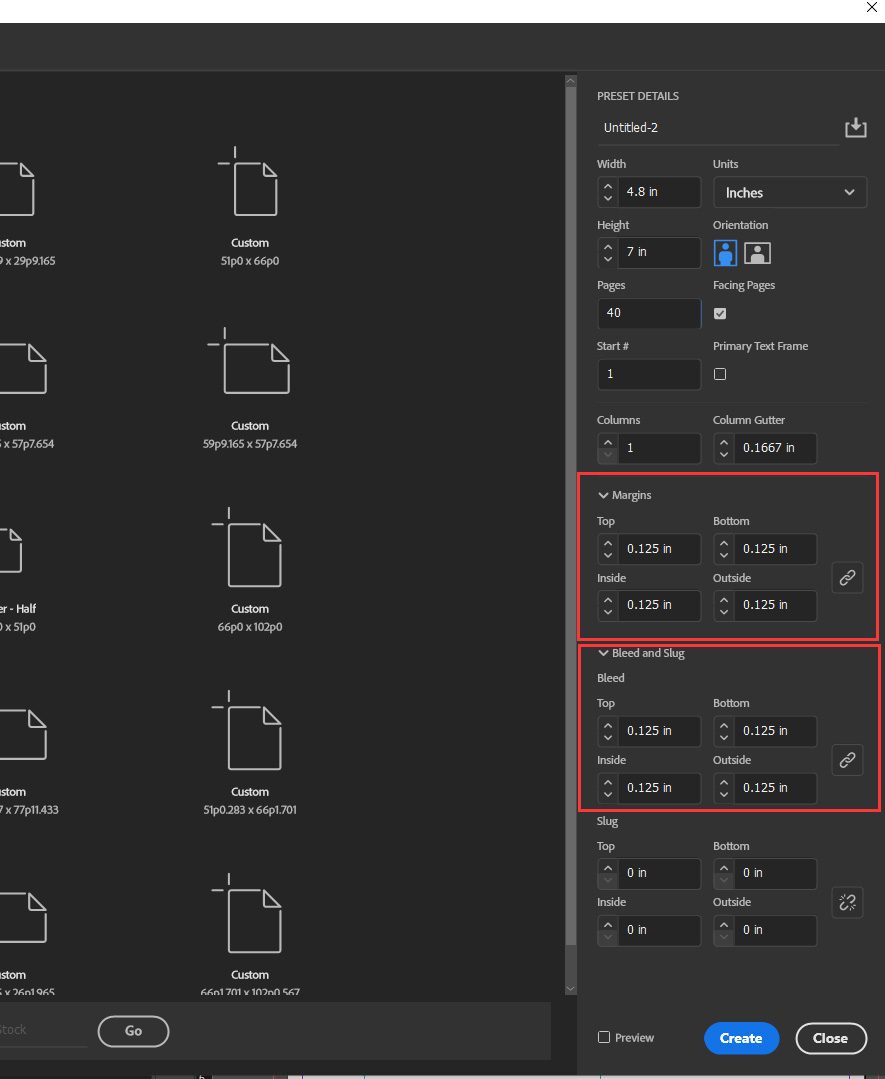
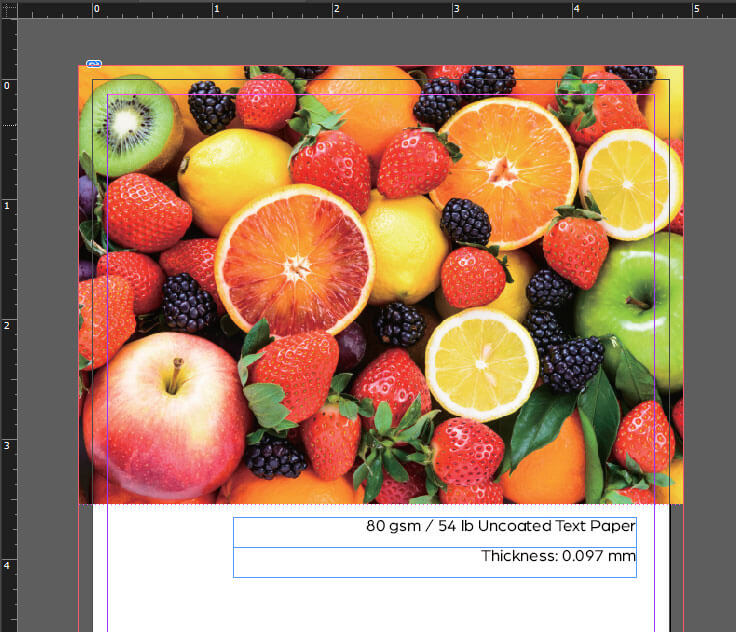
The bleed area refers to an extra 0.125″ or 3 mm of artwork around the edges of your design. This buffer helps prevent unwanted white borders or partially cut-off artwork. It’s important to keep critical text and important graphics at least 0.125″ away from the edge of the page, inside the “safe area”.
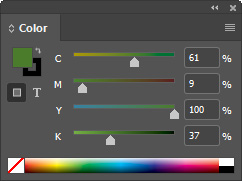
Color space
When preparing your file for offset printing, use the CMYK color space instead of RGB. CMYK refers to the four-color process used in offset printing: cyan, magenta, yellow, and key (black). Converting your file to CMYK helps ensure that the colors in your design are accurately reproduced during printing.
Typography tips for offset printing
Typography plays a vital role in preparing files for offset printing. Properly managing typography ensures legibility, a professional appearance, and successful printing.
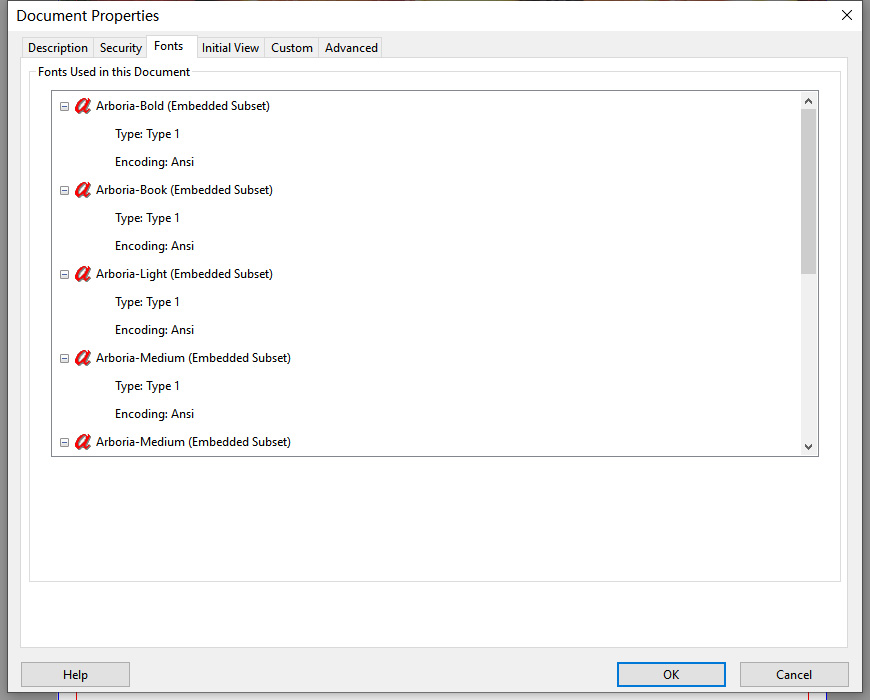
Font embedding
When preparing your files, it’s crucial to embed all fonts into the document. This allows for consistent typography across different computers and printing equipment. Not embedding fonts might cause unexpected font substitution or errors during the print process. Create a print-ready PDF with fonts and images embedded to ensure proper font embedding. Remember to use CMYK color space as well.
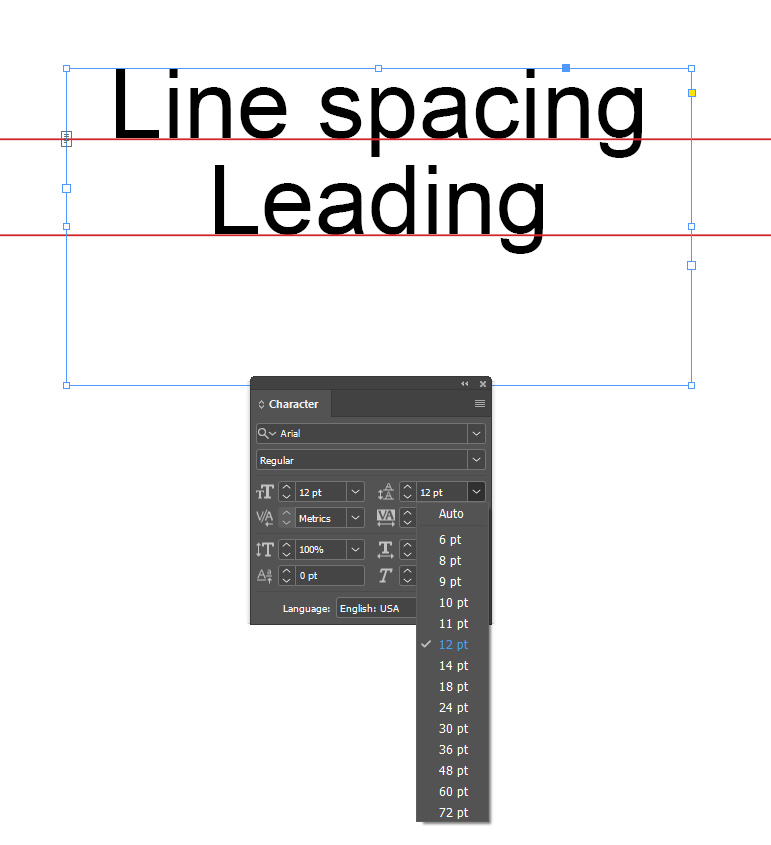
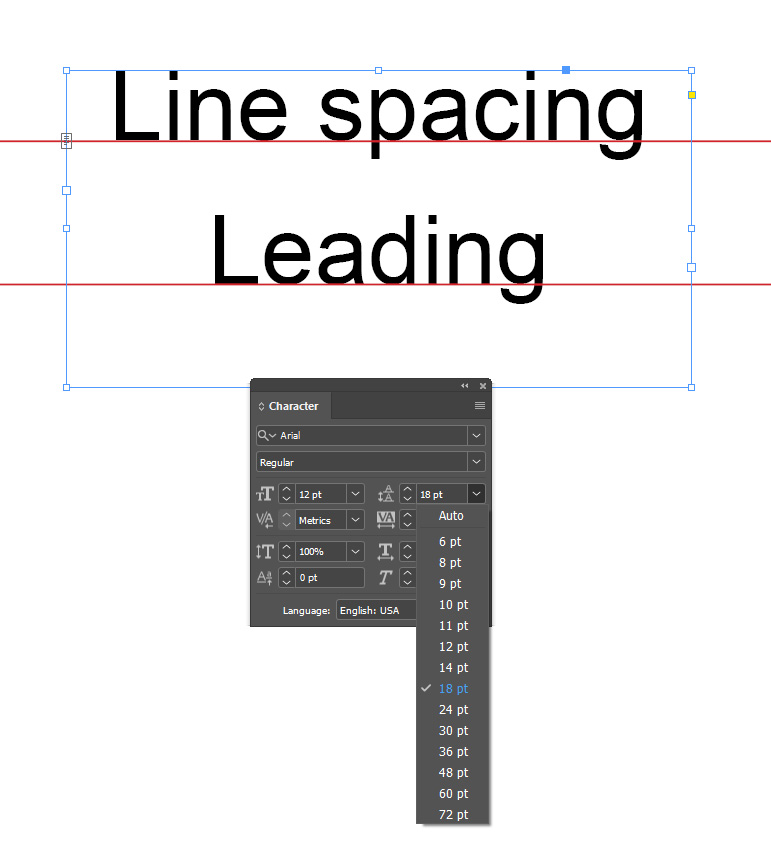
Line spacing
Line spacing, also known as leading, significantly impacts the readability of your printed materials. Use adequate line spacing to avoid overcrowding text and ensure a proper balance between text and white space. The leading should be 120% to 145% of the font size. Experiment with different leading values to find the best balance for your specific design.
Kerning
Kerning refers to the space between individual characters in a word. Proper kerning ensures that your text is visually appealing and easy to read. Adjust the kerning settings in your design program so that the spacing between letters is consistent and visually balanced. Pay particular attention to kerning when dealing with large titles or headlines, as improper kerning can cause a less professional appearance.
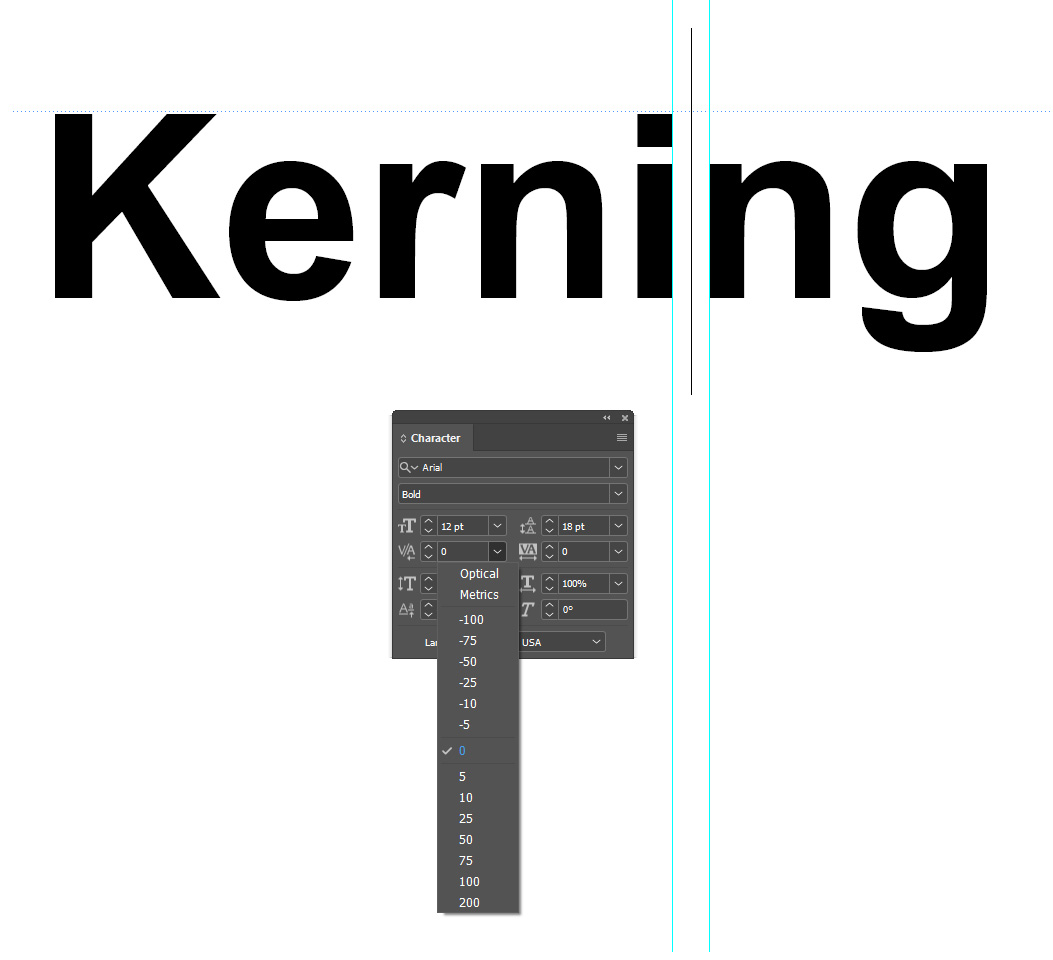
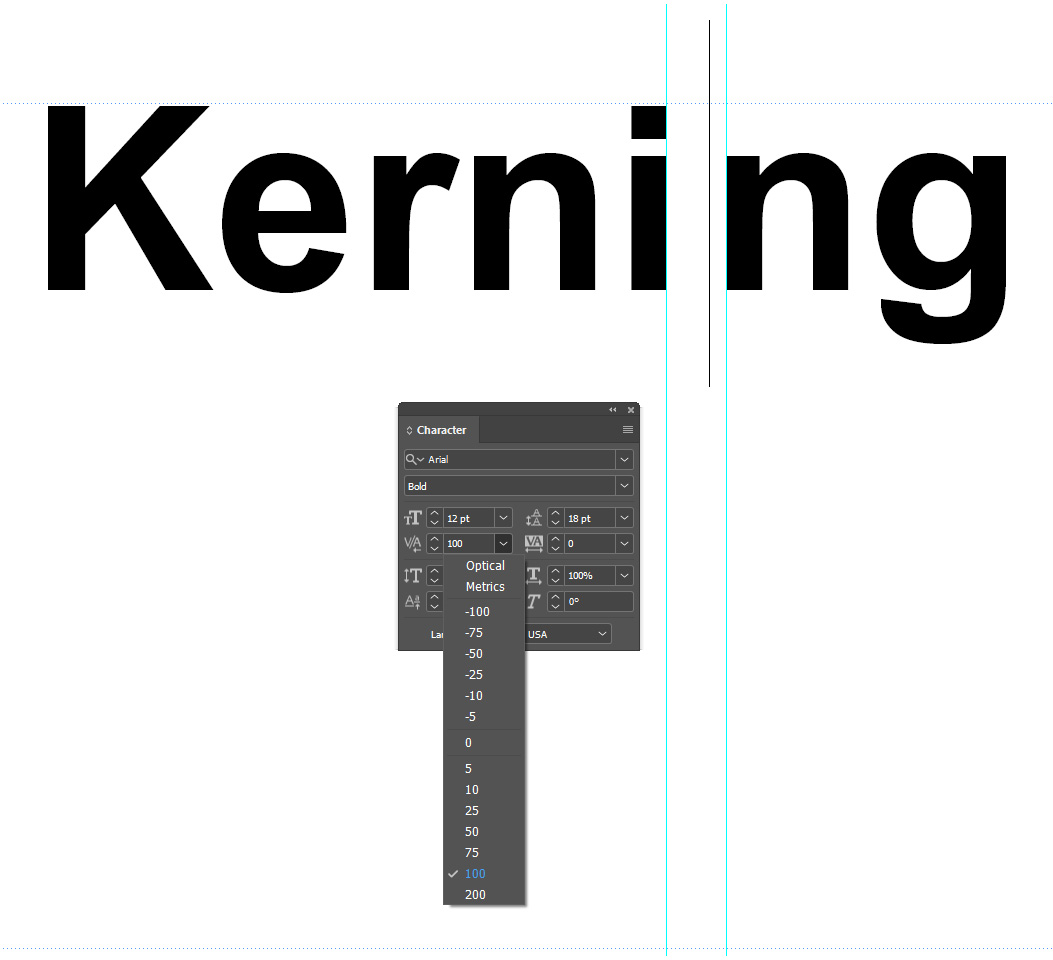
By paying attention to font embedding, line spacing, and kerning, you can optimize your files for offset printing and ensure a professional appearance in your printed materials. Always double-check these aspects before submitting your files to us.
Understanding the importance of high-quality images
With offset printing, high-quality images play a vital role in the final output. It’s important to make sure that your images have a minimum resolution of 300 dpi (dots per inch) to guarantee accurate reproduction. Keep in mind that the resolution may decrease when enlarging an image using software, so starting with an even higher-resolution image is recommended.

At this stage, unless you are a qualified designer, we highly recommend that you consult with us during the design process. By discussing your project and seeking our guidance on file formats and print specifications, you can save both time and money while ensuring the best possible outcome for your offset printing project. We can also provide you with tailor-made design templates to simplify the process and help guarantee the best results.
Avoiding compression techniques is also key to maintaining image quality. While compression reduces file size, it can also compromise image clarity. Be cautious when using image compression and opt for lossless compression methods.
Last, monitor calibration plays a significant role in ensuring accurate color representation on the screen. Regularly calibrate your computer monitor to avoid any discrepancies between what you see on screen and the final printed result.
Choosing the right file formats for images
Selecting the file formats is super-important when preparing your files for offset printing. It helps to make sure that you get the best possible print outcome. There are two primary types of file formats to consider: raster and vector.
Raster vs. vector
Raster images, such as photographs, comprise pixels, while vector graphics are created using mathematical formulas comprising lines and shapes. Raster images can lose quality when enlarged, making them less suitable for offset printing, especially for logos and text elements. However, if you’re using images in your design, ensure they have a resolution of at least 300 dpi. If you need to enlarge an image, the resolution will decrease proportionally.


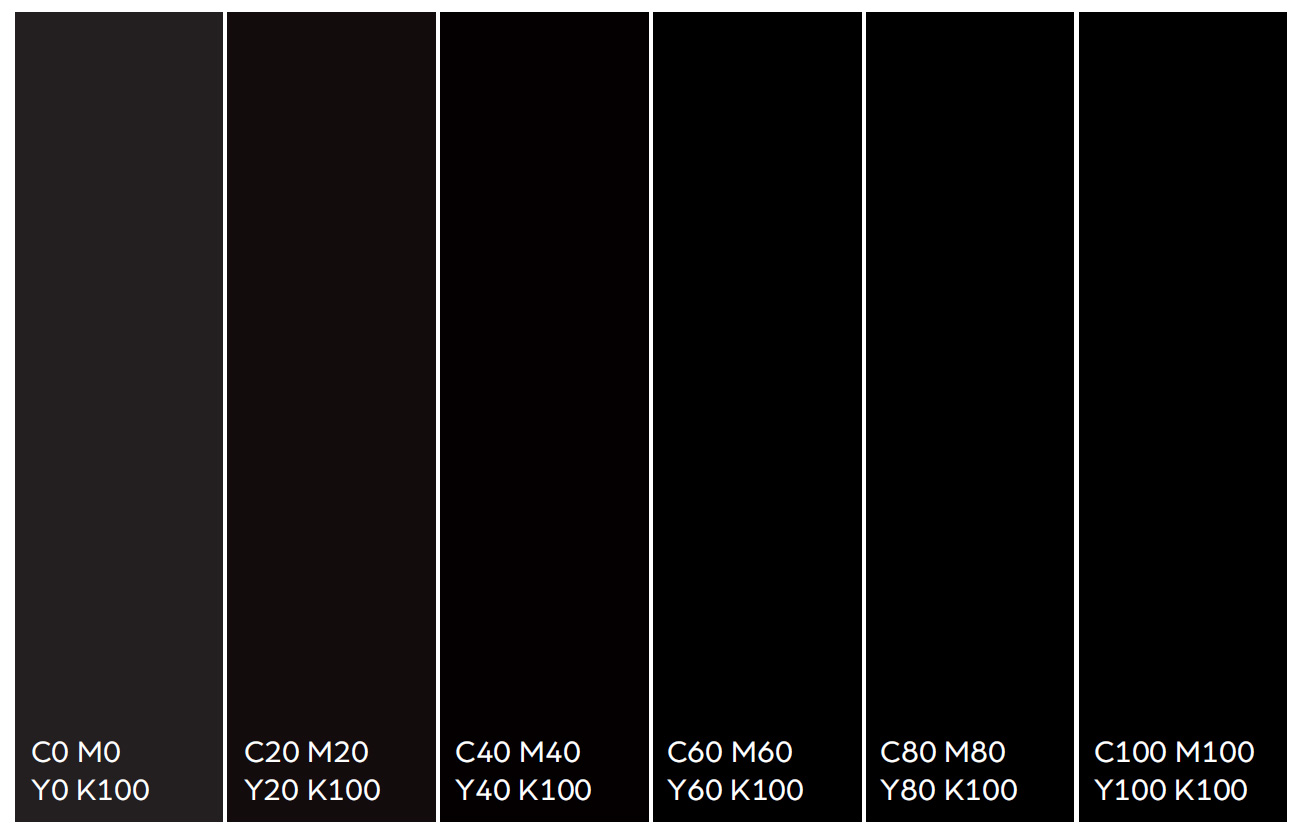
Rich black vs. black (K)
Differentiating between rich black and black (K) is important when it comes to achieving the desired results in your printed materials. Rich black refers to a darker shade of black achieved by combining solid black ink with other colors. It is often used for extensive areas of solid black. Black (K) refers to pure or straight black ink with no additional color mixture.
Choosing the right design software for book printing
Using the right design software can make all the difference when preparing your interior and cover files for offset book printing. Professional page make-up software, such as Adobe InDesign, Illustrator, and Photoshop, are industry standards and have proven track records in creating print-ready files. We strongly recommend the Adobe suite of tools as they are powerful, meet industry standards, and are fully compatible with our production processes.
These software programs offer a wide range of tools and features specifically designed for print production. They allow you to set up document layouts, manage typography, handle images, and export files in the formats for printing. They provide options for color management, including the ability to work in the CMYK color space and select the appropriate color profiles.
While there are free or cheaper design software options available, it’s advisable to stick with the industry-standard programs to ensure consistent and high-quality results. These software packages are widely used by offset printers like us and offer the features and capabilities for professional book printing.
Setting up your book files: interior and cover
Once you’ve selected the right design software, it’s time to set up your book files for offset printing. This involves creating separate files for the interior pages and the cover. Let’s explore the key considerations for each component.
Interior pages
The interior pages of your book contain the main content, including text, images, and any additional elements. When setting up your interior files, consider:
- Page size: determine the final trim size of your book and set up the page size accordingly. Common trim sizes for books include 6×9 inches, 8.5×11 inches, and 5.5×8.5 inches.
- Margins: set up margins to ensure that text and images are positioned correctly on each page. Consider the gutter margin, which accounts for the binding of the book.
- Bleed: if your book contains images or design elements that extend beyond the trim edge, include a bleed area to avoid any white borders. A standard bleed measurement is 0.125 inches or 3 mm.
- Typography: choose fonts, font sizes, and line spacing for optimal readability. Ensure that your chosen fonts are embedded in the file to avoid any potential font-related issues during printing.
- Paragraph and character styles: use paragraph and character styles within your design software to maintain consistency in formatting throughout the book.
- Pagination: set up automatic pagination for your interior pages to ensure that page numbers are correctly applied. Consider whether you want to include headers or footers on your pages as well.
- Image placement: carefully position and align images within the text flow to enhance the visual appeal and readability of your book.
Cover
The cover of your book is the first thing readers see, so it’s important to create a visually compelling design. When setting up your cover file, consider:
- Dimensions: determine the dimensions of your cover based on the final trim size of your book. Account for the spine width if your book will have one.
- Bleed: include a bleed area around the edges of your cover to ensure that design elements extend beyond the trim edge. A standard bleed measurement is 0.125 inches or 3 mm, the same as for the interior.
- Typography: choose fonts and font sizes that align with the tone and genre of your book. Ensure that your chosen fonts are embedded in the file.
- Design elements: incorporate visually appealing design elements such as images, illustrations, or patterns that complement your book’s theme or genre.
- Spine design: if your book has a spine, consider incorporating the book title, author name, and any additional relevant information. Ensure that the spine design aligns correctly with the front and back covers.
- Barcode and ISBN: if your book will be sold in retail stores, leave space for the barcode and include the ISBN (International Standard Book Number) on the back cover.
Finalizing your book files for offset printing
Once you have prepared your interior and cover files according to the guidelines mentioned above, you’ll need to complete them for offset printing. Here are some important steps to consider:
Proofing
Before printing from your files, it’s important to review and proofread them thoroughly. Check for any errors, inconsistencies, or design issues that may affect the overall quality of your book. Create physical or digital proofs to evaluate color accuracy, image quality, and overall layout. Once you send us your files, our experts will manually check them for errors and we’ll generate and send you a PDF proof copy as standard.
Proofing is a vital step in ensuring the accuracy and quality of your offset printing project. This process helps you catch errors, check colors, and ensure the final product meets your expectations. There are two main types of proofing: PDF proofing and hard proofing.
PDF proofing
PDF proofing involves checking your design on a computer screen before sending your files for printing. It’s essential to review your artwork carefully on your monitor, ensuring that your images are at least 300 dpi and that your color settings are in CMYK mode. Use a calibrated monitor to ensure accurate color representation. Check for font issues, missing elements, and alignment errors. Consulting with us about specific requirements or recommendations is also advisable during the PDF proofing stage.
Hard proofing
Hard proofing entails creating a physical sample of your printed material. This step is important for projects where color accuracy is vital. A hard proof allows you to see how your design will appear in print, making it easier to spot any issues that may not be apparent on a computer screen.
By following these proofing guidelines, you can ensure the success of your offset printing project through careful proofing and attention to detail.
File submission methods
When preparing your files for offset printing, submitting them in the appropriate format is essential to ensure optimal results. Consider file compression and file transfer methods to streamline the process.
When submitting your book files to us, make sure that you follow our specific file submission guidelines, including file formats, color profiles, resolution requirements, and instructions related to bleed, trim marks, or other printing considerations as outlined above. Double-check that all fonts and images are properly embedded or included.
Various methods are available for sending your files to us. Email attachments are suitable for smaller files, but if your files are too large, consider using file transfer services like WeTransfer or Dropbox. Another option is using FTP (File Transfer Protocol), which allows you to upload files directly to our server. But if you want to use that method, talk to us first to determine the most convenient and efficient file transfer method for your project.
By following these file submission guidelines, you can ensure a smooth and successful transfer of your print-ready files to our expert team for evaluation.
File compression
Before sending your files, it’s often a good idea to compress them to reduce their size and expedite the upload process. Common file compression formats include ZIP and RAR. ZIP is a widely used format that works well for most file types, while RAR offers better compression rates but requires special software to extract the files.
Communication with your printer
Whether you decide to print with us—and we hope you will—or another printing service, maintain open communication with your printing provider throughout the file preparation and pre-press process. Discuss any specific requirements, preferences, or concerns you may have regarding the printing of your book. The closer the relationship between the designer/author and the pre-press department, the smoother the process is likely to be.
Print run and production
Once your files are approved and submitted, the printing will proceed with the print run and production of your book. This involves various processes, including printing, binding, and finishing. We will always make sure you receive updates on the progress and we’re always here to address any additional requirements or questions that may arise.
Talk to us! We're here to help
Preparing your interior and cover files for offset book printing requires careful consideration and attention to detail. By following the guidelines outlined in this post, you can make sure that your files are print-ready and optimized for the best possible results. From selecting the right file formats and design software to managing color and completing your files, every step plays a crucial role in the successful printing of your book. With careful preparation and collaboration, you’ll be on your way to producing professional, high-quality printed materials that meet and exceed your expectations. Get in touch today to discuss your needs or ask us for a no-obligation quote. We’re here and happy to help.