Custom Card Decks
 Custom Holographic Cards
 Folding Cartons
 Rigid Boxes
 Corrugated Boxes
 Custom Board Game
 Kickstarter Print Solutions
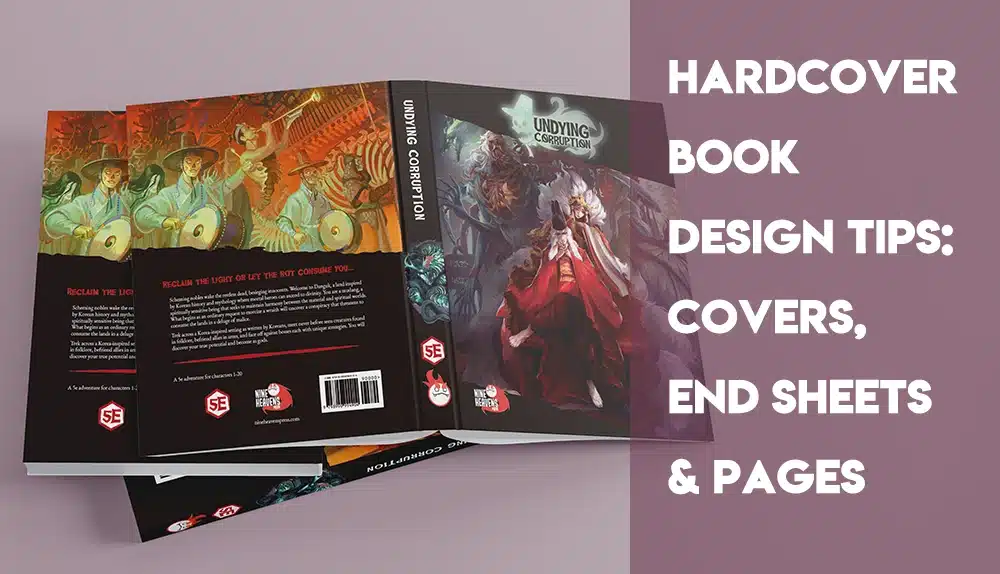
From children’s books to high-end art books, quality printing is a must when creating all types of hardcover books. Therefore, to save time in the design process and achieve professional results, it is essential to understand the ins and outs of how to print hardcovers. This guide offers helpful information about hardcover book printing and provides tips for how to elevate the cover, end sheets, and interior pages of your book.
Helpful Tips for Hardcover Cover Design
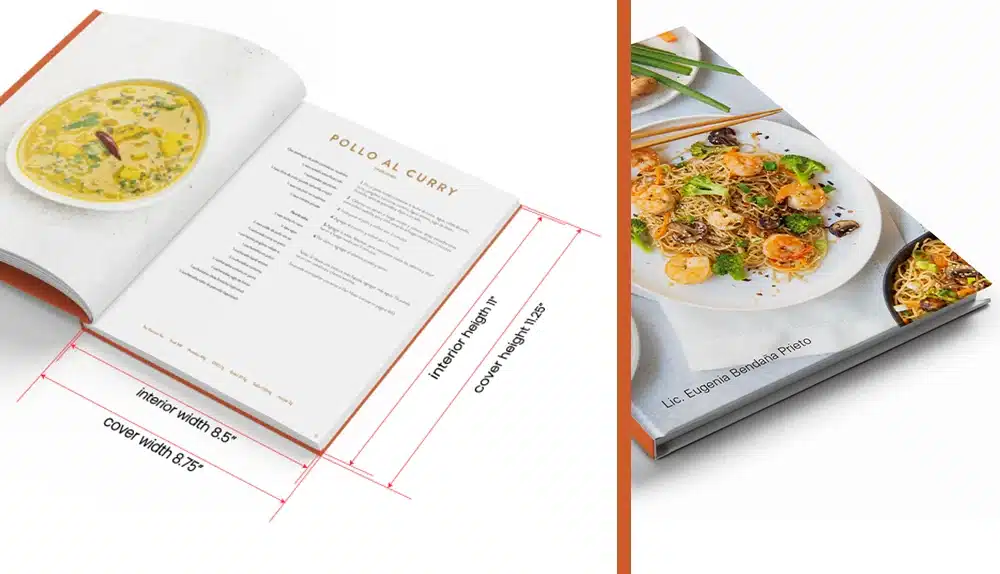
1. Understand the Size Differences Between Interior Pages and Hardcover Case
Compared to softcover books, hardcover books typically require additional space around the edges. The hard cover typically extends approximately 0.125 inches (3.175 mm) beyond the size of the interior pages on all sides. For example, an interior size of 8.5″ × 11″ would require an overall hardcover dimension of 8.75″ × 11.25″. This margin provides extra protection for the pages while also creating a professional appearance. Failing to account for this additional margin may result in misaligned or crowded designs on the cover.
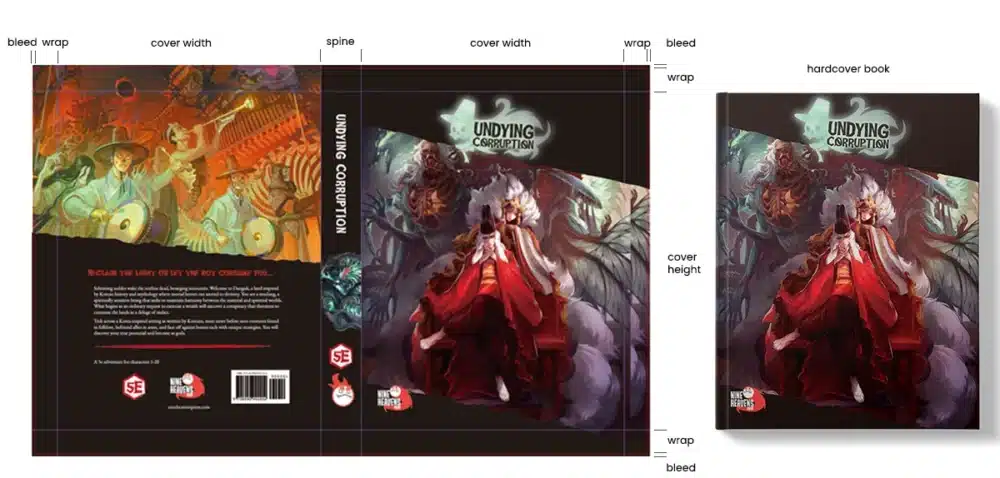
2. Provide Adequate Bleed for Cover Wraps
A hardcover is composed of sturdy gray boards wrapped in printed paper. To achieve a smooth and clean finish, hardcover wraps require a significantly larger bleed — about 0.79 inches — than the standard 0.125 inches used for interior pages. A standard 8.5″ × 11″ hardcover book wrap should be calculated as follows:
- Width: (8.75″ front + 8.75″ back) + spine width + (0.125″ bleed × 2) + (0.78″ wrap × 2) = 19.31″ + spine width
- Height: 11.25″ + (0.125″ bleed × 2) + (0.78″ wrap × 2) = 13.06″
This larger bleed prevents white edges from appearing and ensures high-quality wrapping around the gray board.
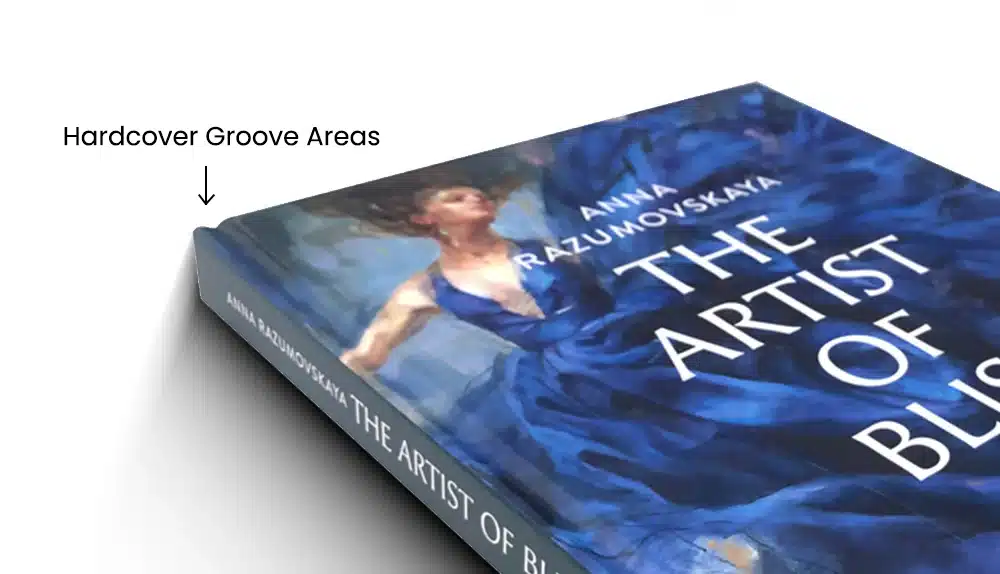
3. Strategically Plan for Groove Areas
Hardcover books have a groove approximately 0.4 inches (10 mm) from the spine in order to facilitate easier opening and handling. Important elements like titles, subtitles, and logos ideally should not encroach into this groove area, as it may affect readability or cause visual distortion. Use the groove markings provided in our downloadable hardcover templates to help position your key elements safely.
4. Accurately Center Cover Elements
Centering cover elements like titles or artwork also requires considering the groove area. Neglecting the centering may lead to a visually off-balance design once the cover is fully bound. For precise symmetry, measure your title or imagery across the entire cover width, including the grooves.
5. Keep Essential Content Within Safe Zones
Important details such as book titles, author names, or key images should be positioned well within the visible areas of both front and back covers. The remaining margin should be at least 0.3–0.4 in (8–10 mm) away from the edges of the cover. Content too close to the edges may appear cramped after wrapping; to avoid issues, adhere to the safe-zone guidelines provided in our hardcover book templates.
6. Properly Position the Barcode
Barcodes of books are typically located in the lower-right corner of the back cover, maintaining at least 0.6 inches of clearance from the spine and bottom edges. This ensures the barcode is not obscured by the groove, making scanning quick and easy. Keep in mind that retailers like Amazon often apply their barcode stickers directly over your printed barcode.
7. Choose the Right Text Size for the Spine
Text clarity is essential for all areas of book covers, even — or especially — on the spine. Text that is too large can seem crowded or may get cut off, while overly small text may be illegible. Always reference spine measurements from your hardcover book template to determine the ideal size. Typical spine content includes the title, author’s name, and occasionally publisher details, all of which should be clearly visible after binding.
8. Correctly Set Up Special Surface Treatments
Special finishes like foil stamping, embossing, debossing, or spot UV can dramatically enhance the aesthetics of a hardcover book. For the best results, always use vector graphics and vector text for these processes. Using spot colors and clearly labeling your design files will also help reduce printing issues when applying these special finishes.
Best Practices for End Sheet Design
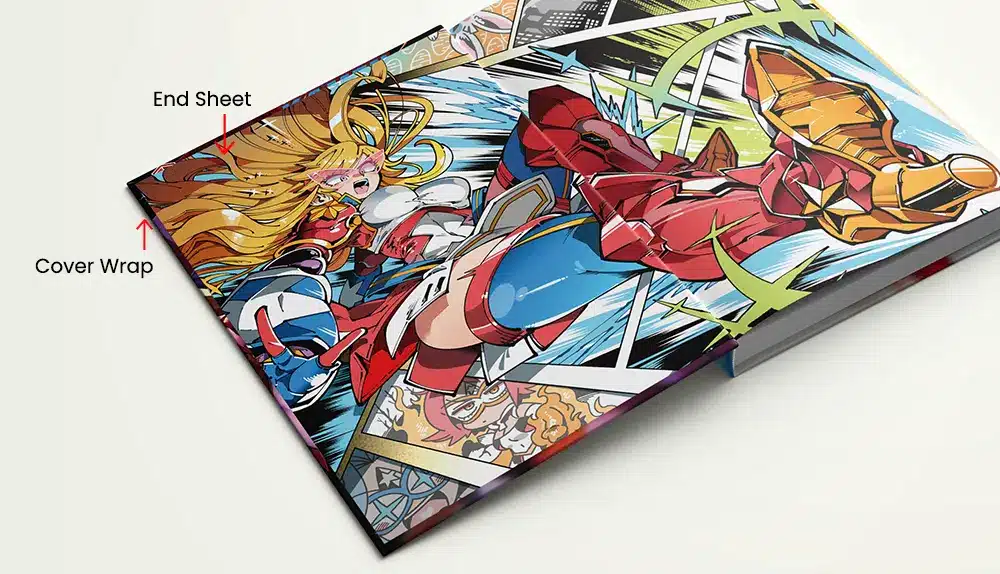
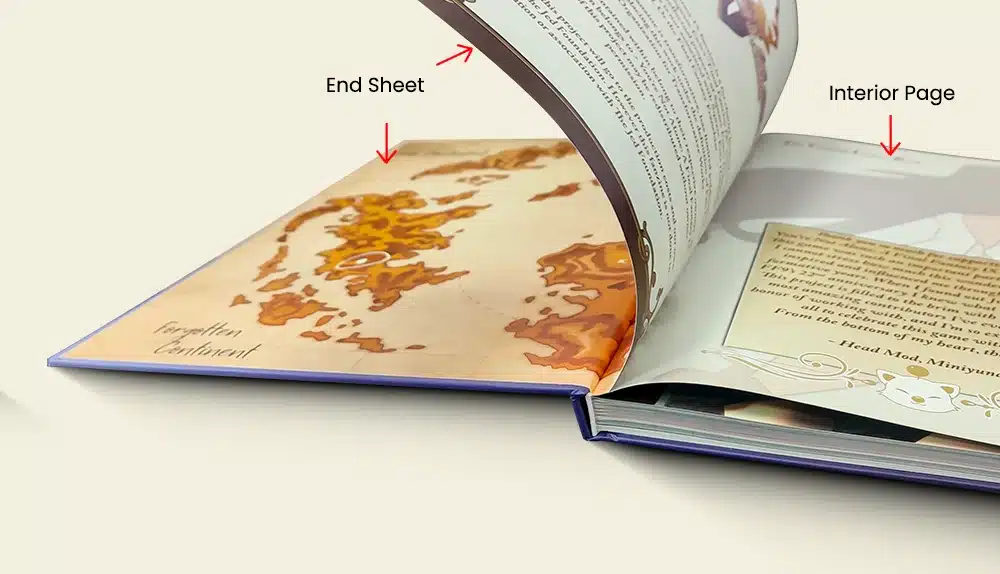
1. Understand the Role of End Sheets
End sheets connect the hardcover to the interior pages and provide an attractive visual transition from the cover to the internal pages. The first page of the front end sheet and the last page of the back end sheet are glued directly to the inside front cover and inside back cover. When designing an end sheet, focus your decorative design on one spread, plus a page for front end sheet and back end sheet.
2. Leave 8–10 mm Margins at Binding Edges
Be sure to leave an 8–10 mm (0.3–0.4 in) margin on the binding edge of the last page of the front end sheet and the first page of the back end sheet. Maintaining these margins is essential so that no essential content gets hidden when gluing these areas to the first and last interior pages.
3. Choose Simple and Elegant Designs
While end sheets help establish a book’s tone, the designs do not need to be elaborate. Simple and elegant design — solid colors, soft textures, or minimalistic illustrations — work best to maintain a professional appearance without appearing cluttered.
4. Select the Right Paper for End Sheets
Paper choice matters significantly for both the aesthetics and functionality of end sheets. Uncoated offset paper is best for end sheets due to its strong adhesion and resistance to cracking. Generally, choose 140 gsm offset paper for books under 200 pages and no larger than 8.5″ × 11″. Opt for 160 gsm offset paper for larger or thicker books.
Effective Guidelines for Interior Page Layouts
1. Optimize Spreads for Sewn Binding
Sewn hardcover books lay relatively flat, making them ideal for two-page spreads. When designing, apply bleeding only to the outer (cutting) edges and avoid any along the binding edge. This ensures smooth visual flow and prevents any loss of interior page content near the spine.

2. Use Efficient Page Counts
Hardcover books are bound in folded signatures. To reduce waste and lower production costs, consider designing your book with these optimal page counts:
- Multiples of 16 pages for 8.5″ × 11″ books
- Multiples of 32 pages for 5.5″ × 8.5″ books
- Multiples of 12 pages for 11″ × 11″ square books
If your book cannot match these optimal counts, make sure that your page total is still divisible by four to accommodate sewn binding.
3. Plan for Adequate Page Counts
Avoid designing overly thin hardcover books, as they are less guaranteed in terms of binding quality. Most hardcover books should have at least 32 interior pages plus 8 end sheet pages. At QinPrinting, we can handle books as slim as 24 interior pages plus end sheets without sacrificing any quality; keeping to these minimum recommendations ensures your book is substantial and of durable quality.
Drawing on my 35 years (and counting!) of printing experience, I’ve assembled these tips to help you create an outstanding, print-ready hardcover book. Following these guidelines outlined above will help enhance your design efficiency, improve print quality, and guarantee that your finished product meets professional and library standards.