Custom Card Decks
 Custom Holographic Cards
 Folding Cartons
 Rigid Boxes
 Corrugated Boxes
 Custom Board Game
 Kickstarter Print Solutions
We take you step-by-step through everything you need to know to get your files print-ready using Affinity Publisher, including a video tutorial, text explanations, and handy FAQ and troubleshooting sections
Welcome to this comprehensive tutorial on creating print-ready design files in Affinity Publisher. Despite living in what many call “the digital age”, print design remains a vital aspect of marketing, publishing, and branding efforts across a wide range of sectors and enterprises. Whether you’re creating flyers, posters, and brochures or designing book covers, board games, packaging, tarot cards, or anything else, making sure that your designs are print-ready is essential for achieving professional results.
Affinity Publisher stands out as a powerful tool that provides designers with the capabilities needed to produce high-quality print materials. In this guide, we’ll walk you through the process of setting up, designing, and exporting print-ready PDF files step by step, while also providing valuable insights and best practices along the way. We have nearly 30 years of success in the industry at the point of writing and we’ve helped thousands of happy clients produce first-class results with the guidance and support of our expert design team and state-of-the-art offset print workshops and facilities.
Setting up a new document
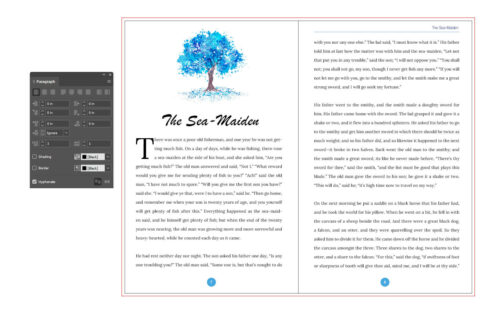
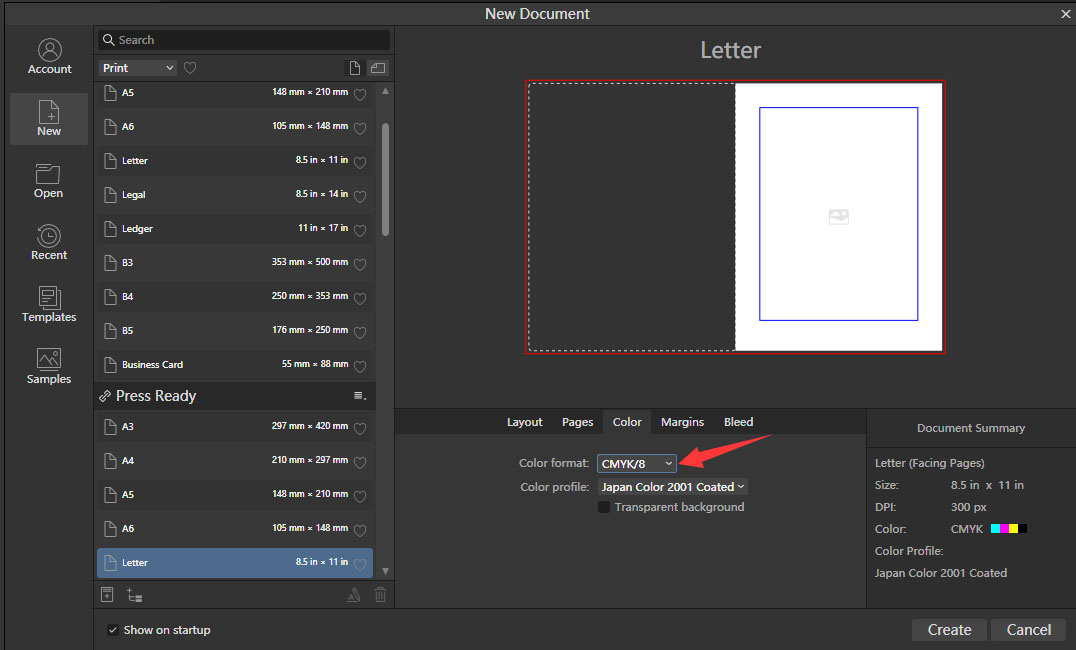
Begin by launching Affinity Publisher and creating a new document. Think about what your project is for and how it will be used to help you decide on the fundamentals of your design, and choose the appropriate finish size and units. For example, a standard US letter size (8.5″ x 11″) is commonly used for documents like flyers and posters, while smaller sizes are ideal for game cards, 2.5″ x 3.5″, for example. A paperback (perfect bound) novel may be best with the standard 5″ x 8″ or 6″x 9″ trim size and a coffee table book might be as large as 11.5″x 13.5″. Also, setting the DPI (dots per inch) to 300 makes sure that your images and text will be crisp and clear when printed.

Color management
Next, navigate to the color panel and select the CMYK color mode. Unlike RGB (red, green, blue) which is used for digital displays such as your computer screen, CMYK is optimized for printing and represents the four ink colors used in the professional offset printing process: cyan, magenta, yellow, and “key” (black). Don’t forget to choose the appropriate color profile. For most projects, we recommend that you select “Japan Color 2001 Coated,” to guarantee accurate color reproduction on different printing devices.
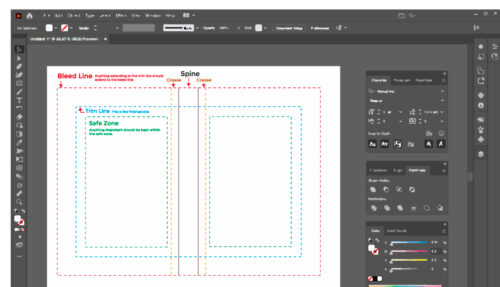
Margins and bleeds
In the margin panel, set a minimum margin of 0.125″ or 3 mm to provide adequate space between your content and the edge of the page. Similarly, in the bleed panel, enter a bleed of 0.125 inches or 3 mm to allow for slight variations during the printing and trimming process. This makes sure that your design extends beyond the trimmed edge, preventing any white borders or cut-offs in the final printed product.
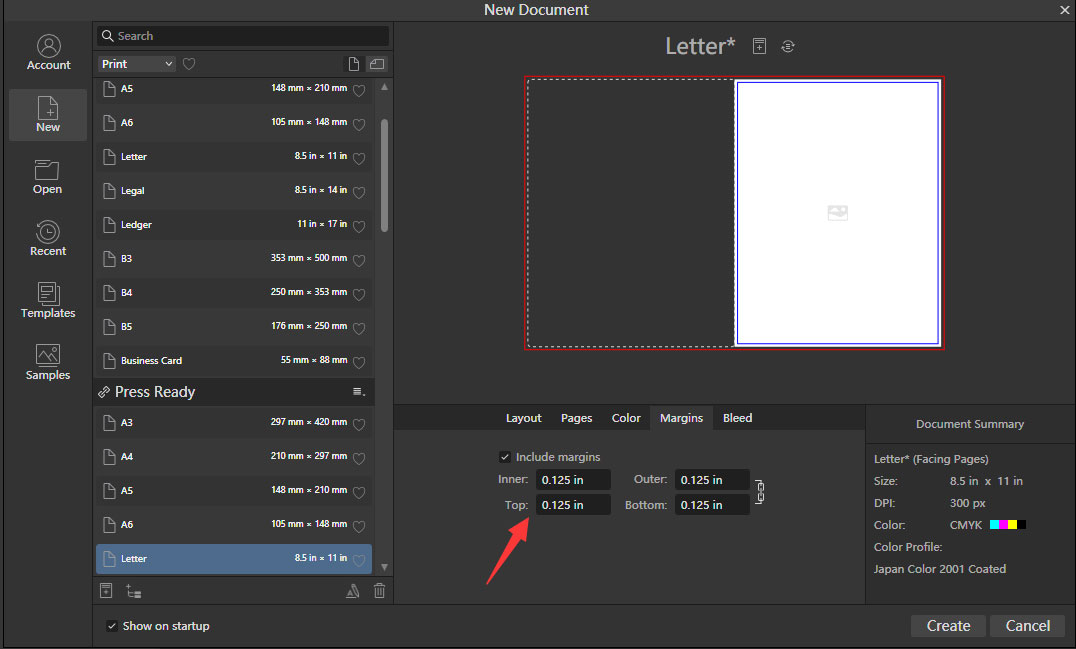
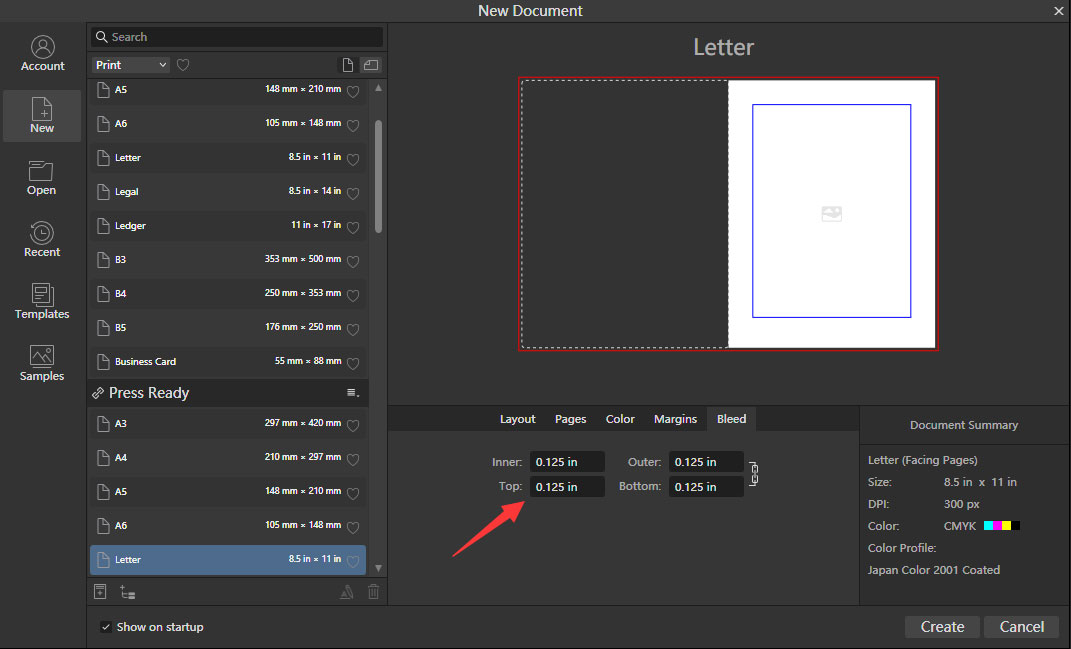
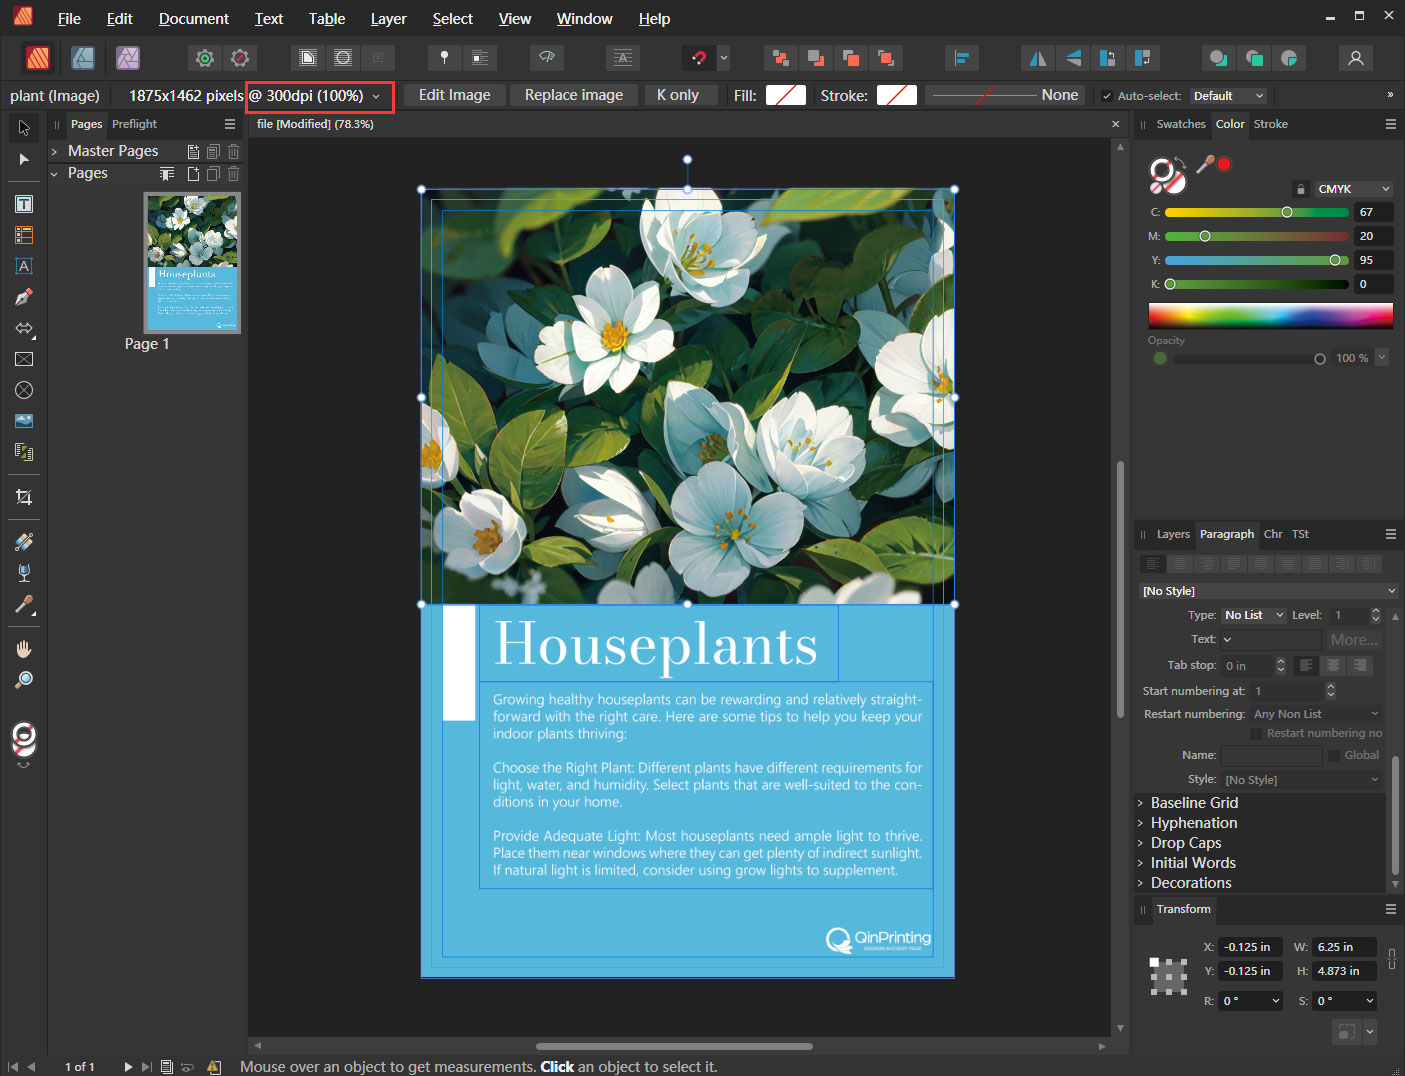
Image and font management
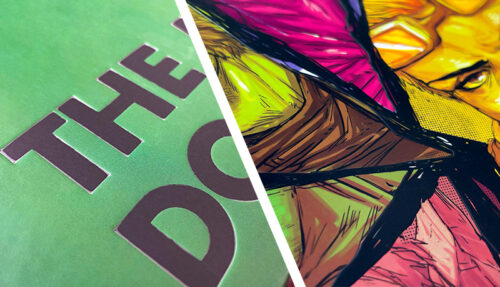
When you’re adding images to your design, make sure they are also created in or converted to CMYK mode and have a resolution of 300 dpi or higher for optimal print quality. Resize, crop, and optimize your images as needed within Affinity Publisher to achieve your desired layout. Make sure you select high-quality fonts for your text elements to avoid compatibility issues in the final PDF file.
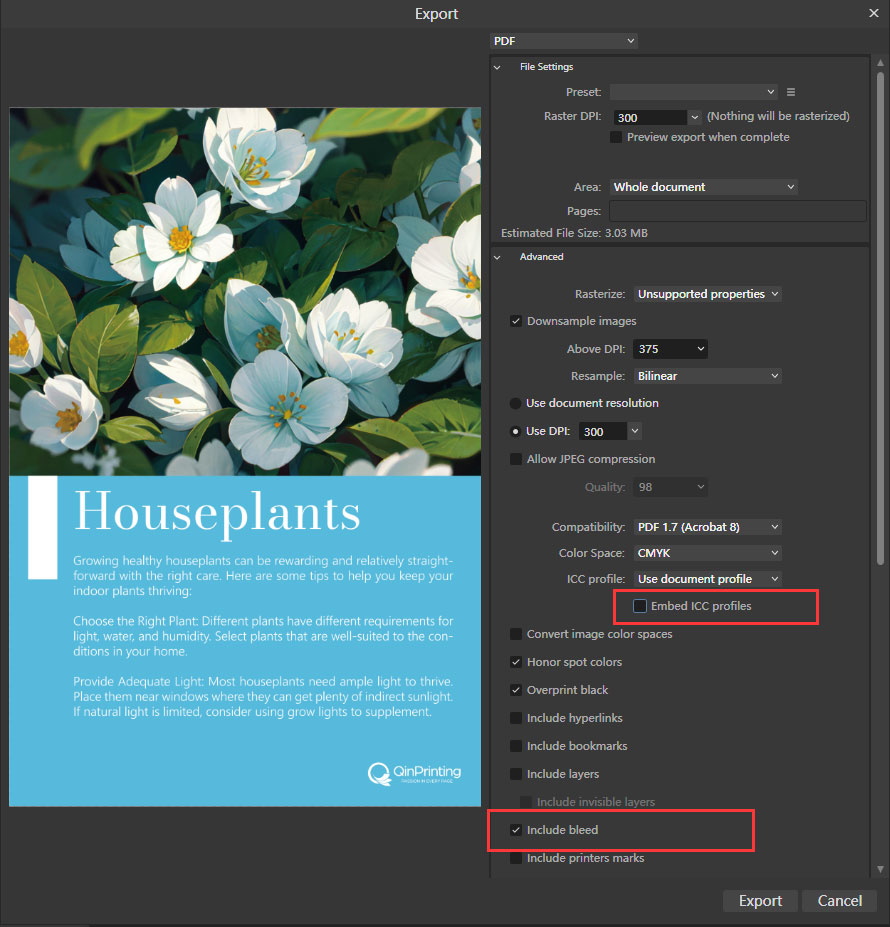
Exporting print-ready PDF files
Once your design is complete and you’re satisfied with the results, you can export it as a PDF print file. To do this correctly, navigate to the “Export” menu and select “PDF (Press ready)” as the save type. Avoid checking the “Embed ICC Profile” option, as it may interfere with color management during printing.
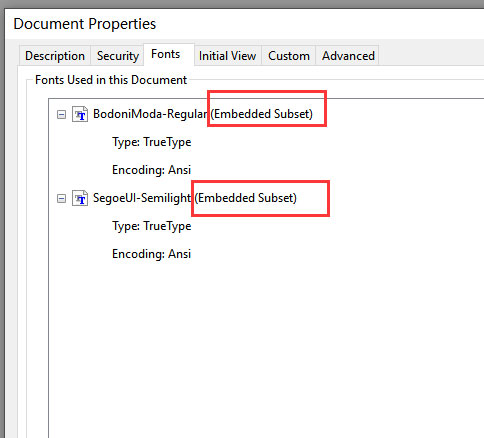
After finalizing the export, open the saved PDF to confirm that it includes bleed areas and trim lines and review the font properties to guarantee that all fonts have the “Embedded Subset” flag.
That’s it. While getting all these settings right is essential for an optimal print output, it’s not too complicated to set up. In any case, when you send your files to us for printing, our team will manually check them and help you correct any errors should they be found.
FAQs
1. How do I set up a new document for print in Affinity Publisher?
To set up a new document for print in Affinity Publisher, go to File > New. Here, you can specify the document size, orientation, and units. Choose the appropriate finish size and set the DPI to 300 for optimal print quality.
2. What is bleed, and why is it important for print design?
Bleed is the area beyond the trim edge of a printed document that makes sure no white borders appear after trimming. It’s essential for accommodating slight variations during printing and trimming processes, so that your design extends seamlessly to the edge of the page.
3. How do I add bleed to my Affinity Publisher document?
When setting up a new document, you can specify bleed settings in the “Bleed” section of the New Document dialog box. Alternatively, you can add or adjust bleed settings later by going to Document > Document Setup and entering your desired bleed values.
4. What are the recommended image resolution and color mode for print design in Affinity Publisher?
For optimal print quality, use images with a resolution of 300 dpi (dots per inch) and make sure they are in CMYK color mode. This resolution makes sure that images appear crisp and clear when printed, while CMYK color mode accurately represents colors for print output.
5. How can I ensure my fonts are embedded in the PDF file for printing?
To ensure that fonts are embedded in the PDF file, go to File > Export and choose PDF as the file format. In the PDF export settings, enable the “Embed Fonts” option to include all font information within the PDF file, guaranteeing proper rendering on different devices.
6. What are common issues that may arise when exporting print-ready PDF files from Affinity Publisher?
Common issues when exporting print-ready PDF files include font embedding errors, color discrepancies, trim and bleed errors, and file size issues. These issues can affect the final print output and may require troubleshooting to resolve.
7. How can I troubleshoot font embedding errors in Affinity Publisher?
If fonts are not embedding properly in the PDF file, check that all fonts are licensed for embedding and that no font restrictions are applied. You can also convert text to vectors before exporting to help make sure font information is preserved.
8. What should I do if there are color discrepancies between my Affinity Publisher document and the final printed output in my hard sample?
To address color discrepancies, check again that your document is set to CMYK color mode and that color profiles are correctly assigned. Consider using color swatches or proofs to verify colors before printing. If you have any uncertainties about this, get in touch and our design team will help you.
9. How can I troubleshoot trim and bleed errors in Affinity Publisher?
To troubleshoot trim and bleed errors, verify that your document includes adequate bleed areas and that important content is within the safe zone. Double-check trim and bleed settings in the document setup and adjust them as needed before exporting the PDF file. Our recommended minimums are 0.125″ or 3 mm.
10. What are the best practices for optimizing PDF export settings in Affinity Publisher?
When exporting PDF files for print, use the appropriate PDF preset for your intended output (ie., “press ready”). Adjust compression settings to balance file size and quality, and make sure that all necessary elements are included in the export.
11. How can I reduce the file size of my exported PDF in Affinity Publisher?
To reduce the file size of your exported PDF (for example, if it is too large to send as an email attachment) consider optimizing images and reducing the number of unnecessary elements in your document. Experiment with compression settings and consider using PDF presets designed for smaller file sizes. You can also send us your files via a document transfer service such as DropBox or WeTransfer.
12. What should I do if I encounter file corruption or export failures in Affinity Publisher?
This is extremely rare, but if you encounter file corruption or export failures, try saving your work frequently and using backup files to minimize data loss. Additionally, check for software updates or reinstall Affinity Publisher to troubleshoot any software-related issues causing export failures. If you have persistent issues, get in touch and our technical experts will help you.
Troubleshooting tips for Affinity Publisher
Font Embedding Issues
Problem: Fonts may not embed properly during export, leading to inconsistent typography in the final printed document.
Solution: Check font licenses, convert text to curves, or reinstall fonts to guarantee proper embedding and maintain consistency across different devices and printing systems.
Color Discrepancies
Problem: Unexpected color shifts or mismatches between on-screen and printed colors may occur.
Solution: Calibrate your monitor, adjust color profiles, or use color swatches from reputable sources to ensure accurate color reproduction in the final printed output.
Image Resolution Problems
Problem: Low-resolution images may result in pixelation or blurriness when printed.
Solution: Make sure images maintain a resolution of 300 dpi for optimal print quality. Resize images without losing quality or source higher-resolution alternatives to avoid image degradation.
Trim and Bleed Errors
Problem: Incorrect trim or bleed settings may lead to white borders or cut-offs in the final printed sample.
Solution: Adjust settings within Affinity Publisher and verify them before exporting the final PDF to make sure that the design extends beyond the trim edge and includes adequate bleed areas.
File Corruption or Export Failures
Problem: File corruption or export failures may occur, leading to loss of work or incomplete print files.
Solution: Save your work frequently, use backup files, or reinstall Affinity Publisher to troubleshoot file corruption or export failures and guarantee a smooth printing process.
Printer Compatibility Problems
Problem: Compatibility issues with certain printers or printing services may arise, resulting in printing errors or unexpected output.
Solution: For best compatibility, use common file formats (PDF) and consult with us if you have doubts about specific requirements and recommendations.
Resource Constraints and Performance Issues
Problem: Performance issues such as lagging or freezing may occur when working with large or complex documents in Affinity Publisher.
Solution: Optimize performance by closing unnecessary applications, clearing cache memory, or upgrading hardware if feasible to create an environment which supports smooth and efficient workflow.
Talk to us!
Mastering the art of print design requires attention to detail and adherence to industry standards. Affinity Publisher provides you with the tools you need to create professional print materials with ease. By following the guidelines outlined in this tutorial and incorporating the tips and insights provided, you’ll be well-equipped to create print-ready files that meet the highest standards of quality and precision perfect for production with Qinprinting, one of the world’s leading international offset printing services. Still need more help? No problem! Just get in touch. We’re always here to support our valued customers.