 Custom Card Decks
 Custom Holographic Cards
 Folding Cartons
 Rigid Boxes
 Corrugated Boxes
 Custom Board Game
 Kickstarter Print Solutions
While many self-published authors outsource cover design to a third party designer, others like to do it themselves. Here, we give you a simple guide to get you started designing your own book covers in Adobe Illustrator.
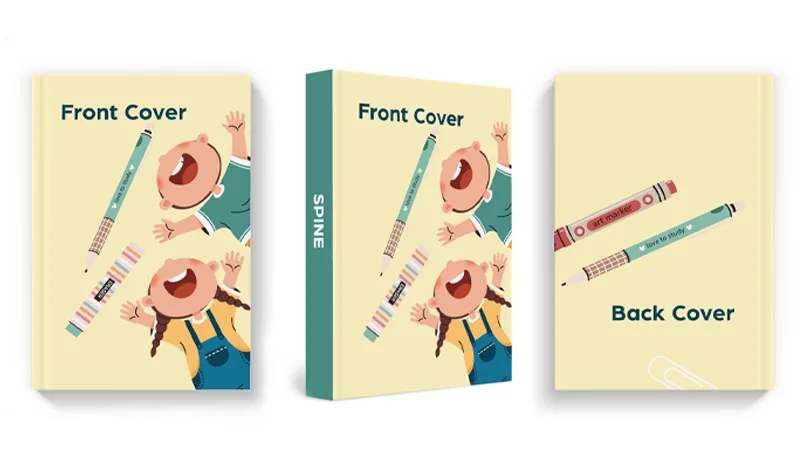
Are you an aspiring author or self-publisher looking to design a captivating book cover? Look no further than Adobe Illustrator. While InDesign is a popular choice, Illustrator offers even more room for creativity. At QinPrinting, we use both, although we favor InDesign for text formatting and interior book layouts and Illustrator for beautiful, professional book covers.
Based on decades of experience in the industry and helping thousands of authors just like you to print gorgeous books, in this post we will explore two methods how to create a book cover using Adobe Illustrator: using a template — whether one of ours, your own, or from some other source — or creating your cover design from scratch. Whether you’re a beginner or an experienced designer, this tutorial will get you started with the knowledge and tools to create a professional book cover that will grab readers’ attention and help you make sales.
Why use Adobe Illustrator for book cover design?
Adobe Illustrator is a powerful graphic design software that allows you to have precise control over every element of your book cover. With its extensive range of tools and features, you can create stunning typography, incorporate intricate illustrations, and experiment with various color schemes. Illustrator’s flexibility makes it an ideal choice for designing book covers that stand out on the shelves or online platforms.
Choosing the right book size
Before diving into the design process, it’s vital to choose the size of your book. And you’ll also need to know your final page count as that will determine the spine width. Book sizes vary depending on the genre and format. While at QinPrinting, we specialize in custom book printing, here are some common standard book sizes for you to consider:
Paperback books
- 8.5″ x 11″
- 5.5″ x 8.5″
- 6″ x 9″
- 4.25″ x 6.87″
Hardcover books
- 6″ x 9″
- 8.5″ x 11″
- 7″ x 10″
- 9″ x 12″
- 12″ x 12″
Children's books
- 6″ x 6″
- 5.5″ x 8.5″
- 9″ x 12″
- 8″ x 10″
- 8.5″ x 11″
Once you’ve figured out the size of your book and the spine width (paper thickness times half number of pages), you can proceed with designing the perfect cover. If you’re not sure how to do it, you can enter your book dimensions and page count on this page to download a free template with accurate book cover dimensions and bleed marks.
So, let’s look at how to design a book cover using Adobe Illustrator.
Designing a book cover
Whether you’re new to book cover design or you have experience in design, the basic steps are always the same. Here’s a basic step-by-step guide:
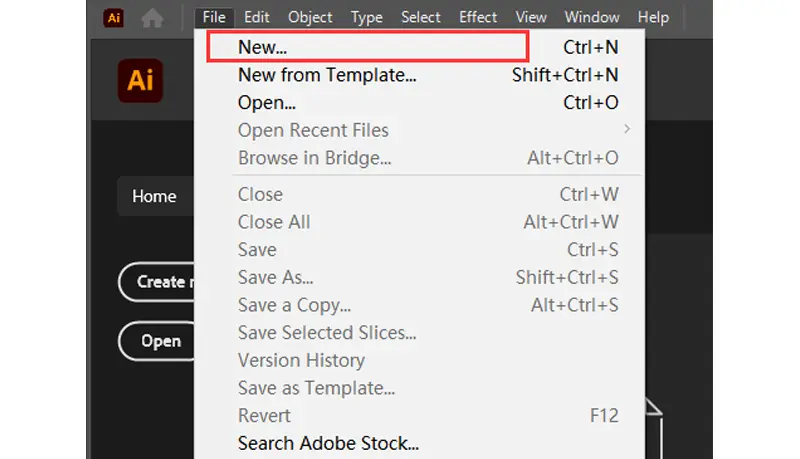
Step 1: Create a new document
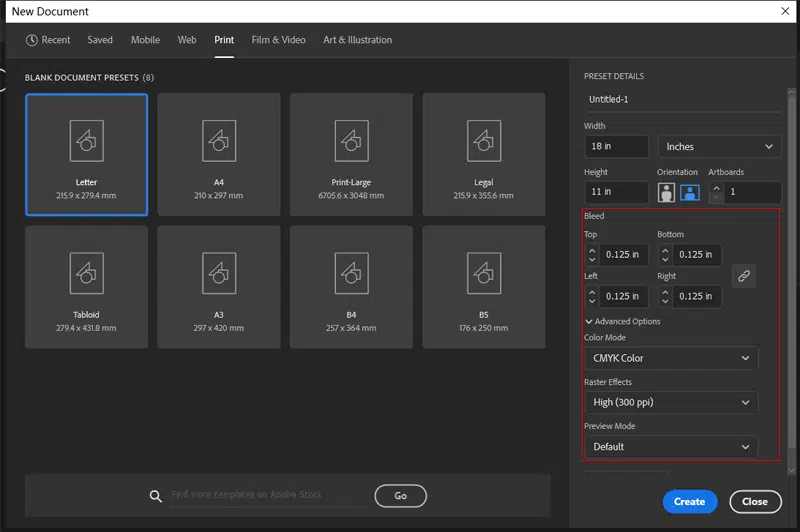
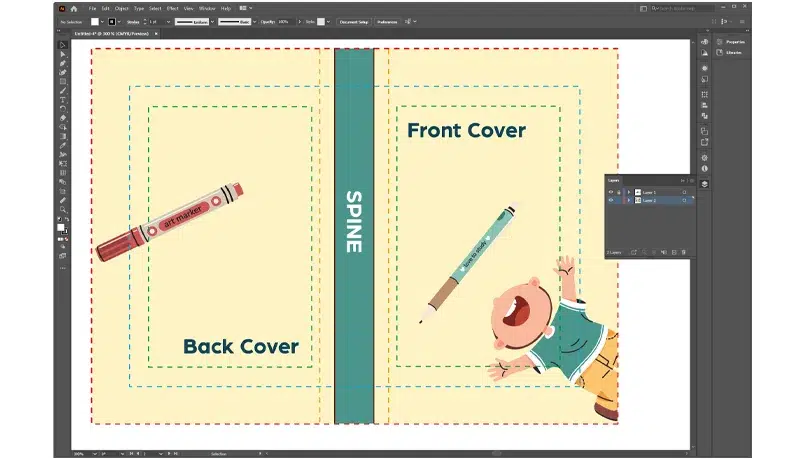
Launch Adobe Illustrator and create a new document. Go to the “Print” section and input the dimensions corresponding to your book cover size and set 0.125 inch bleed. Use guidelines to mark the position of the spine for subsequent design.
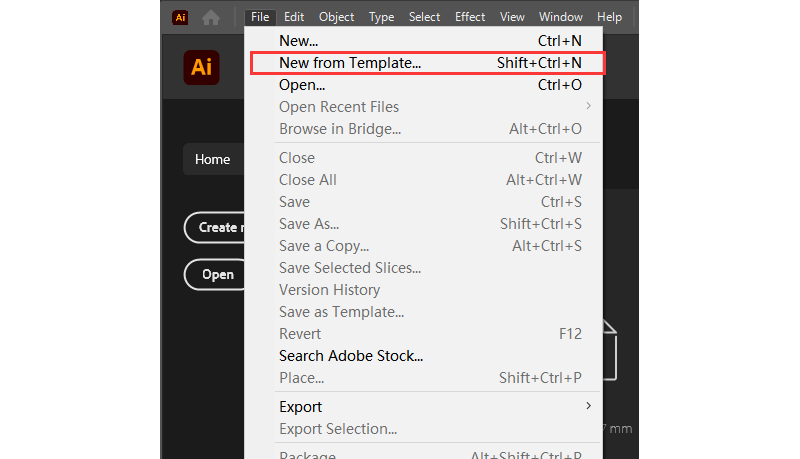
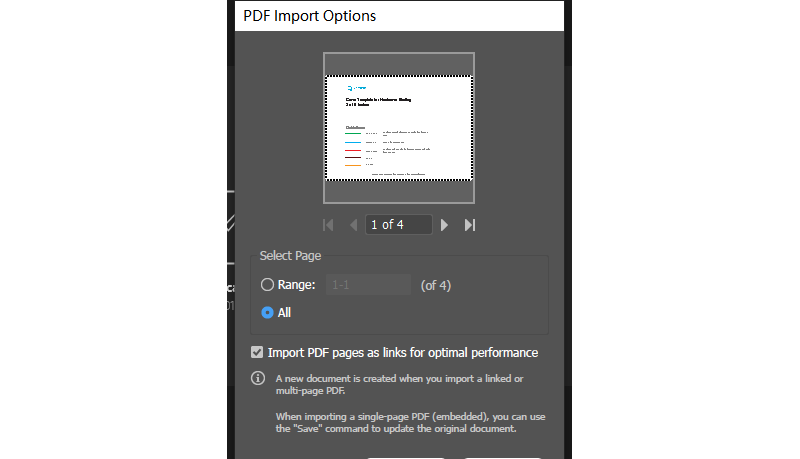
You can also open our book cover template directly using Adobe Illustrator. Choose “File” > “New from Template”. Our template has already marked the positions of the spine, trim line, and bleed line. You just need to create a new layer for design.
Step 2: Add elements to your cover
If you prefer a more straightforward approach, using a pre-designed cover can save you time and effort. Adobe Stock provides a few book cover templates you can customize to suit your needs. You can change the book’s title, adjust colors, and add or remove elements.
If you have experience in design and you’d prefer complete creative freedom , it’s time to unleash your creativity! Use the various tools available in Illustrator — if you’re not familiar with them yet, they’re fairly intuitive and Adobe provides excellent help and support features — to add text, images, and graphics to your book cover. You can create illustrations directly in the software, import graphics or photographs, and incorporate typography to bring your vision to life. Remember to keep separate layers for any special print features, such as foil stamping or UV spot.
Step 3: Finalize and save
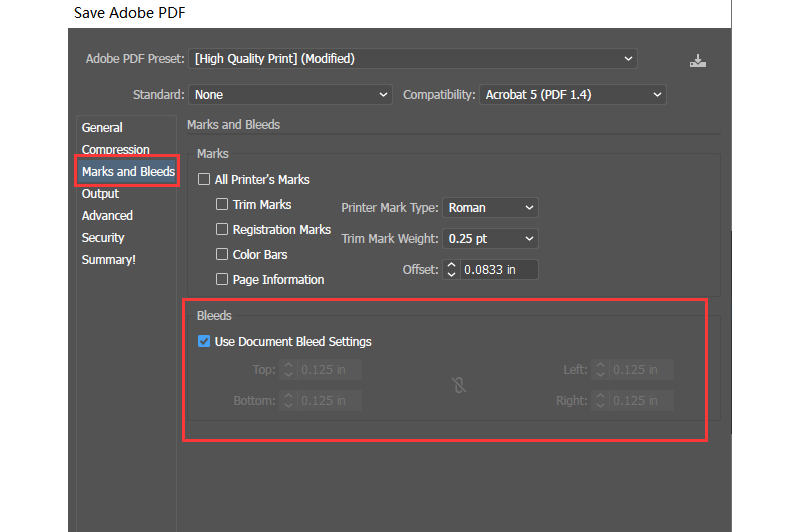
Once you’re satisfied with your design, it’s super-important to save your work correctly. Go to “File” > “Save As” and save the file in the AI format. To prepare the design for printing, save a PDF copy of your book cover. Choose the appropriate PDF preset, such as “High Quality Print,” then click the “Marks and Bleeds” section, and choose “Use Document Bleed Settings” to make sure you get the best results.
If you use our cover template, please hide or delete the template layer, before saving as PDF.
Tips for creating a book cover that sells
Designing a book cover is not just about aesthetics; it’s also about capturing the essence of your story and appealing to your target audience. Here are some tips to create an engaging book cover:
- Know your target audience: Research your genre and understand the expectations and preferences of your readers. A mystery novel cover will differ from a romance novel cover.
- Keep it simple: Avoid overcrowding your book cover with too many elements. A clean, minimalist design often stands out more effectively.
- Choose the right typography: Select fonts that complement your genre and convey the mood of your book. Experiment with different font styles to find the perfect match.
- Use interesting imagery: Whether it’s an illustration, photograph, or graphic, choose an image that captures the atmosphere of your story and intrigues potential readers.
- Consider color psychology: Different colors evoke different emotions and associations. Choose colors that express your book’s genre and theme.
- Test your design: Before finalizing your book cover, gather feedback from your target audience, beta readers, social media, or fellow authors. These insights can help you refine your design and make sure it resonates with readers.
Creating a striking book cover in Adobe Illustrator is an exciting journey that allows you to showcase your creativity and captivate potential readers. Whether you opt for a template or design from scratch, Adobe Illustrator provides the tools and flexibility to bring your vision to life. Remember to consider your target audience, choose engaging imagery, and create a design that reflects the essence of your story. With these tips and Adobe Illustrator’s powerful features, you’re well on your way to designing a book cover that will leave a lasting impression. Happy designing!
Talk to us!
At QinPrinting, we can boast almost 30 years of success in the offset printing industry and in that time, we’ve helped thousands of self-published writers and independent creatives just like you to create beautiful and successful print editions of their books. We have a vast experience and expertise which we can put at your disposal. And we’ve made it super-easy to get in touch with us, either by telephone, email, the live chat, Skype, or the online contact form. We look forward to hearing from you, and seeing all your hard work finally wrapped in a beautiful, professional book cover design.


2 thoughts on “How to Create a Book Cover Using Adobe Illustrator”
Hi,
As an Author I would like to create my own book covers, since I write so many, it has gotten expensive as you can imagine.
So I have decided to purchase Adobe Illustrator.
However, I am not sure how I can use an AI Graphic Generator within Adobe Illustrator?
is there such an app inside Adobe Illustrator that I could ask for example; create or make or draw a mountain with a waterfall?
Warm Regards
Joseph J. Pamelia
Hi Joseph,
Great question — and yes, there is a way to use AI tools within Adobe Illustrator for creative artwork!
Please take a look at this page from Adobe:
https://www.adobe.com/products/illustrator/text-to-vector-graphic.html
This explains the "Text to Vector Graphic" feature powered by Adobe Firefly inside Adobe Illustrator. With this tool, you can type a prompt like "draw a mountain with a waterfall", and Illustrator will generate editable vector graphics that you can further refine, resize, recolor, and compose into your book cover design.
Important note:
To use this feature, you will need to update Adobe Illustrator to the latest version. Older versions do not have the built-in AI/Firefly integration.