Our easy-to-follow, step-by-step tutorial on preparing your files for printing using Adobe Photoshop, with video, screenshots, and detailed text
Creating a print-ready PDF file is an essential skill for anyone involved in professional print design. Making sure your document is correctly set up can prevent costly errors and make sure your printed materials look exactly as you have designed them. In this easy-to-follow tutorial, we’ll guide you step-by-step through the process of preparing a print-ready PDF file using Adobe Photoshop. By the end of this guide, you’ll have a solid understanding of the key principles and practical steps needed to create perfect print files using Photoshop. Before we go further, though, we strongly recommend watching the above instructional video. Once you’ve done that, read the text—which goes into a little more detail than the basic “how-to” steps included in the video.
Why print-ready files matter
A print-ready file is a document that meets all the technical requirements for printing, making sure that the final output looks exactly as you design it to be. Incorrectly prepared files can lead to costly errors, such as misaligned prints, poor image quality, or unexpected color shifts. Print-ready files matter because they help to guarantee that we can reproduce your design as accurately as possible, avoiding common pitfalls and making sure that you get a professional, high-quality outcome.
Why use Adobe Photoshop?
We generally recommend using Illustrator and InDesign from the Adobe Creative Suite. However, several clients, particularly if they are working with lots of photographic raster images rather than vectorized designs, like to use Photoshop. And certainly, Adobe Photoshop is a powerful and widely-used tool in the design industry. While, as we’ve said, it’s primarily known for photo editing, Photoshop also works well for creating complex graphics and preparing files for print. It offers precise control over color, resolution, and layout, making it an excellent choice for preparing print-ready documents which rely heavily on photos. After all, it’s called Photoshop; the hint’s in the name!
Step 1: set up your document
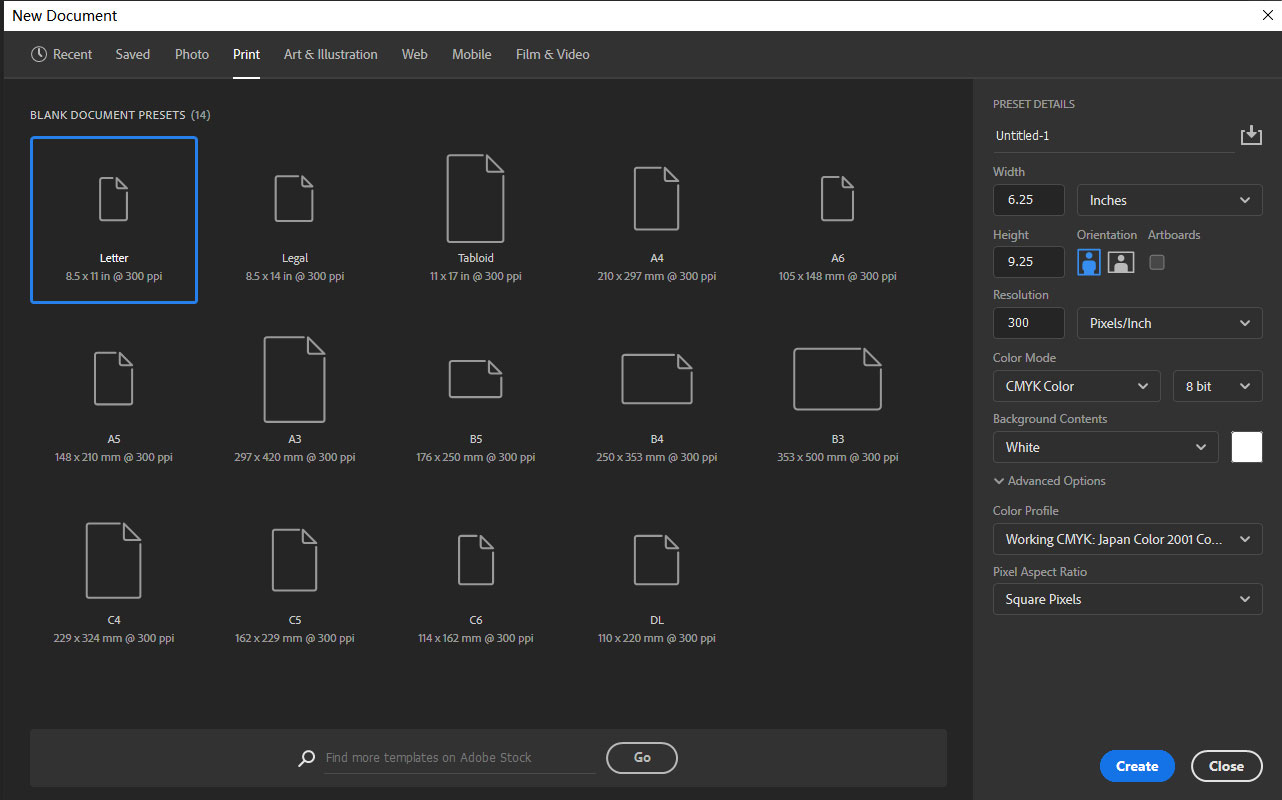
To get started, open Adobe Photoshop and click on “Create New”. Enter your project’s dimensions and include the bleed margin. For example, if your design is 6″ x 9″, you’ll need to input 6.25″ x 9.25″ to allow for the standard bleed of 0.125″ (or 3 mm) on each side. Bleed is crucial for making sure that there are no white edges on your printed document after trimming. Different types of print documents, such as brochures, books, and flyers, may have specific size and margin requirements, so always check the specifications provided by your designer, but in most cases, this is the standard “margin of error”.
Make sure that you set the resolution to at least 300 dpi (dots-per-inch). This is important for making sure your images are crisp and clear once printed. If your setting is less than 300 dpi, then you are likely to get fuzzy or pixelated prints. High resolution is essential for maintaining the quality of text and images, especially in professional print jobs. For large-format prints, such as posters, it’s especially important as you’ll often be significantly resizing, which is when images are most likely to become pixilated.
Next, choose the color mode “CMYK”, which is the gold standard for offset printing, as it aligns with the color processes used by our state-of-the-art machinery. Select the “Japan Color 2001 Coated” color profile to get the best results and faithful color reproduction. Proper color settings make sure that the colors you see on your screen closely match the printed output. CMYK represents the ink colors used in offset printing: Cyan, Magenta, Yellow, and Black (Key).
Step 2: setting up guidelines
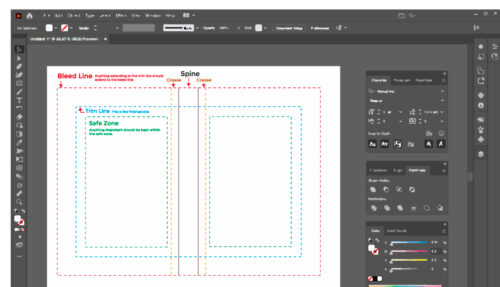
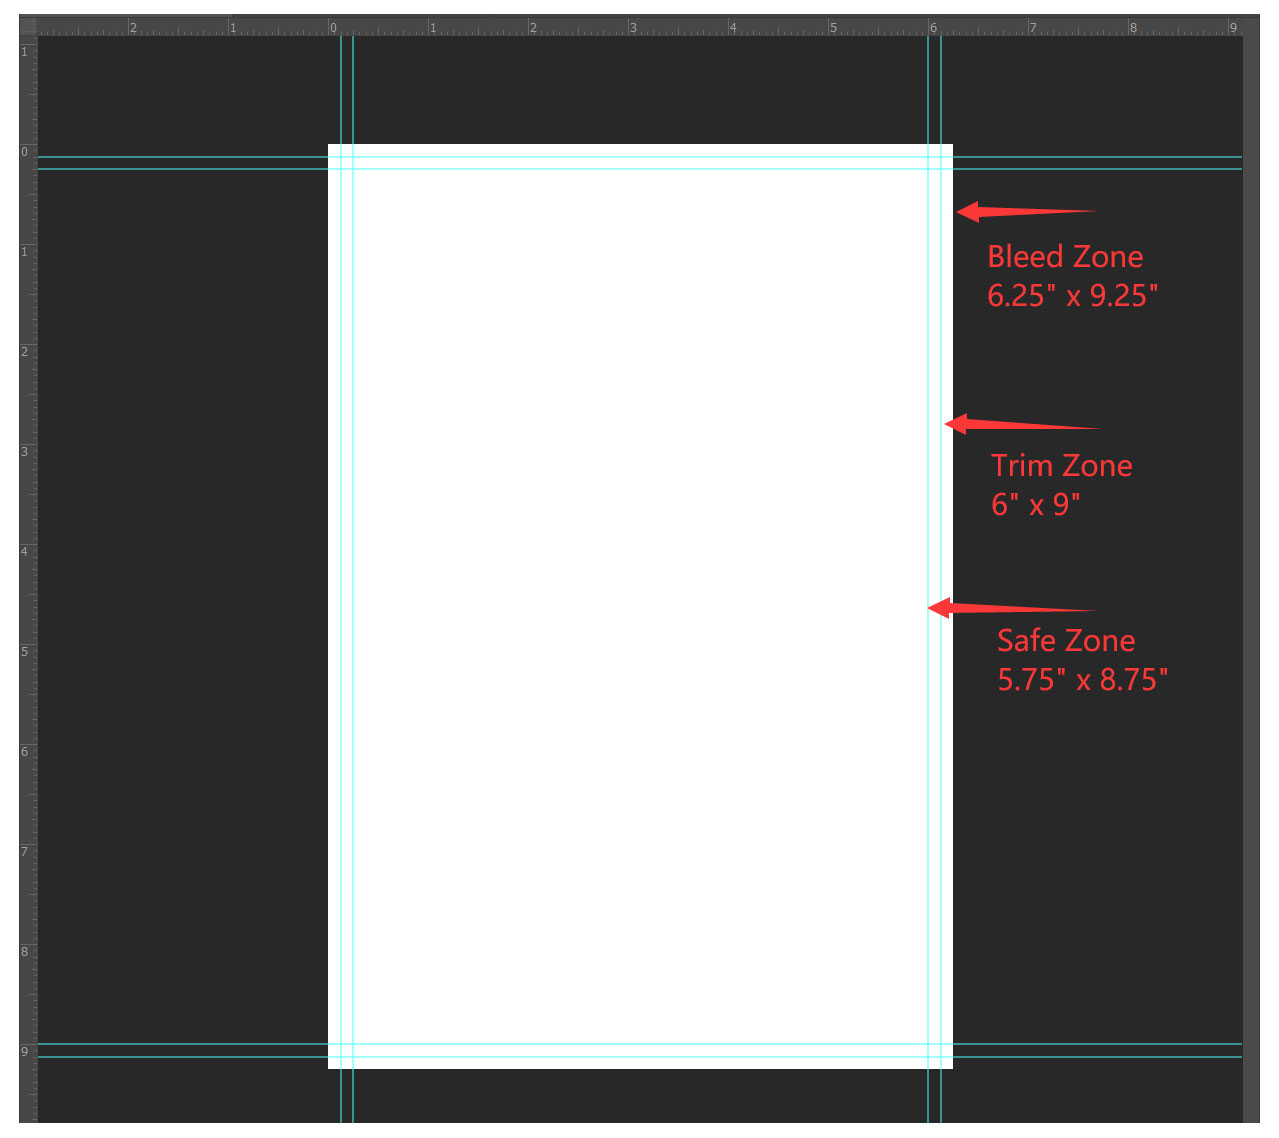
In the new document you’ve just set up, the entire white area includes the bleed, while your actual product size is represented by the 6″ x 9″ area centered on the page. Anything that lies outside this area may be cut off during post-printing trimming. For this reason, we recommend that you set up guidelines on your document so that you can easily visualize the bleed margin and the trim lines. Guidelines are essential tools for keeping your design elements properly aligned and avoiding critical design elements being too close to the edge.
You should also add a safe area, which is 0.125″ (3 mm) within the trim lines. Keep all your important text and images within the safe area to allow for slight variations during printing and trimming, so that none of your work gets lost. Mark the safe area with guidelines as well. You can also use guidelines to align text and images consistently, helping to create a clean and professional look.
A simple method to draw guidelines:
1. Use the rectangle tool to draw a rectangle, setting the dimensions to 6″x9″, which is the final product size. Align it to the center.
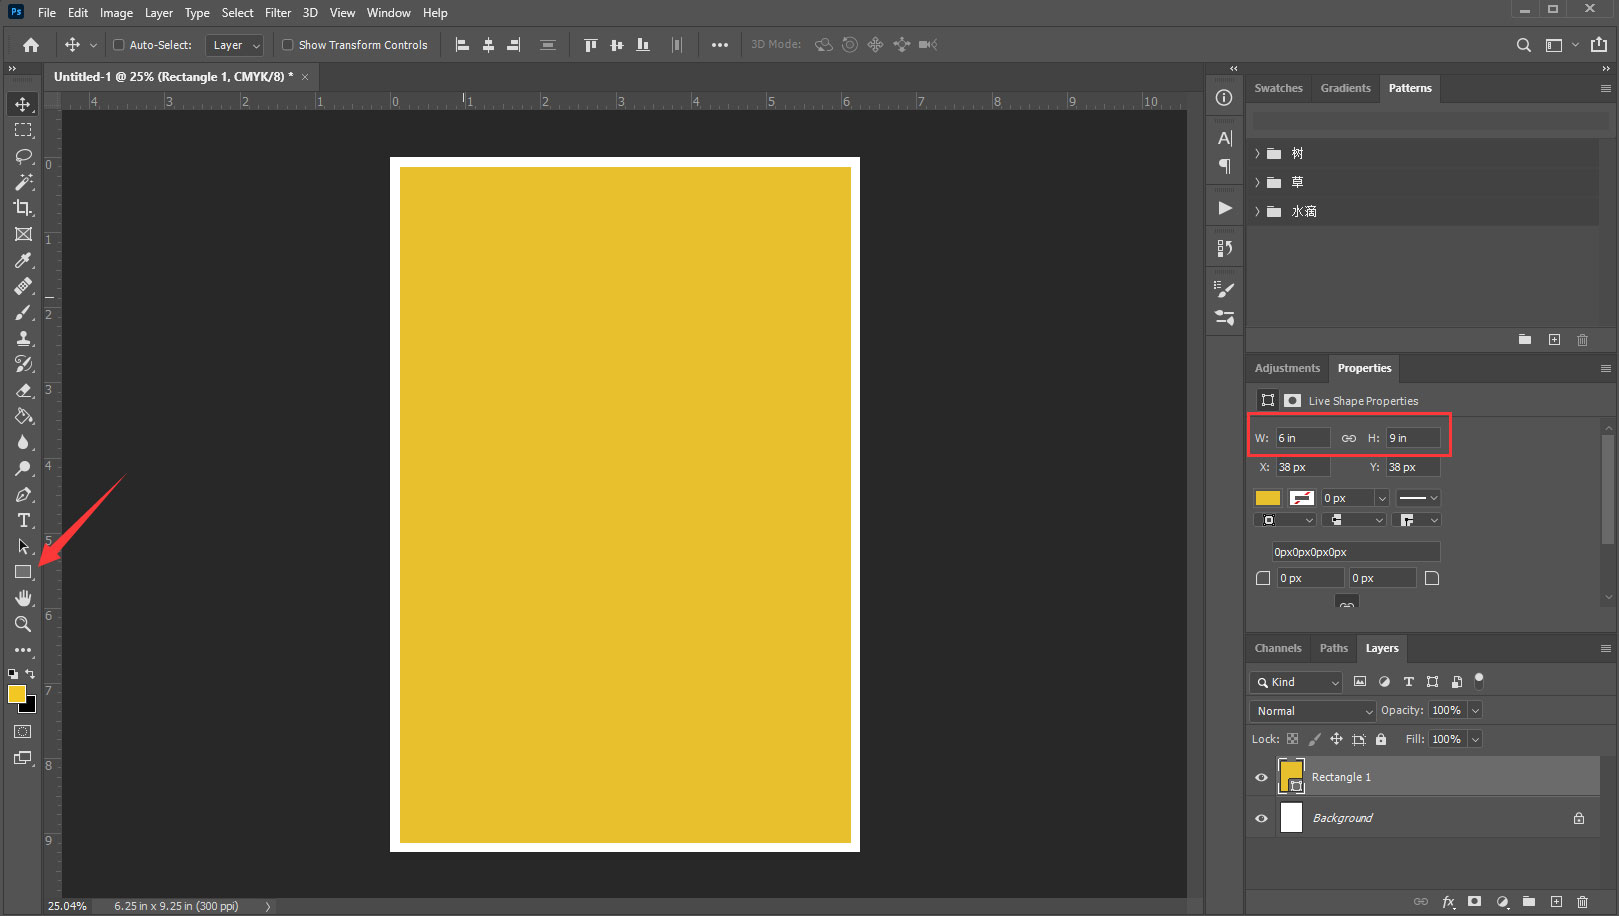
2. Right-click and select “New guide from shape.”
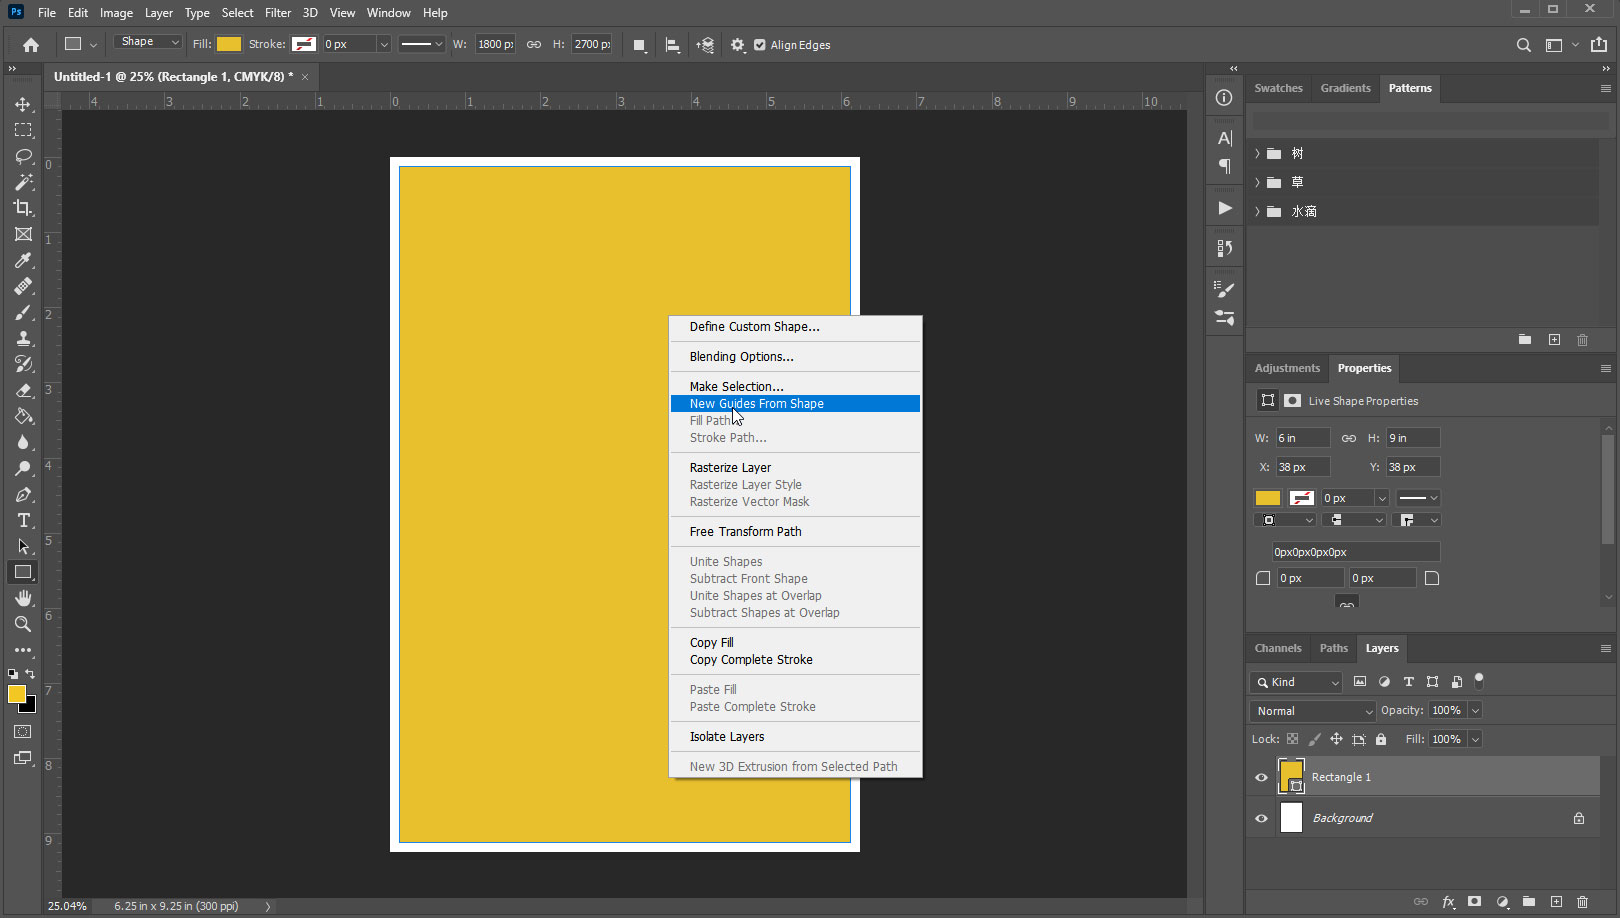
3. Hide or delete the layer with the rectangle, leaving only the guidelines.
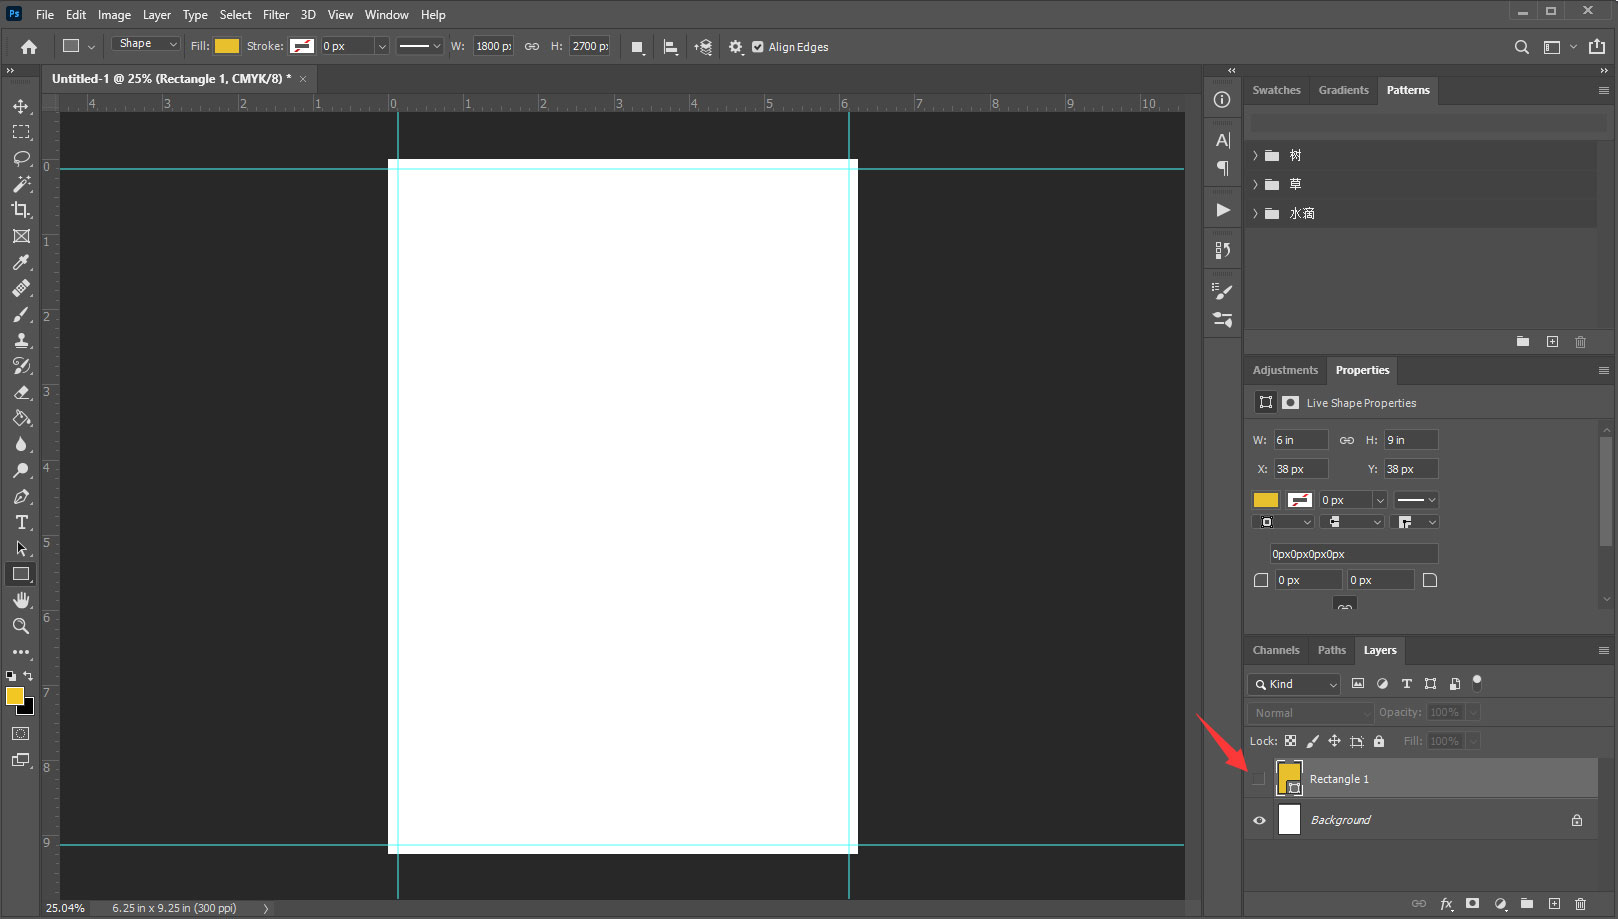
4. Using this method, draw the safety area (5.75″ x 8.75″) guidelines.
Step 3: creating your design
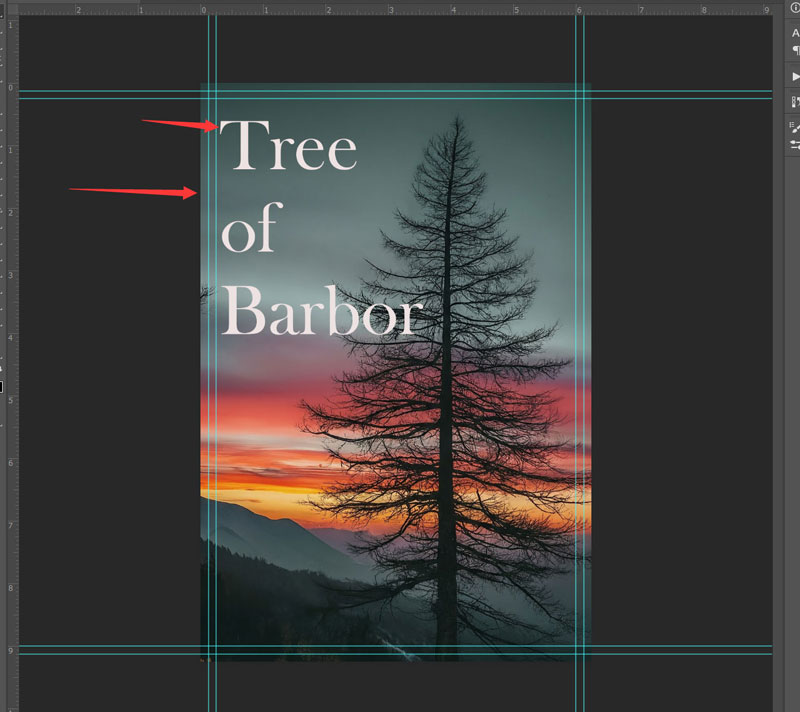
Now that you’ve set up your page correctly and added guidelines, you can begin to generate your design. Remember, if creating or importing images from different sources, always make sure they are in CMYK color mode and with a resolution of at least 300 dpi. Consistency in color mode and resolution is the key to a professional final product. When designing, keep in mind basic design principles such as alignment, contrast, and balance, which can enhance the overall look and readability of your print project.
Before finalizing your document, extend the background into the bleed area. This makes sure that there are no white lines on the edges of your printed document after trimming. Double-check that all your important text, images, and other content are safely within the safety lines, at least 0.125″ (3 mm) inward from the trim lines. Also, use layers to organize different elements of your design. Layers can help you manage complex designs by separating backgrounds, images, and text, allowing for easier adjustments and edits as you work.
For text, choose appropriate fonts that are easy to read and suit the style of your design. Pay attention to leading (line spacing) and kerning (space between characters) to enhance readability and visual appeal.
Step 4: exporting your PDF
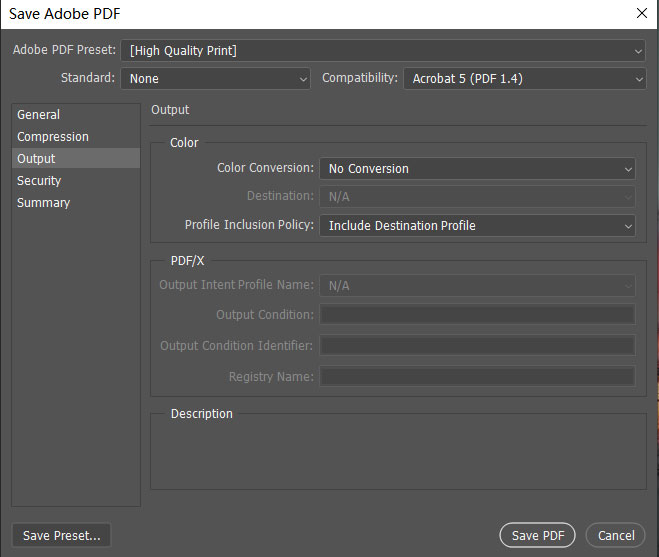
Once you’ve completed your design, you can prepare it for export. From the “File” menu, choose “Save As” and then select the type of file as “Photoshop PDF”. You’ll get a pop-up window with several options for the quality of your output. Choose “High Quality Print”.
In the “Output” options, make sure to select “Don’t Include Profile”.
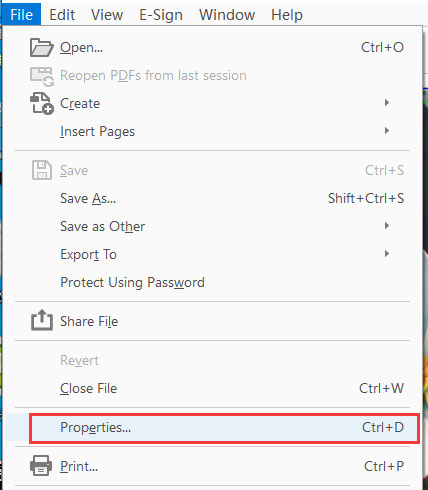
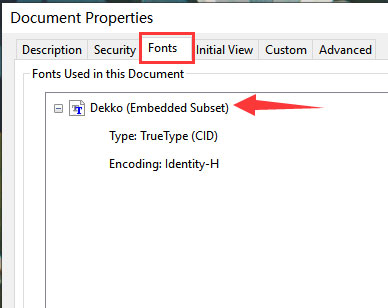
After exporting, open your saved PDF file and check that the size includes bleed. You’ll also need to verify that all fonts are embedded. To do this, open the PDF in a reader like Adobe Acrobat, click on “File” and then “Properties”. Look to see that all the fonts have the “Embedded Subset” flag in place. Embedding fonts makes sure that your text appears correctly, regardless of whether we have your font choice in our font library.
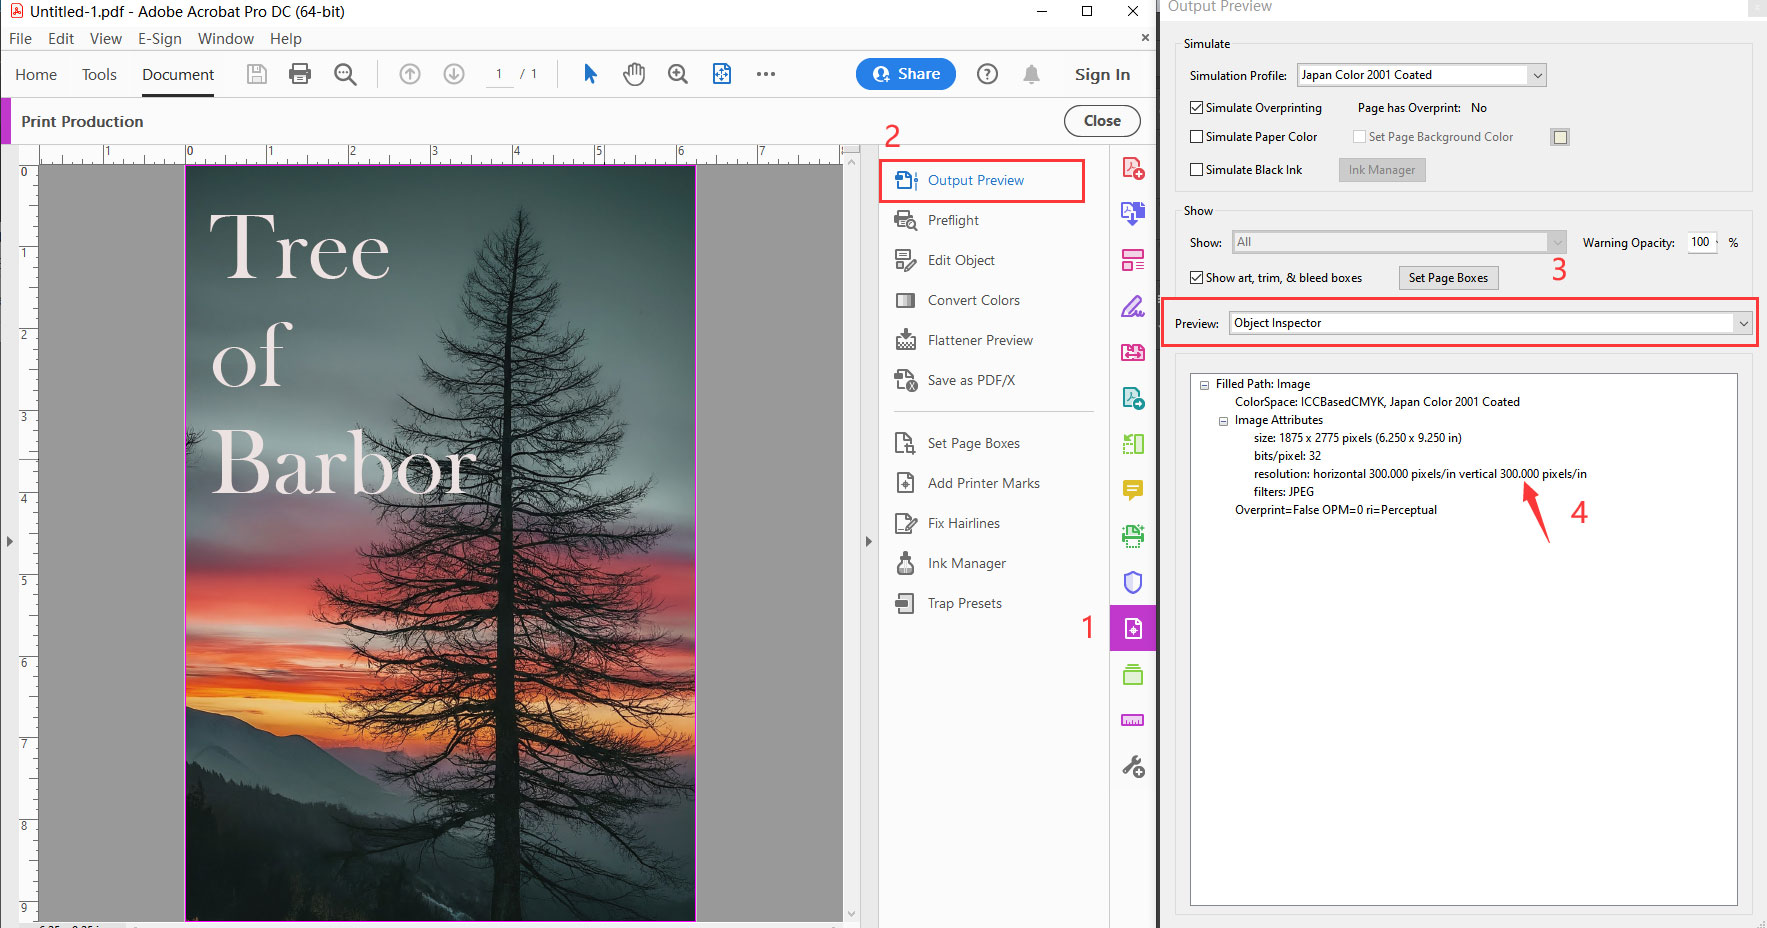
Finally, check the resolution of your images by clicking on “Print Production” and then “Output Preview”. Under “Preview”, select “Object Inspector”. Click on the image in the document to view its resolution. Make sure it is 300 dpi to guarantee high-quality prints.
Need more help? Talk to us!
By following these steps, you can create a print-ready PDF file with confidence. Proper setup and attention to detail at each stage of the process will save you time and avoid costly errors. Common issues that might arise include incorrect color profiles, missing bleeds, or non-embedded fonts, all of which can be avoided by thorough checks during the design process. If you encounter any issues or have questions, our print design experts are always on hand to help you. Just get in touch, and we’ll assist you with any part of the process.
For those new to Adobe Photoshop or print design, there are many resources available to further your knowledge. Adobe’s official tutorials and user forums are excellent places to start. Additionally, books and online courses on graphic design principles can enhance your understanding and skills.
We look forward to helping you produce beautiful, professional-quality printed materials.

